11:20 PM
Sep.11, 2006
Clock
Manual Clock
Daylight Saving
Time Zone
On Timer
Off Timer
Auto Off
No
Yes
Time
G
V-Chip
Menu Language English
Menu Transparency
Semi Opaque
Set ID 1
11:20 PM
Sep.11, 2006
DE Move OK Select MENU Back
DE Select MENU Back
11:20 PM
Sep.11, 2006
Clock
Manual Clock
Daylight Saving
Time Zone
On Timer
Off Timer
Auto Off
Easten
Time
G
V-Chip
Menu Language English
Menu Transparency
Semi Opaque
Set ID 1
11:20 PM
Sep.11, 2006
DE Move OK Select MENU Back
F G Select MENU Back
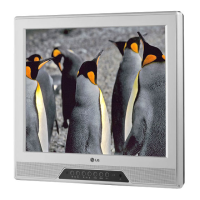
Daylight Saving
Installer can select to use Daylight Savings to adjust the clock time.
This is operated from the Automatic Time Settings.
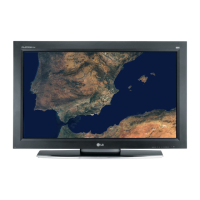
Installer can set the Time Zone.
This is operated from the Automatic Time Settings.
Time Zone Settings
Press the MM EENNUU button and then use the AADDJJ D or E
button to highlight the SSeettuupp menu and press the OO KK
(( EEnn tteerr)) button.
1
Use the AADDJJ D or E button to the TT iimmee.
2
Press the OO KK (( EE nn ttee rr )) button to highlight CClloocckk.
3
Use the AADDJJ D or E button to highlight the DD aayyllii gg hhtt
SSaavviinngg and press the OOKK (( EE nn ttee rr )) button.
4
When finished, press MM EE NNUU repeatedly to remove the
menus.
6
Use the AADDJJ D or E button to choose YY ee ss or NN oo.
5
Press the MM EENNUU button and then use the AADDJJ D or E
button to highlight the SSeettuupp menu and press the OO KK
(( EEnn tteerr)) button.
1
Use the AADDJJ D or E button to the TT iimmee.
2
Press the OO KK (( EE nn ttee rr )) button to highlight CClloocckk.
3
Use the AADDJJ D or E button to highlight TTiimmee ZZoonnee
and press the OO KK (( EEnntteerr)) button.
4
Use the AADDJJ F or G button to select the TTiimmee ZZoonnee
and press the OO KK (( EEnntteerr)) button.
5
When finished, press MM EE NNUU repeatedly to remove the
menus.
6