Cura LulzBot Edition
Print. Your TAZ will then go through the process of heating, cleaning,
and probing your bed before starting the print.
Recommended Temperatures and Bed Preparation
When generating GCODE, it may be benecial to adjust temperatures
depending on your specic model le or lament. We have also found that
for certain materials applying unscented glue stick to the print surface is
required for successful bed adhesion and/or part release. Glue stick can also
be added to help rst layer adhesion on any material, and may be helpful
for objects with a larger surface area. You can nd our recommended
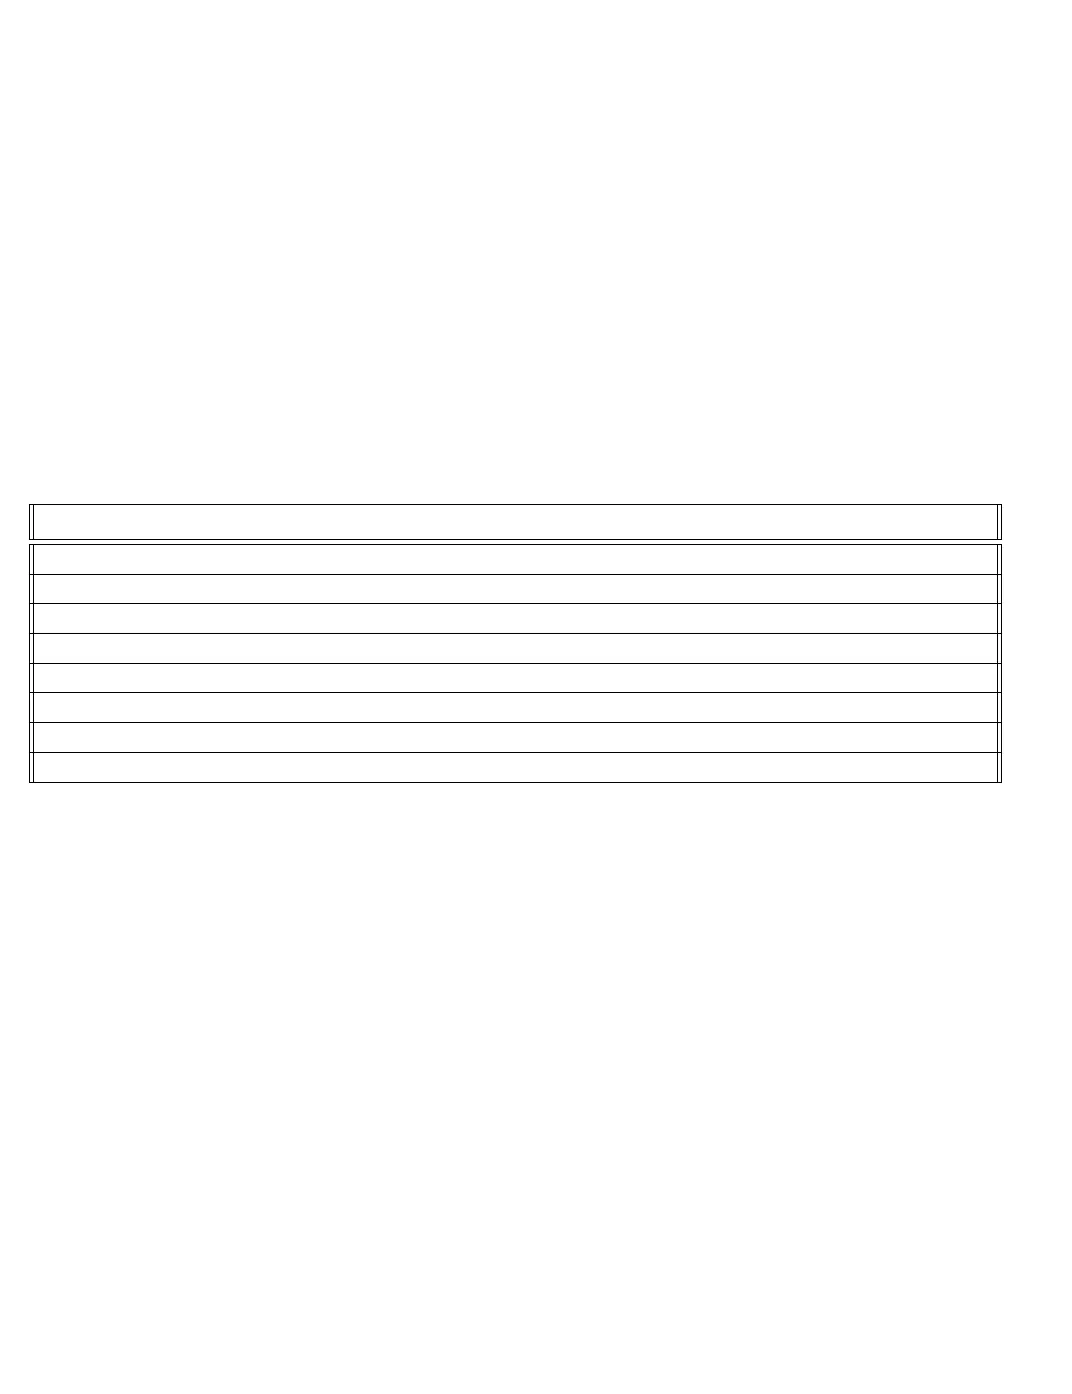
temperature ranges and adhesion techniques below.
Filament Type Bed Preparation Nozzle Temp Bed Temp Removal Temp
ABS Clean PEI 245-270 110 50
Nylons Gluestick 240-270 65 45
TPU’s Gluestick+PEI/Clean Glass 225-240 60 25
Polycarbonate Gluestick 250-295 60-110 45
PETG Gluestick 235-265 80 45
PLA Clean PEI 215-235 60 45
Soluble Support Clean PEI 200-230 60 45
PolyCast Clean PEI 215-235 60 45
Table 2.1: Recommended Temperatures (C)
2.6 Removing Your First Print
After your rst print has nished, wait for the print surface to cool to
the recommended print removal temperature. Your parts will be easier
to remove if you allow your heated bed to cool down to optimal temper-
ature. Your print bed will move forward once the model is ready
to be removed.
Once your heated bed has cooled, use the blue handled knife that was
included with your toolkit to remove the item. Carefully insert the blade
of the knife between your print and heated bed. Once underneath the part
34