39
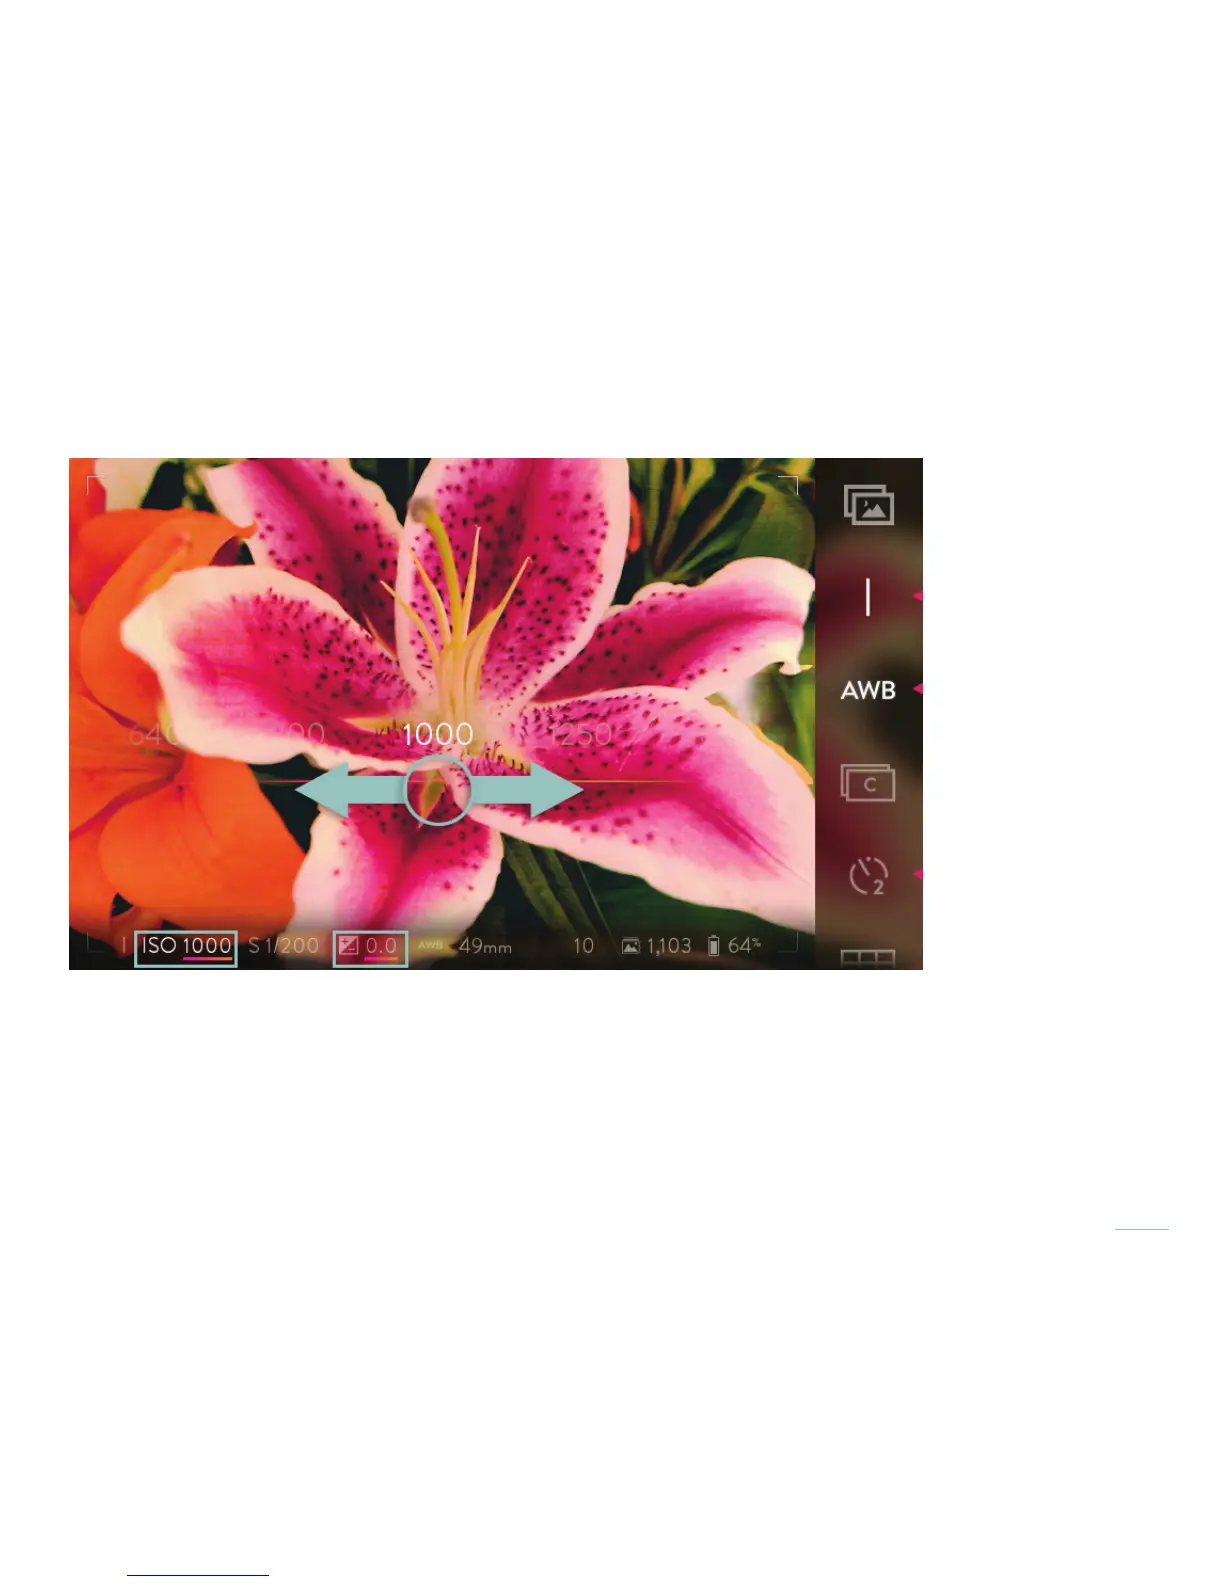
Swipe the band from right to left to increase the ISO, or from left to right to lower it. Tap on any ISO visible in the selection band to
go directly to that setting. Double-tap on the selection band returns to the initial ISO setting.
Swipe the ISO selection band to increase or lower the ISO.
Once the selection has been made, tap the screen anywhere outside of the selection band to close the band. A half press of the
shutter button will also close the selection band. A full press will close it and take a picture.
Set the ISO using the front dial while in ISO Priority Mode or using the rear dial while in Manual Mode*. As the dial is rotated, the
ISO indicator in the Information Bar at the bottom of the screen will change to display the current setting.
*Note that the functions assigned to the front and rear dials in the various exposure modes can be changed (see Camera controls).
The default assignments are referenced here.