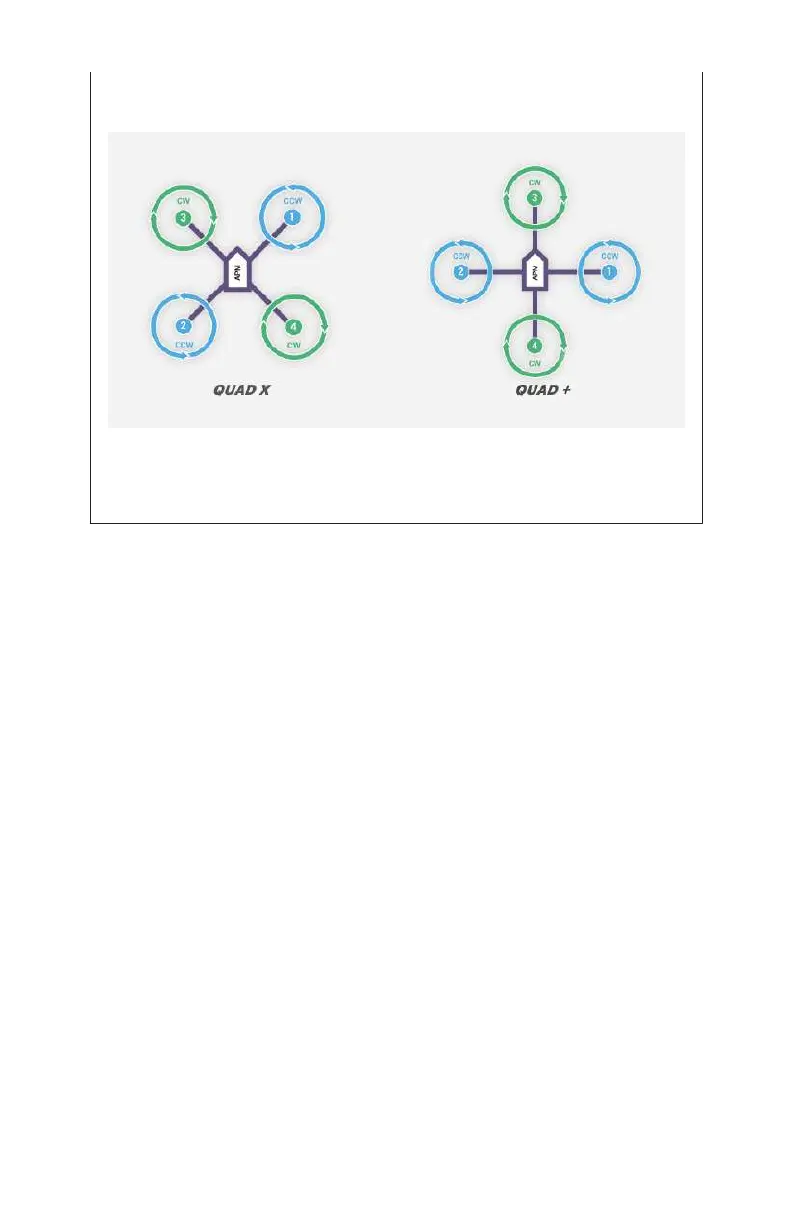
configuration would point directly toward one. Figure 9-8 illus-
trates this.
Figure 9-8. Two quadcopters with dierent configurations, X
and +.
Step 2.2: Calibrate accelerometer
The next substep is to calibrate our accelerometer. This sets a
baseline for the APM to understand what direction is up, down,
and so forth. Mission Planner will ask you to move the drone into
dierent positions, so be sure you have a nice, clear area on a
level work surface to follow the directions as described. It is
important that you do this on an area that is as level as possible.
If you have one, use a bubble level to confirm that the area you
have selected is not out of level. We often use a small TV table
because it is easy to shim up to level if it’s o a little bit.
Click the Accel Calibration button from the left-hand menu (see
Figure 9-9). This will place a single button labeled Calibrate
Accel in the main application window. Click that button and fol-
low the instructions that Mission Planner sets before you. It will
ask you to position your drone in a number of dierent positions
before pressing any key to continue. Once the process is done,
you will see a notification that the calibration either passed or
failed. The positions it will ask you to use are:
138 Make: Getting Started with Drones