Setup 17
2.A Preparing a virtual installation offline, then linking it to a physical
installation later
You can use either a P3-100 with no need for panels connected to it at this stage or the Offline Editor
application on a Windows PC to configure a virtual installation. Creating a complete virtual installation offline
can allow you to familiarize yourself with the P3-100 system or prepare a video display in advance of an
event.
Placing and configuring virtual panels and groups
To manually set up an on-screen virtual installation using a P3-100 or the Offline Editor:
1. Make sure you have a plan or a clear idea of what panels the physical
installation will contain and where those panels will be located.
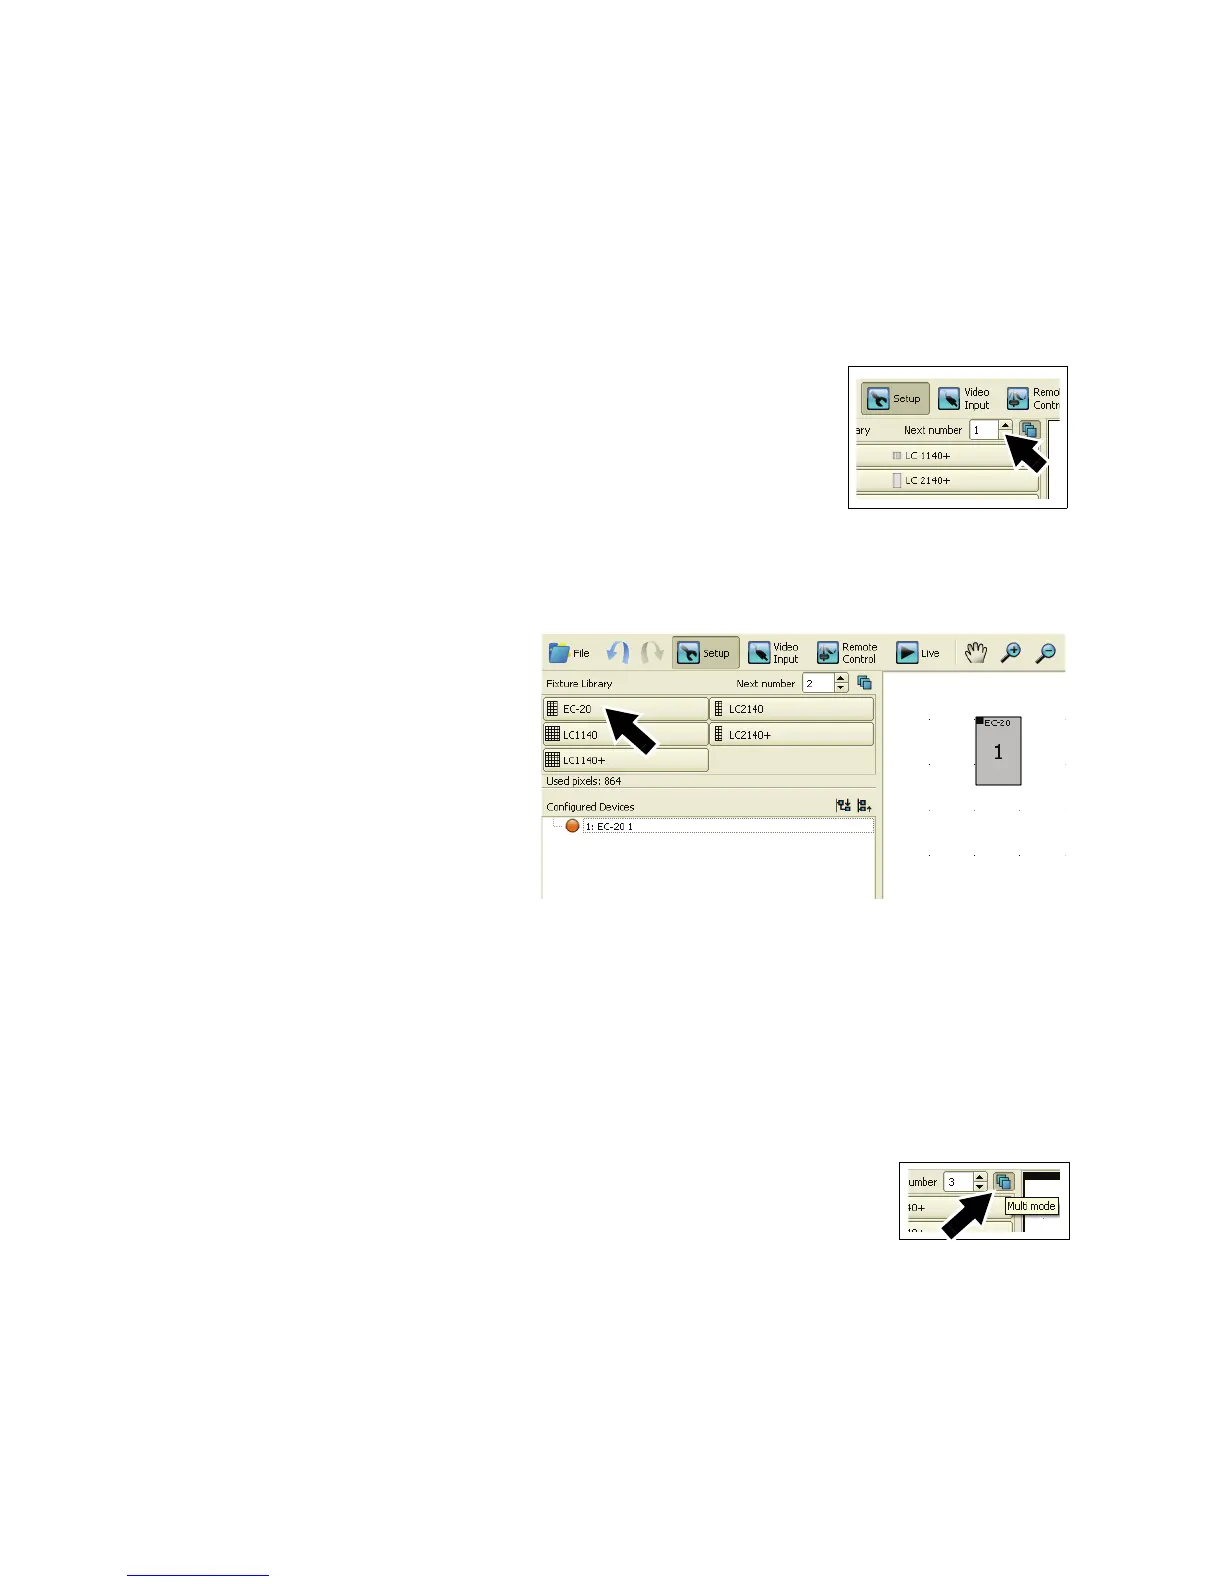
2. See Figure 9. In the configuration file you want to work in, open the
Setup view window. Check that Next number (arrowed) is set to 1.
It does not matter which panel address numbers you give to panels at
this point provided that you set up panels in the physical installation with
the same address numbers as the corresponding panels in the virtual
on-screen installation later in the setup process.
3. See Figure 10. Click on the
panel type in the Fixture
Library (arrowed) that
corresponds to the panel you
want to place in position
number 1 in the installation.
4. Move the cursor over to the
canvas. The cursor will take
the form of a panel. Click to
position panel number 1 on
the video frame.
5. See Figure 10. The panel will
be placed on the canvas in
your on-screen installation
labelled with display address 1
in the center of the panel icon.
The panel will also appear with an orange ‘bullet-point’ in the Configured Devices list. The number in the
Next number box will jump to 2, ready for the next panel.
If you are using a P3-100 that has auto-detected panels that are connected to it and these panels have
the same display address as the panels you add to the on-screen installation, they will automatically be
linked to the panels in your on-screen installation and appear in the Configured Devices list with a green
bullet-point. Ignore this for the moment: you will link physical panels to the panels in the on-screen
installation later.
6. See Figure 11. Multi-mode is active by default. In this mode, you simply click
on the canvas each time you want to position another panel of the type you
selected (if you de-activate Multi-mode, you must click on the desired panel
type in the Fixture Library each time you want to add a panel to your
on-screen installation).
7. Continue adding panels, selecting a different panel type in the Fixture Library
if necessary. Panels are displayed on the canvas according to their physical size. The P3-100
automatically scales the video sent to the panels to match different dot pitches.
8. To remove a panel from your on-screen installation, right-click on it and select Delete.
Figure 9: Next panel
address number
Figure 10: Fixture library in Setup view
Figure 11:
Multi-mode active