MARV User Manual
18
Print Bed Preparation
Prepare the adhesive tape and print bed provided with the machine.
Apply the adhesive tape to secure the object to the print bed. For enhanced printing
results, we recommend that you use new tape each time you print an object.
Caution
• Install the print bed in the machine before printing.
• If tape is not applied to the print bed, the lament will not be secure and may affect printing quality.
• Do not forcefully move or cause physical impacts to the machine's nozzle unit. Doing so may cause
the machine to malfunction or damage the sensors.
• The nozzle may become excessively hot during the device installation and printing. Avoid touching
the nozzle. Doing so may cause burns.
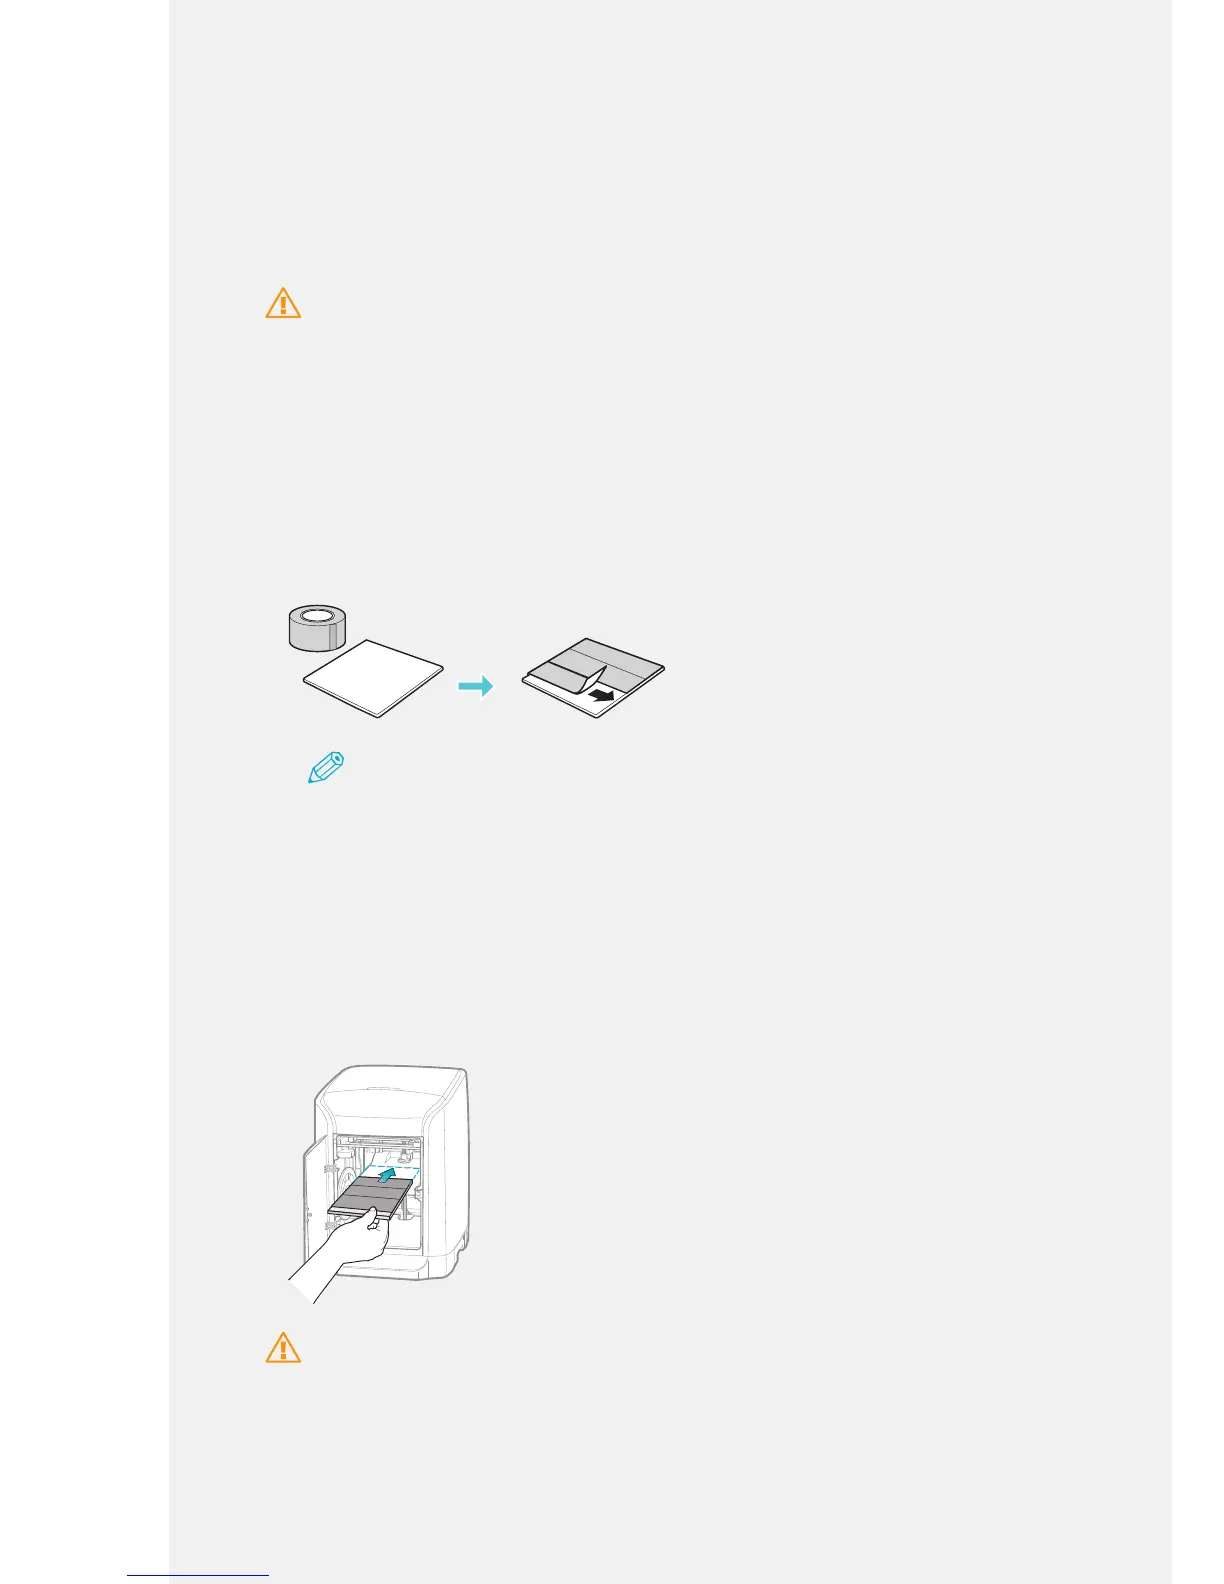
1.
Apply the adhesive tape to the print bed.
Apply the tape evenly over the surface of the print bed to make sure that it does
not overlap.
Note
• If the tape is applied unevenly or overlaps, it may cause a nozzle calibration error and affect
printing quality.
• Apply tape to the print bed only and not beyond the edges of the print bed.
2.
Press [PUSH] to open the front cover.
3.
Insert the print bed with the adhesive tape facing upwards.
Place the print bed on the left and right staging brackets and push the print bed
until it meets the back of the machine.
Caution
Insert the print bed securely on the left and right staging brackets. Failure to do so may result in an
uneven printing bed.
 Loading...