MARV User Manual
31
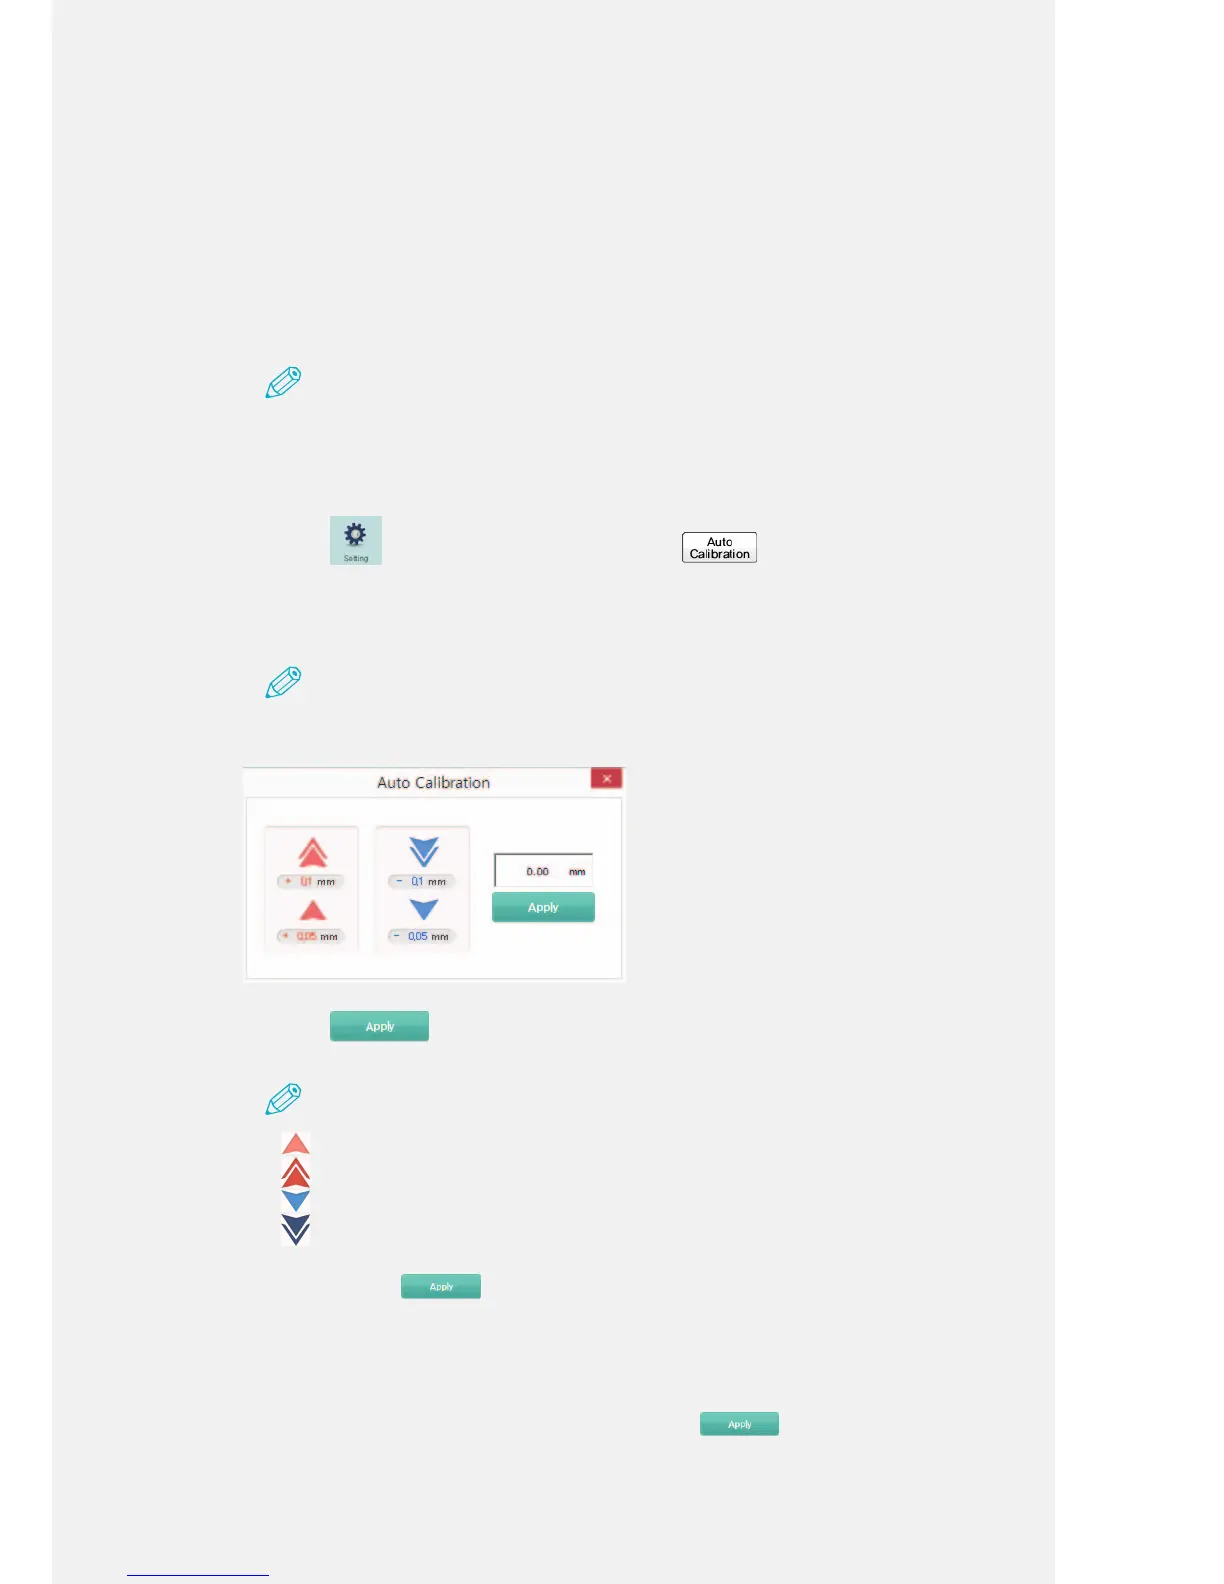
Calibrating the Nozzle
If the gap between the nozzle and the stage is not approximately 0.3 mm, you can
conduct this process by using the MARV software’s ‘Auto Calibration’ feature. If you
use this feature, the modied value is saved and the same gap between the stages is
automatically used for the next printing job.
1.
With the adhesive tape facing up on the print bed, mount the print bed on
the stage.
Note
Adjust the gap between the nozzle and the print bed after it is installed on the staging brackets.
2.
With the printer connected to your computer, run the MARV software.
3.
Click the menu icon, and then click the button.
4.
Adjust the stage’s height using the arrow buttons.
Fine-tune by checking the value that appears in the white box.
Note
The count for the number of times the arrow buttons have been pressed is displayed in the
white box.
5.
Click the button.
The printing job is executed where the stage level is indicated.
Note
• button: Click once to raise the stage level by 0.05 mm.
•
button: Click once to raise the stage level by 0.1 mm.
•
button: Click once to lower the stage level by 0.05 mm.
•
button: Click once to lower the stage level by 0.1 mm.
• The maximum adjustable range for automatic nozzle calibration is +/-2 mm
• If you press the
button, the stage moves to the position where it was adjusted to
when the printing job completes. The stage does not immediately move while pushing the
button.
• When calibrating the nozzle, make sure that there are no obstructions on the print bed. If
there are obstructions on the print bed, the machine can malfunction when the print bed rises.
• If you press the button after you calibrate the nozzle, the previous value is reset to the
default. If you do not want to calibrate the nozzle, press
to exit the window. Then, it
will maintain previous gap.
• If the stage is not level after you conduct the calibration, perform a ‘Manual Calibration’. For
information about the ‘Manual Calibration’ feature, refer to the following page. (P. 42)