28
Calder Brothers Corp
V 1.0
Model: 1860 Paver
SN:
Serial Number Range:
874-S-86TCX5Y2*03874 to _____________
^ WARNING
Crush hazard.
Paver can be inadvertently started and moved.
Stop engine, remove key and place a Do Not Operate tag on ignition switch.
7. Stop paver engine, remove key and place a Do Not Operate tag on ignition switch.
8. Flip middle walk board up.
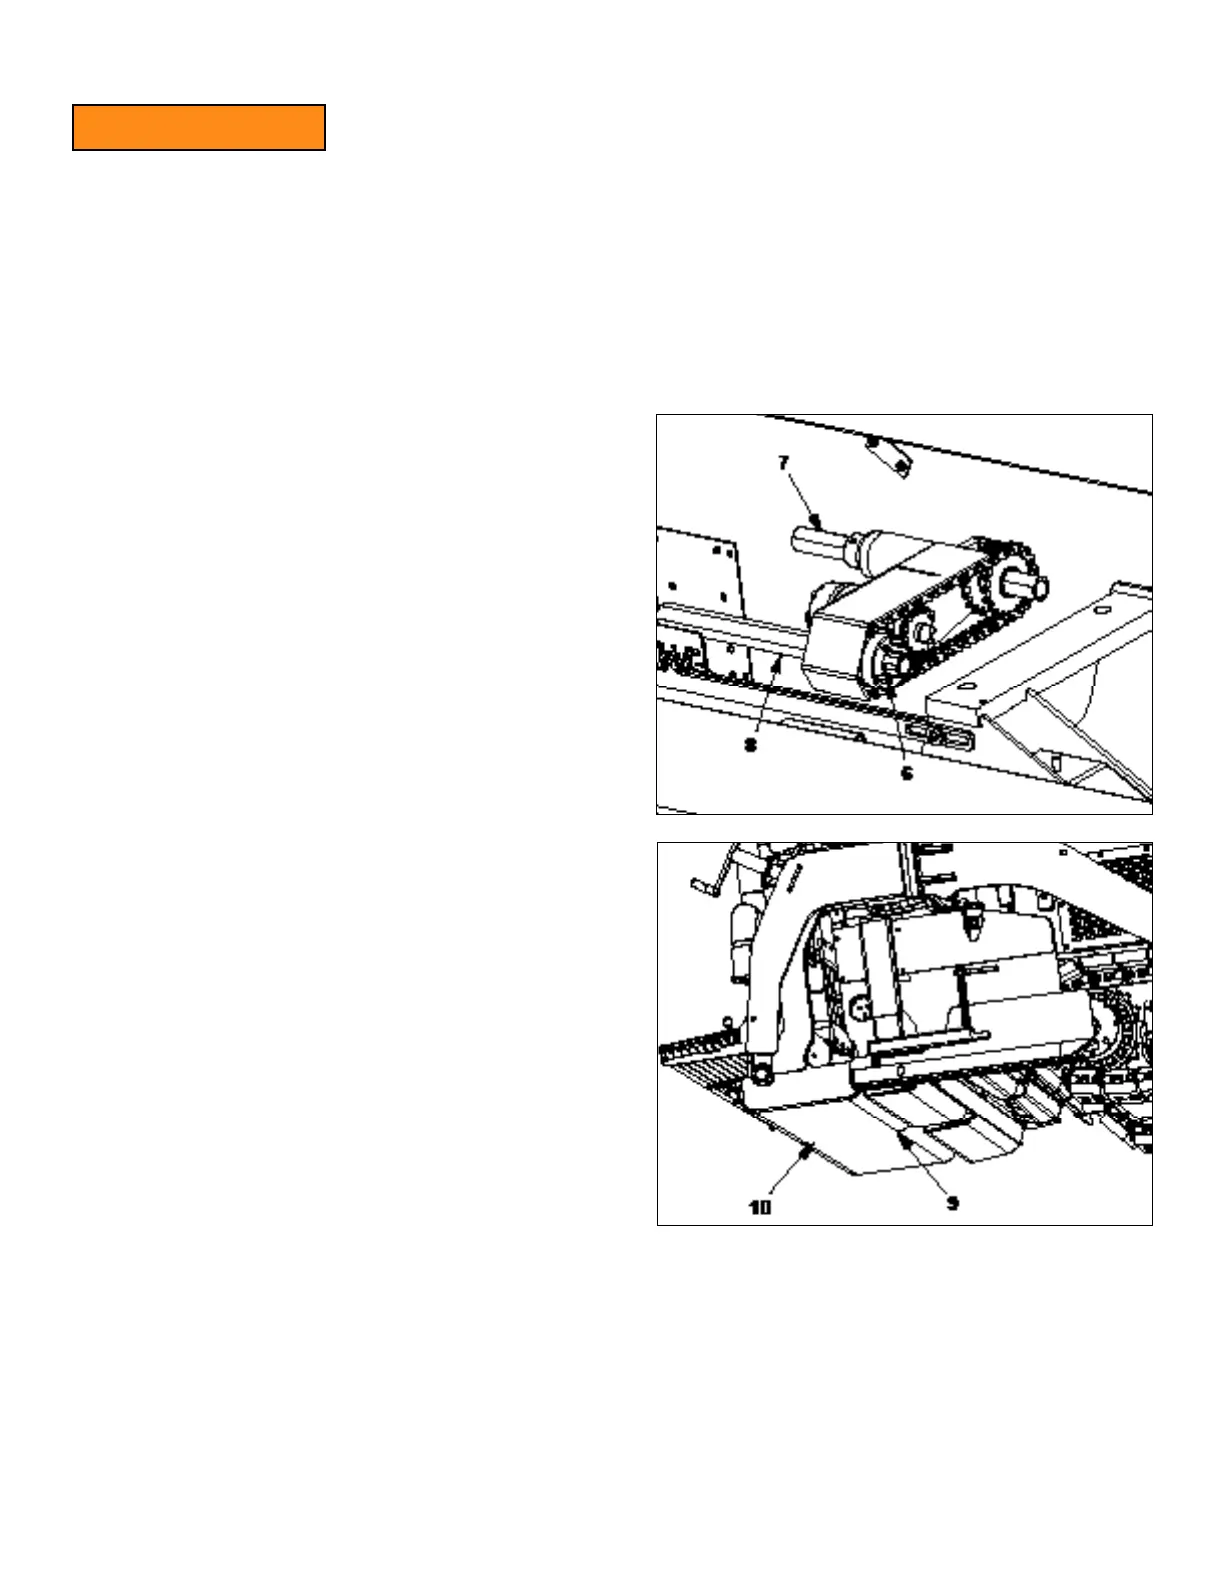
9. Disengage three spring latch pins (6). Disengaging pins
will allow front (7) and rear (8) crown adjustments shafts
to be turned independently of each other.
10. Hook or wrap one end of a string on a large bolt head
on one end of main screed. Walk to other end of screed
and position string across leading edge (9) of main
screed bottom, as close as possible to the bullnose of
the screed plate. Hook end of string to a large bolt head
and pull tight. String MUST be on at portion of screed,
not on radius portion.
11. Rotate forward crown adjustment shaft (7) until there is
approximately 1/16 in. (1.6 mm) gap between center of
screed plate and the string. Pull string away at one end,
and bring it back to verify 1/16 in. (1.6 mm) dimension at
center of screed.
12. Place another string across trailing edge (10) of main
screed bottom, near rear curvature of screed plate.
13. Rotate rear crown adjustment shaft (8) until screed
plate just touches the whole length of the string. Pull the
string away at one end and bring it back to verify that it
contacts entire length at the same time.
14. Recheck gap between leading edge (9) of screed bottom
and string. Adjust forward ratchet jack as necessary to
obtain the 1/16 in (1.6 mm) gap between string and
screed plate.
15. Recheck gap between trailing edge of screed bottom
and string. Adjust rear ratchet jack as necessary to verify
screed plate just touches whole length of string.
16. Engage three spring pins (6). It may be necessary to
turn rear crown adjustment shaft to get pins and holes to align, but no more than 1/3 of a turn.