32
Calder Brothers Corp
V 1.0
Model: 1860 Paver
SN:
Serial Number Range:
874-S-86TCX5Y2*03874 to _____________
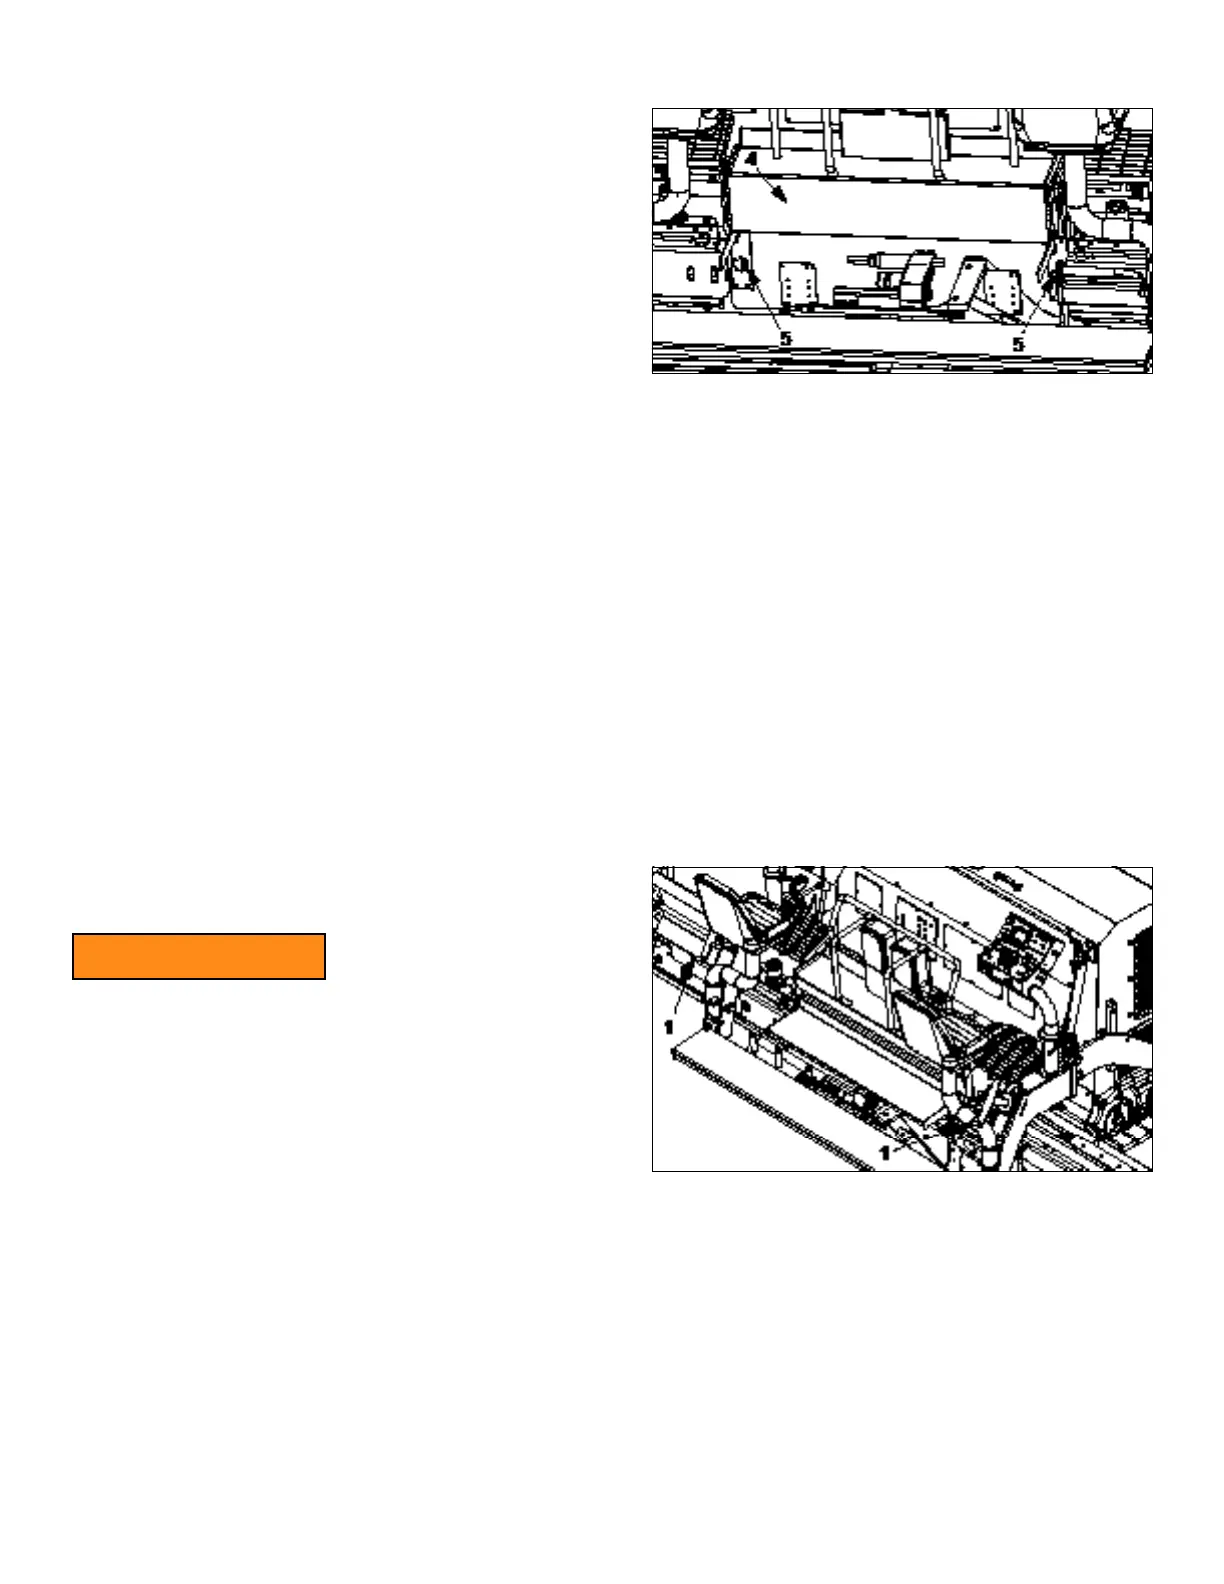
10. Raise center walk board (4) exposing the cam style
adjustment (5) for each side. Loosen jam nut on locator
bolt and fully remove the locator bolt. Rotate the cam
bolt clockwise to raise pre-strike off. Install locator bolt
and tighten jam nut.
From this initial factory screed setting you will need to
make a match height adjustment in the down direction
when you start paving.
5.4 Setting Screed To Pave
The procedure in sections 5.1, 5.2 and 5.3 was set before leaving the factory. It is recommended that before
initial start up, follow procedure in these sections to verify settings.
5.4.1 Before Paving
Screed must be elevated a distance equal to the desired mat depth plus enough extra height to allow for
compaction. To achieve this, the most popular methods are starting blocks or an asphalt pad
• Starting Blocks – A 2.5 in. (63.5 mm) thick starting block is a good for a nished mat of 2 in. (51 mm).
• Compacted Asphalt Pad – A starting block equal to the amount of compaction will be required.
• Non-Compacted Asphalt Pad – Lower the screed fully onto pad, no starting block required.
Starting blocks should be at least as long as the front to rear dimension of the screed plate. They should be
placed lengthwise in the direction of travel, directly below screed depth cranks.
5.4.2 Nulling The Screed And Setting Angle Of Attack
This is adjustment of the screed to a perfectly at position
on either starting blocks or an asphalt pad.
^ WARNING
Crush hazard.
Do not place any part of body under screed.
1. Lower screed completely onto starting surface, blocks
or pads.
2. Rotate adjustment crank handles (1) to locate position
of free movement. This is a limited area where adjustment cranks rotate freely in either direction. This is the
nulled position.
3. Rotate adjustment crank handles (1) two full clockwise rotations to set center screed.
4. Start paving and make adjustments as required.