28
BepopPC EX Software Installation
Howtoapplycutletterdesigns
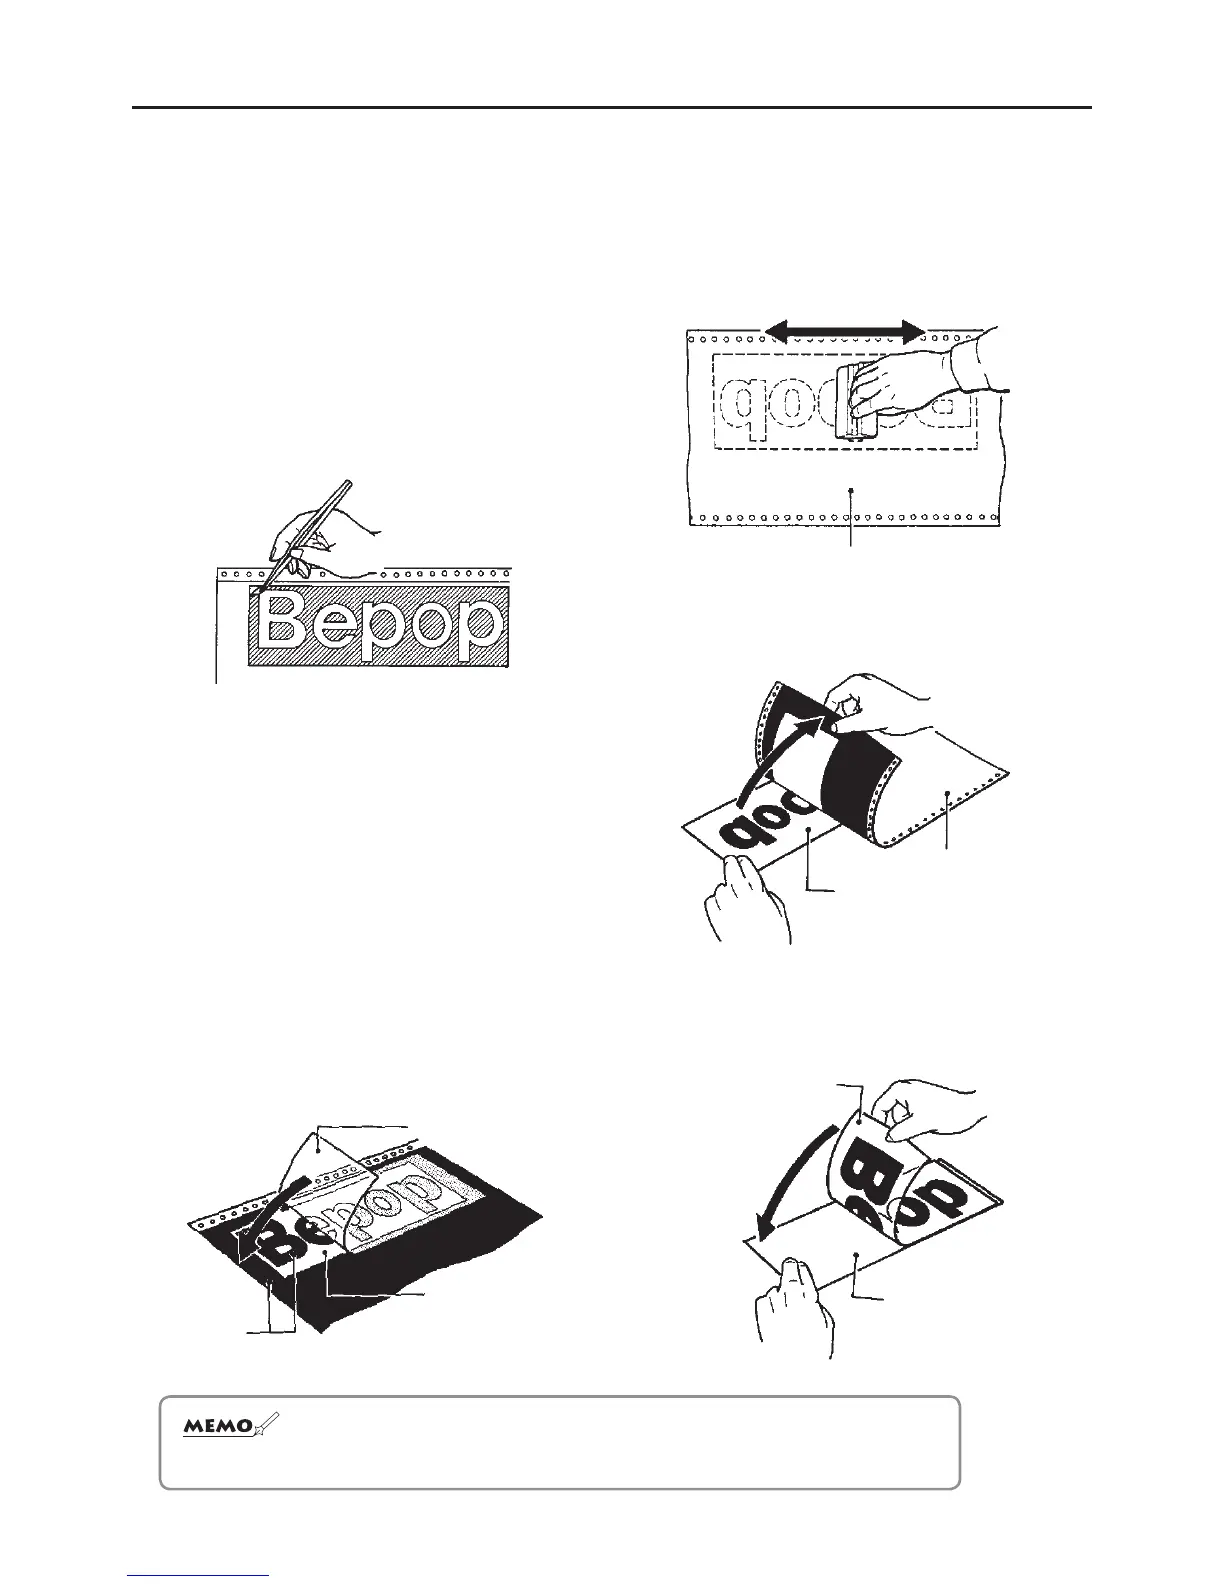
Preperation(weeding)
When your CPM-200 has nished cutting letters, use
the following instructions to prepare your letters for
transfer.
1
Remove the unneeded parts of the tape after the
CPM-200 has nished cutting, and the sheet has
dropped out of the machine.
Weed the parts with the slanted lines in the picture below.
* Use the tweezers included with the printer to remove
the unneeded pieces.
DesignTransfer
In order to tranfer your design, use the Application
Sheet(SL-L100AP).
1
Cut the application sheet to the appropriate
size(slightly larger than your design). Remove the
application sheet from its backing and apply over
your design. Be careful not make wrinkles when
applying the application sheet, as it may distort your
design.
Application sheet
Tape Roll
Paper backing
☆ Forsmallletters,removetapeinsidethelettersbeforeremovingtheoutside.
☆ Thepaperbackingfortheapplicationsheetisuseddurrinttheapplication
process,
DONOTTHROWIT
A
WAY.
2
Press the application sheet rmly against the surface
of the design. If the design is difcult to transfer,
press the back of the sheet as well.
Paper backing (back)
3
With the application sheet face down, pull away
the release liner. The design will transfer to the
application sheet.
Application sheet
Tape Roll
4
Return the completed design to the paper backing of
the application sheet, and prepare to apply it to the
application surface(see page 34).
Application sheet
Paper backing


 To Next Page