11921 Slauson Ave. Santa Fe Springs, CA. 90670 (800) 227-4116 FAX (888) 771-7713
22
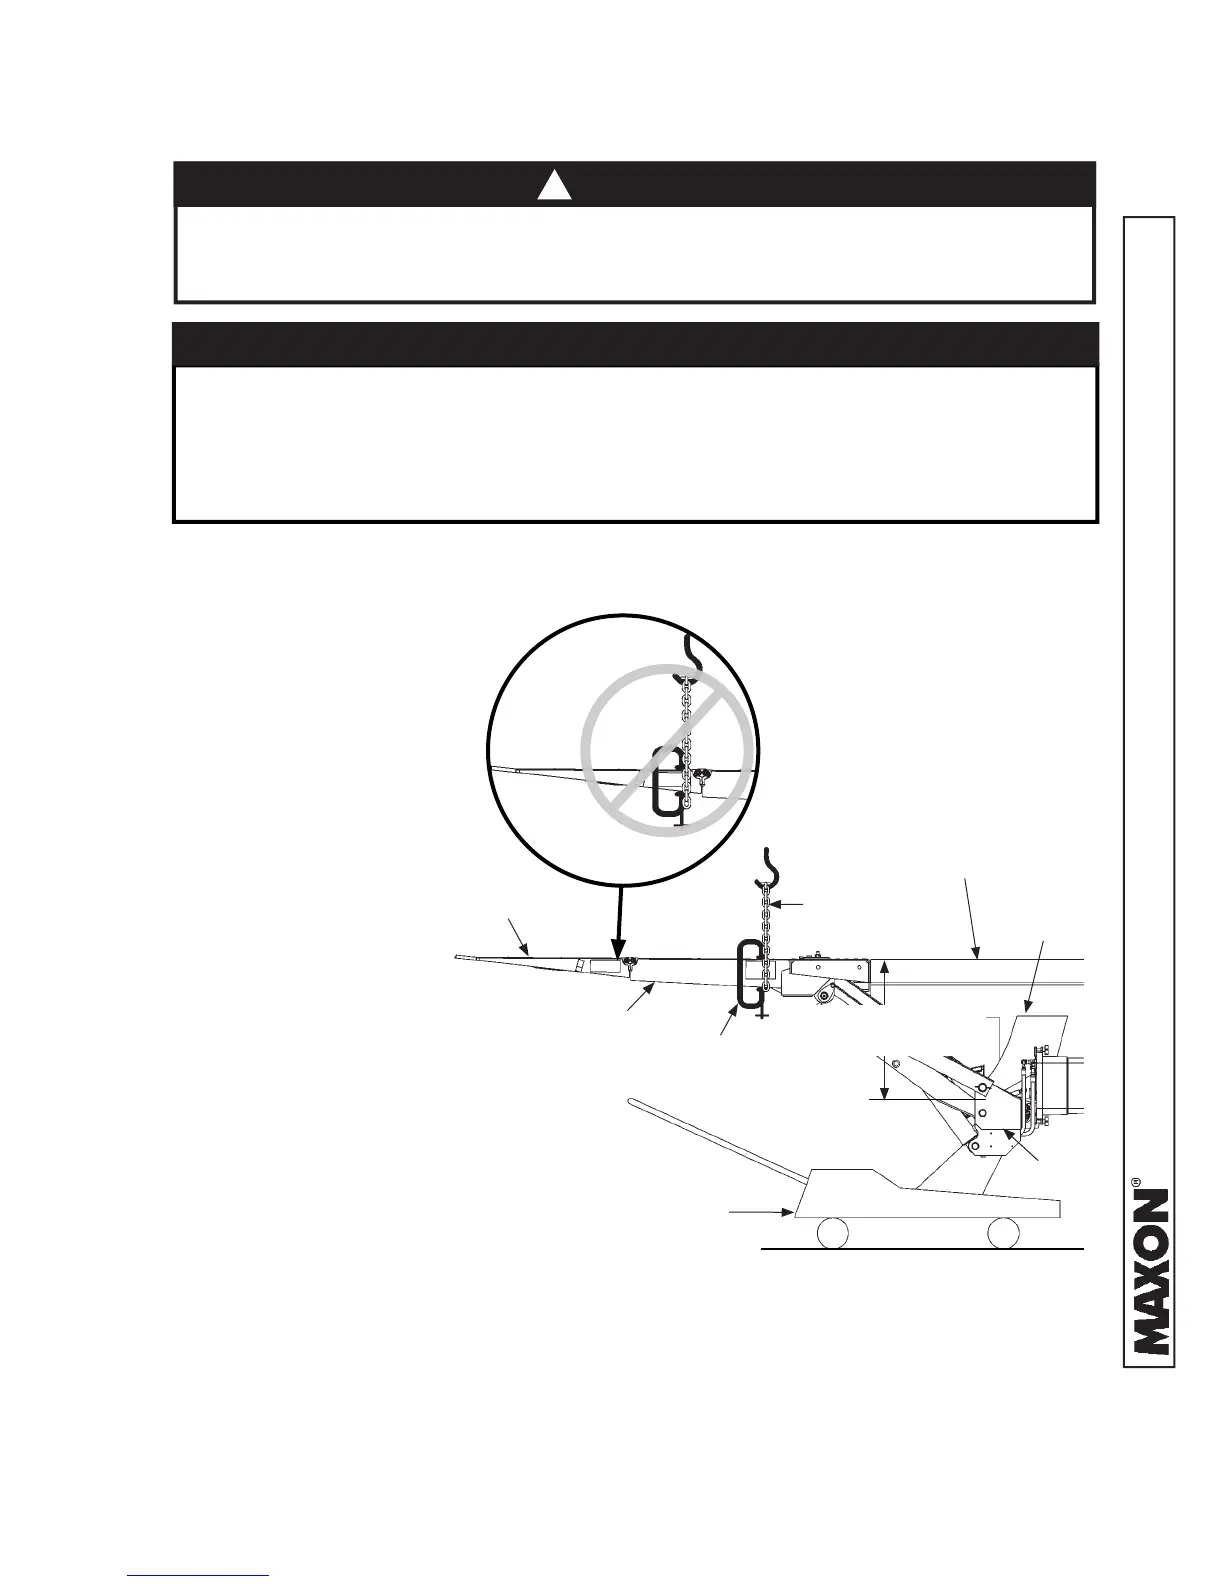
STEP 2 - WELD LIFTGATE TO VEHICLE - Continued
To prevent damage to aluminum fl ipover, NEVER hoist the Liftgate by the
fl ipover. Hoist the Liftgate only by the platform. Refer to the illustrations below
for the “INCORRECT WAY” and the “CORRECT WAY”.
CCORRECT WAY TO HOIST LIFTGATE
FIG. 22-1
CAUTION
FLOOR JACK
(CENTERED ON
MAIN FRAME TUBE)
HOIST CHAIN
MAIN
FRAME
VEHICLE FLOOR
(HORIZONTAL)
MOUNTING
PLATE
FLIPOVER
PLATFORM
!
C-CLAMP
(2 PLACES)
INCORRECT
* TOLERANCE IS +/- 1/4”
* 23-7/8” (GPTWR-25/-3)
* 22-3/8” (GPTWR-4/-5)
4. Hoist the Liftgate. Then,
place fl oor jack under
center of main frame (FIG.
22-1). Jack the Liftgate into
position. Make sure vehicle
fl oor is horizontal. Maintain
distance between fl oor and
top of main frame as shown
in FIG. 22-1.
Correct fl oor clearance must be maintained when Liftgate is in position and
being welded. Maintain distance between vehicle fl oor and top of main frame
at center of main frame as shown in the instructions. Dimension tolerance is
+/- 1/4”. Never apply force at the ends of the main frame tube to change the
fl oor clearance.
CAUTION
3. Make sure hoist is not
set up the incorrect way
(FIG. 22-1). Place a “C”-
clamp on each side of
platform (FIG. 22-1) to
prevent hoist chain from
slipping off platform.
Wrap chain around plat-
form (FIG. 22-1).
 Loading...