11921 Slauson Ave. Santa Fe Springs, CA. 90670 (800) 227-4116 FAX (888) 771-7713
58
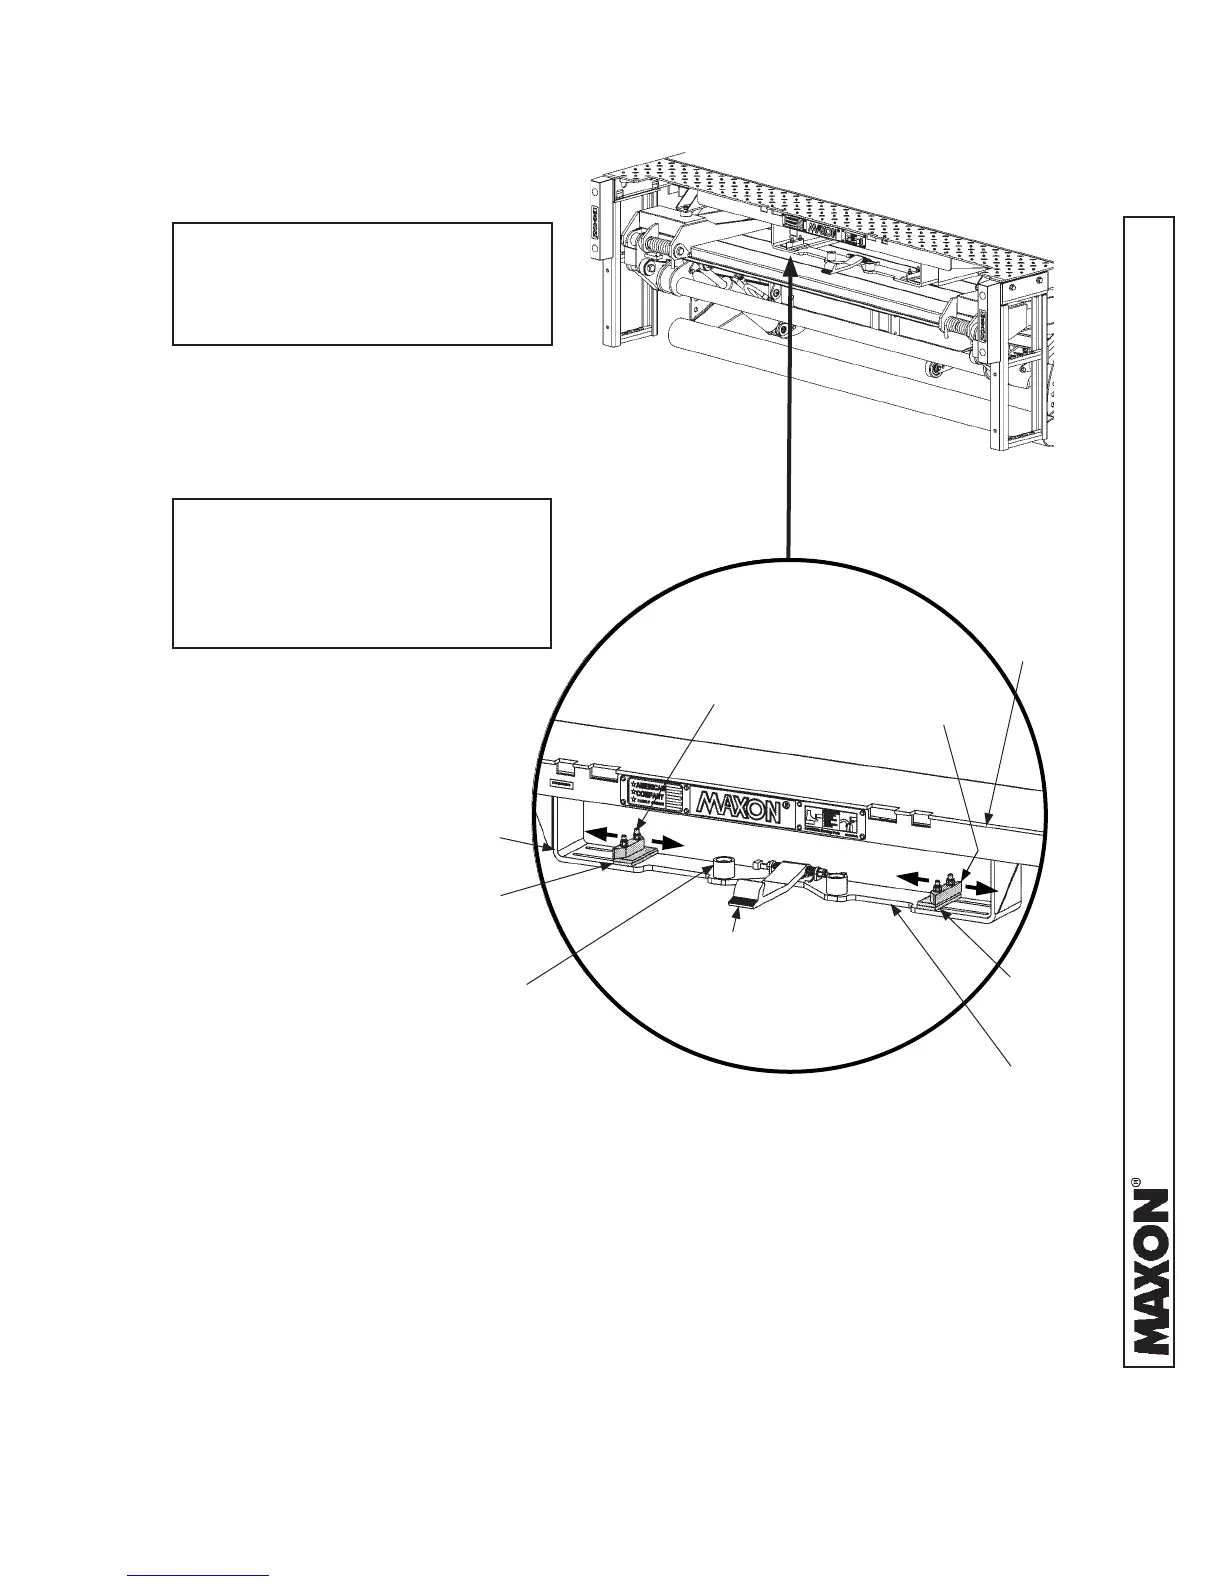
STEP 15 - ADJUST WALK RAMP PADS
1. Stow the platform (FIG. 58-1A).
5. Tighten the socket head
screws and lock nuts securely
(FIG. 58-1B).
LIFTGATE WITH
PLATFORM STOWED
FIG. 58-1A
4. Slide the ramp pads to the edge of
the walk ramp (not shown) (FIG.
58-1B).
2. Loosen the socket head screws and
lock nuts (FIG. 58-1B). Slide the
pads toward the outside of the walk
ramp box (FIG. 58-1B).
3. Install the walk ramp (not shown)
according to manufacturer’s in-
structions.
WALK RAMP
INSERTED HERE
WALK RAMP
BOX
EXTENSION
PLATE
(REF)
WALK RAMP PAD
(2 PLACES)
WALK RAMP LATCH
(REF)
SOCKET HEAD
SCREWS
(4 PLACES)
ADJUSTING WALK RAMP PADS
FIG. 58-1B
NOTE: If necessary to lower each
walk ramp pad, the steel
shim under each pad can
be removed.
NOTE: If a different ramp stop
method or equipment is
required, the ramp stops
shown in the illustration
can be removed.
SHIM
(REF)
RAMP STOP
(2 PLACES)
SHIM
(REF)
 Loading...