11921 Slauson Ave. Santa Fe Springs, CA. 90670 (800) 227-4116 FAX (888) 771-7713
57
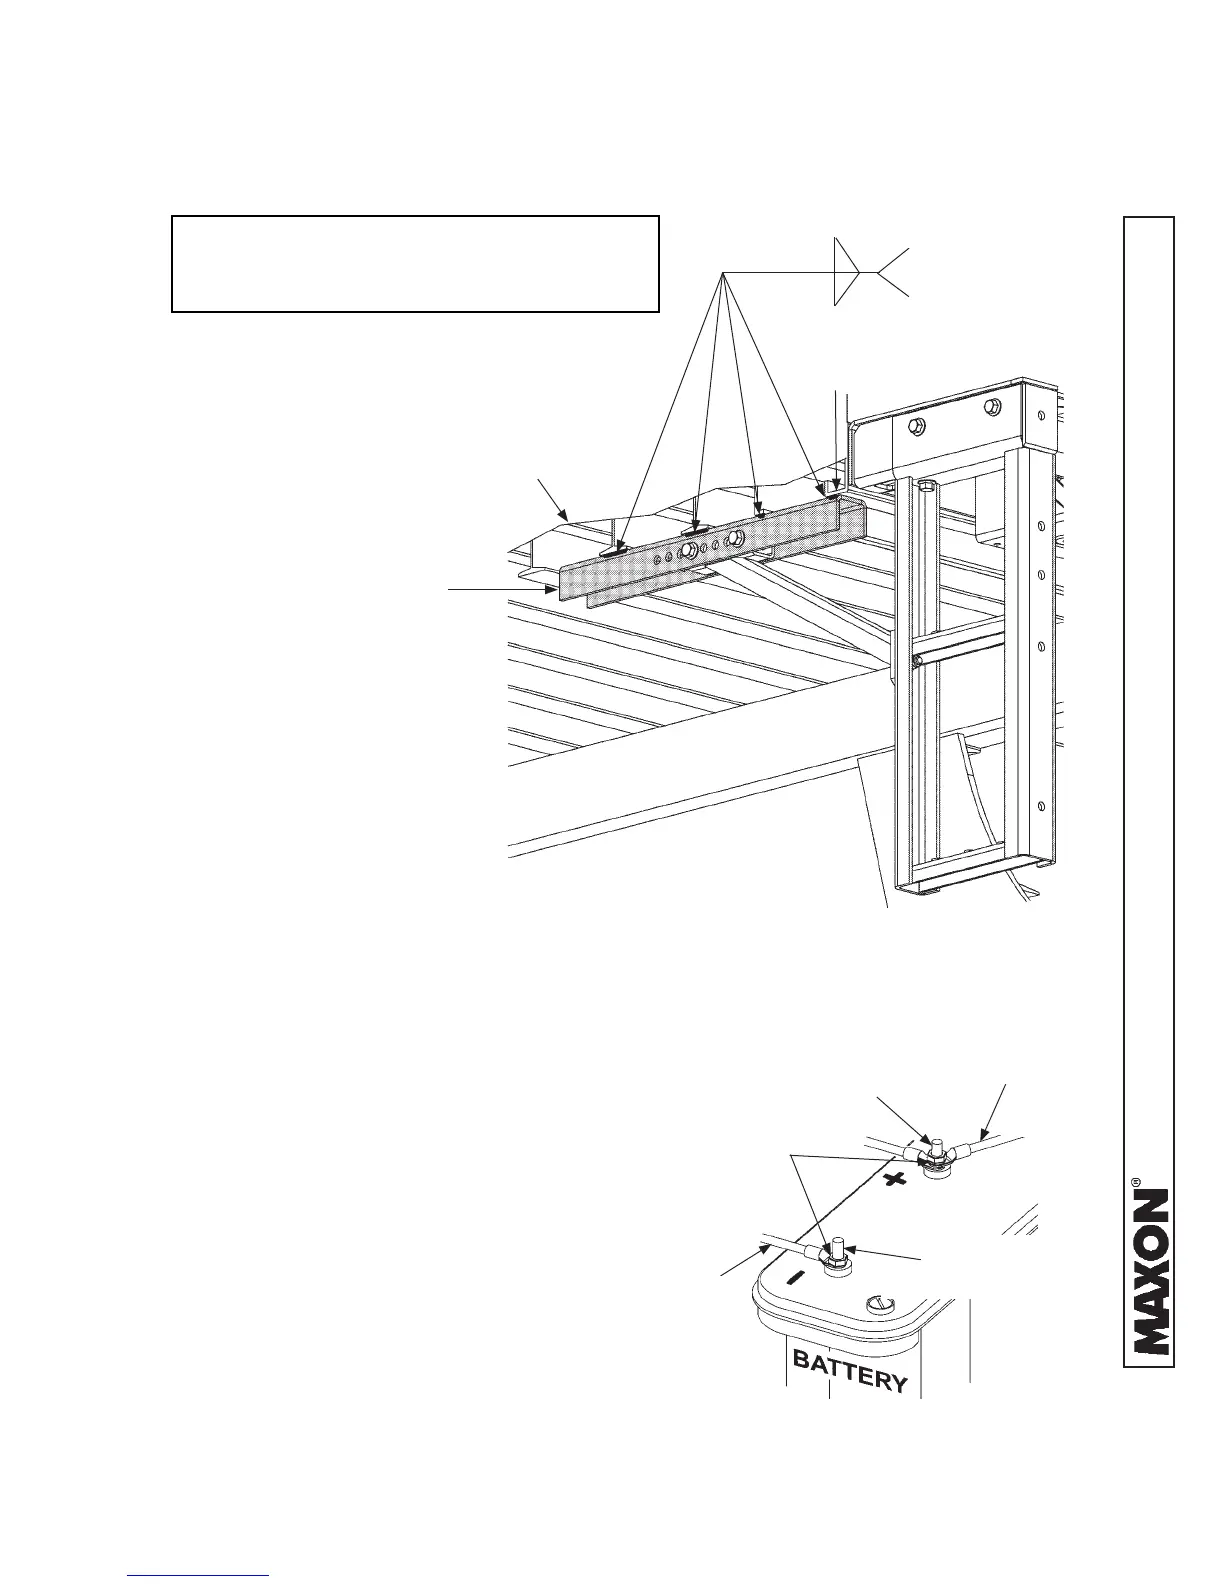
WELDING FLAT OF MOUNTING CHANNEL
TO VEHICLE BODY (LH STEP SHOWN)
FIG. 57-1
8. Repeat instructions 3 through 7
for RH step. Use the RH Step As-
sembly (Kit item).
7. Weld the fl at part of the mounting
channel to vehicle body as shown
in FIG. 57-1.
NOTE: Before welding mounting channel to
vehicle body, ensure step is straight
and steps are in vertical position.
STEP 14 - BOLT STEPS TO EXTENSION PLATE
- Continued
3/16”
WELD TO AS MUCH
I-BEAM FLANGE &
REAR SILL AS POSSIBLE
I-BEAM
(VEHICLE BODY)
REAR SILL
3/16”
MOUNTING
CHANNEL
RECONNECTING POWER
FIG. 57-2
9. Reconnect power to the pump by
reconnecting positive (+) and nega-
tive (-) cables to battery (FIG. 57-1).
Reinstall and tighten nut when each
battery cable is reconnected.
POSITIVE (+)
BATTERY POST
NEGATIVE (-)
BATTERY CABLE
NEGATIVE (-)
BATTERY POST
NUT
POSITIVE (+)
BATTERY CABLE
 Loading...