11921 Slauson Ave. Santa Fe Springs, CA. 90670 (800) 227-4116 FAX (888) 771-7713
55
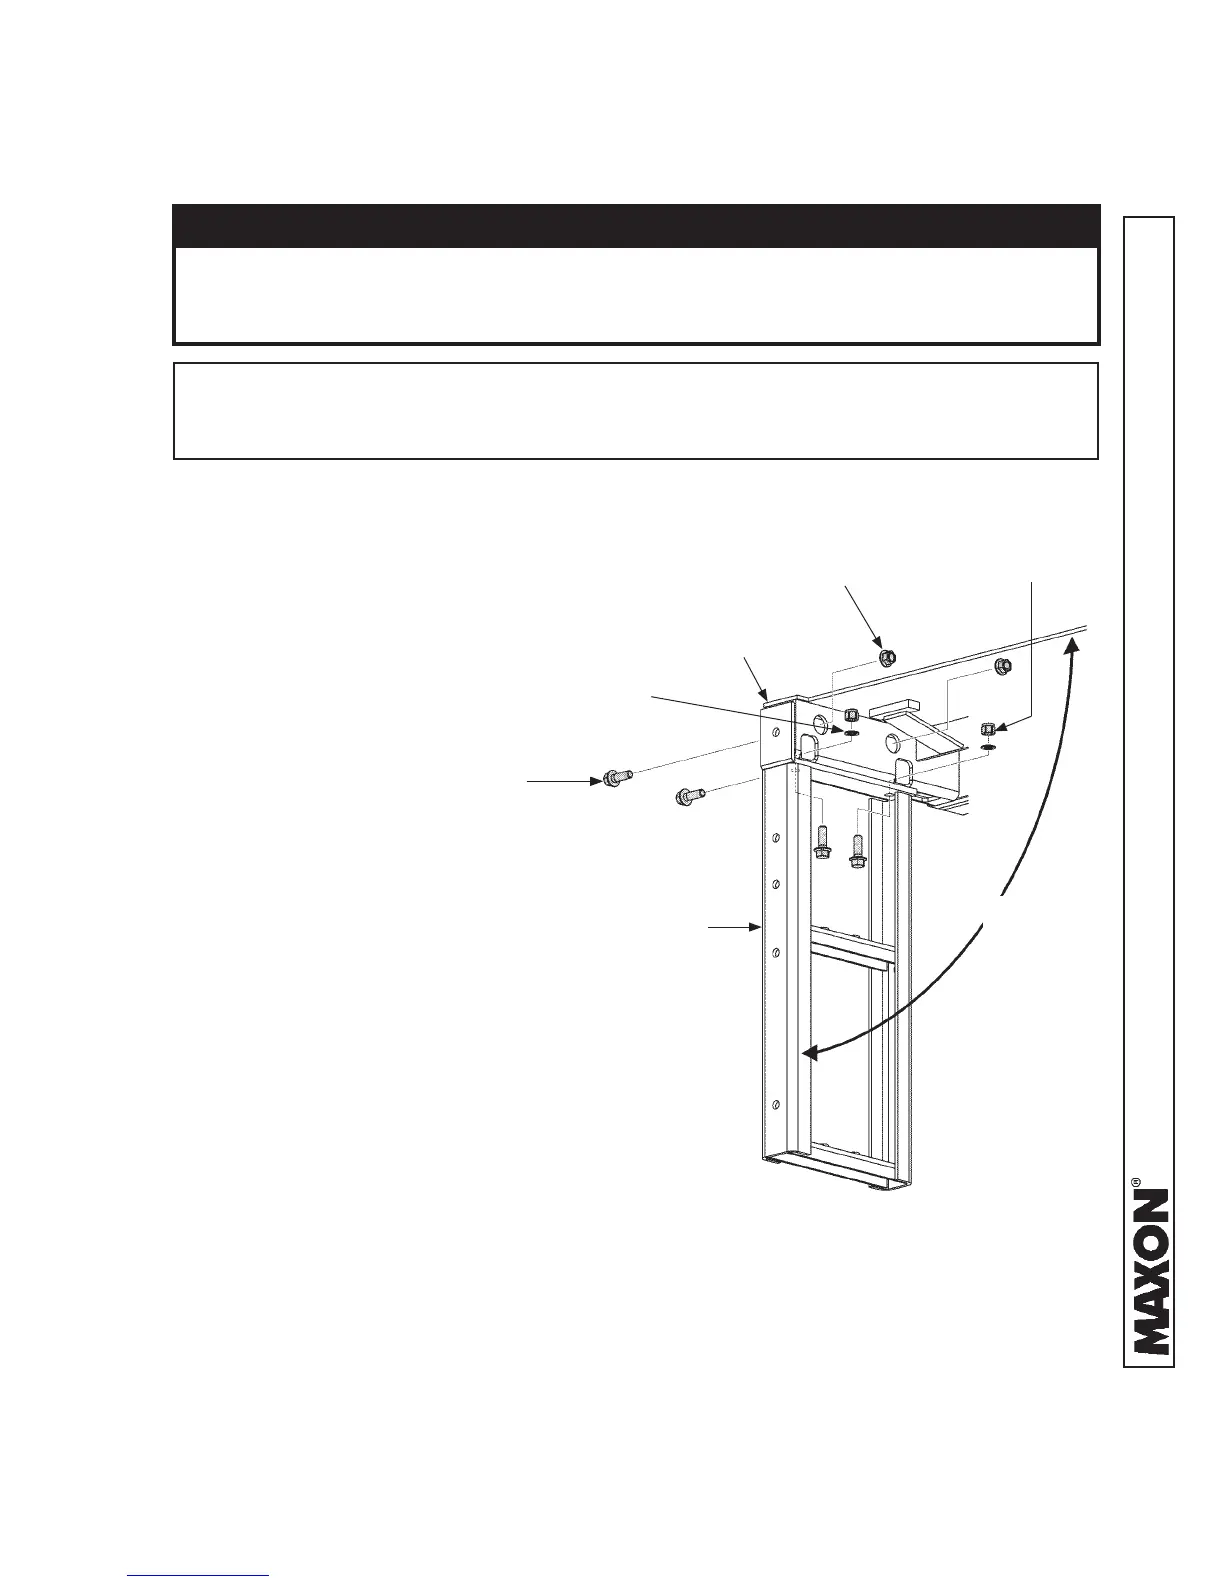
STEP 14- BOLT STEPS TO EXTENSION PLATE
- Continued
NOTE: If 102” extension kit is to be installed for 102” wide vehicle, install the exten-
sion kit before installing the steps. Refer to Instruction Sheet M-09-06 for
installing the extensions.
To prevent interference with Liftgate and possible damage, maintain 90º angle
between steps and extension plate. Tighten bolts only in the order shown in
illustration.
CAUTION
3. Line up the LH step (Kit item) on LH
side of the extension plate. Bolt step to
extension plate (FIG. 55-1). Tighten
bolts 1, 2, 3 and 4 in the numbered
order shown in FIG. 55-1. Then, torque
each bolt and lock nut to 105 lb-ft. in
the same order.
BOLTING STEP TO EXTENSION PLATE
(LH DUAL STEP SHOWN)
FIG. 55-1
1/2” X 1-1/2” LG
FRAME BOLT
(4 PLACES)
PART OF
EXTENSION
PLATE
2
3
4
1
90°
FLANGE LOCK NUT
(2 PLACES)
LH STEP
LOCK NUT
(2 PLACES)
FLAT WASHER
(2 PLACES)
 Loading...