Reciprocating Compressor M Series
5-19
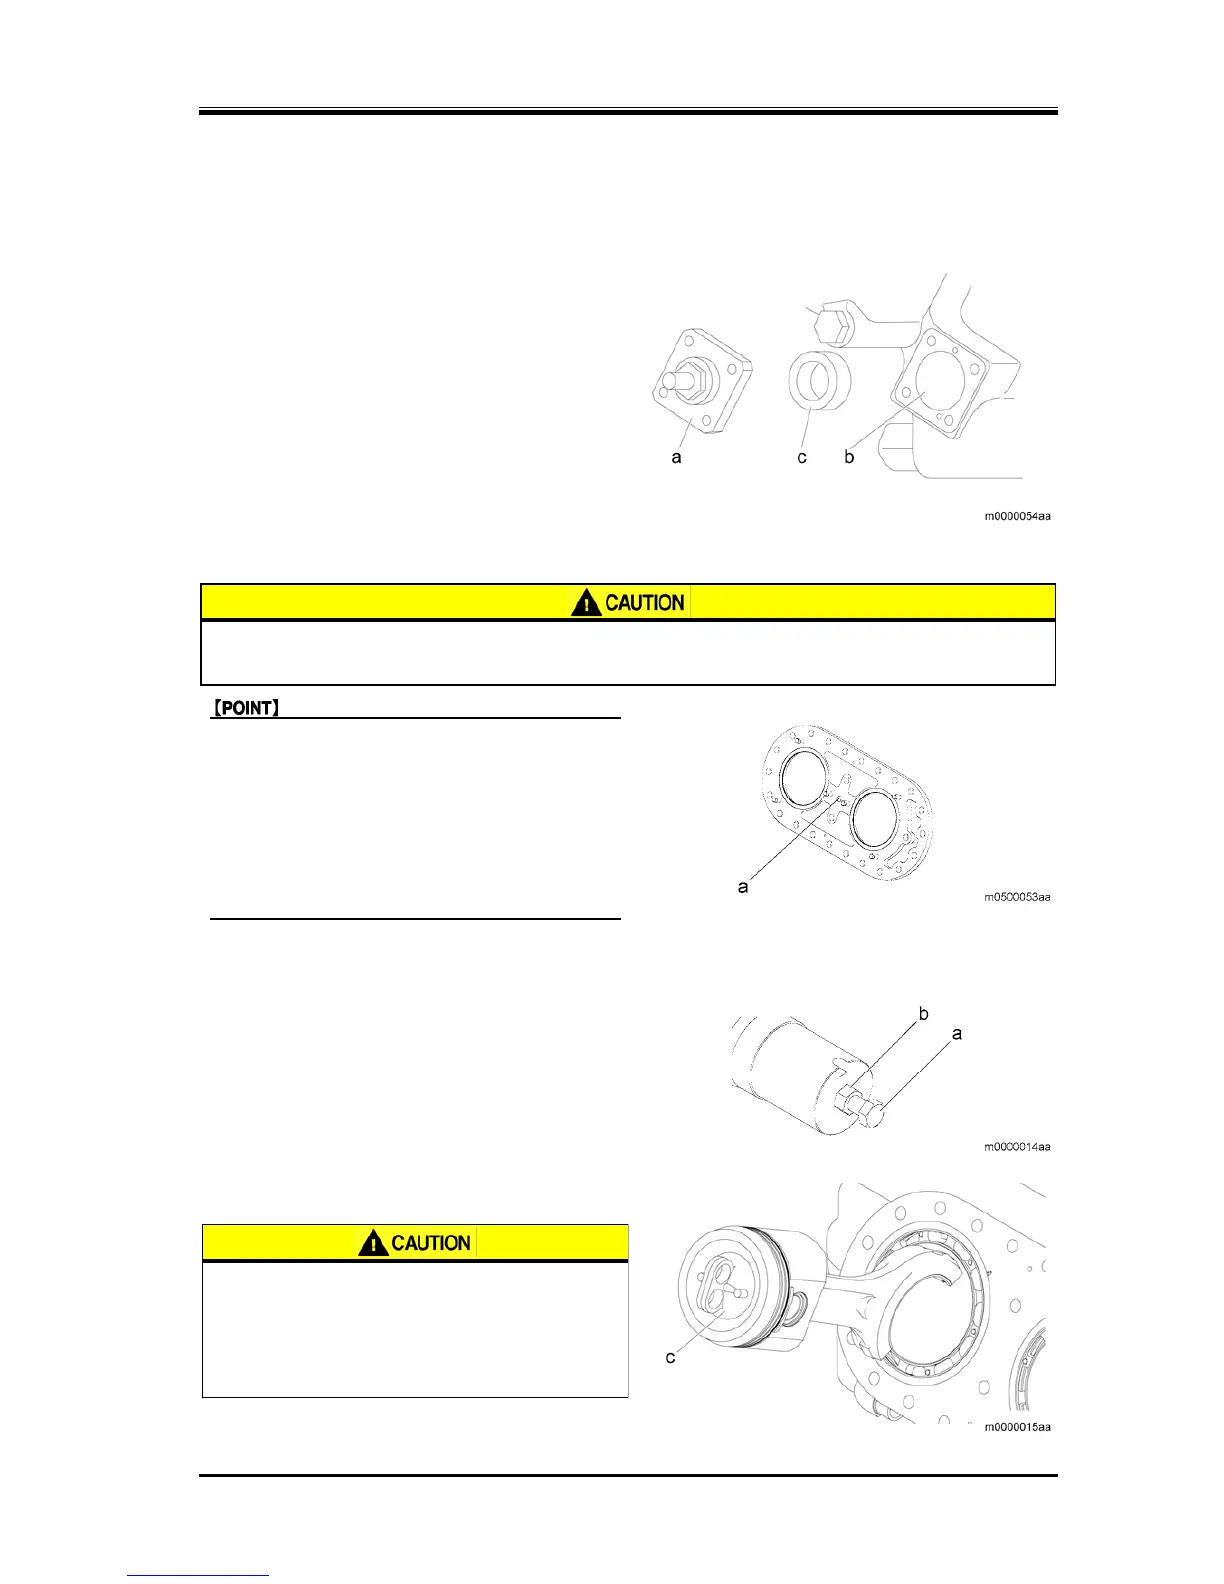
5.5.4.1 Attachment of the Spacer
1. Remove the coil screw from the integrated
solenoid valve unloader cover to remove the coil.
2. Loosen the unloader cover hexagon head bolt, and
remove the unloader cover (a).
3. With the spacer with thickness of 17—19 mm
(0.66—0.75 inches) inserted between the unloader
piston (b) and unloader cover (a), tighten the two
unloader cover hexagon head screws manually.
5.5.4.2 Removing the Valve Plate
z Dropping of the valve plate may cause injury or damage to the compressor.
Always attach the stud bolt before performing the work.
z If the stud bolts that are used for removing
the head cover are already removed, attach
the stud bolts into the head cover screw bolt
holes for two sections at the top, then
remove the valve plate.
z To remove the valve plate, insert the valve
plate screw into the service hole (a) and
tighten it.
5.5.4.3 Removing the Piston Assembly
1. Attach the bolt (M20) (a) and nut (b) to the
crankshaft.
2. Using the bolt (M20) (a), rotate the crankshaft so
that the piston assembly to be removed is
positioned at the bottom dead center.
3. Remove the piston assembly using the suction
disk (c).
z Verify that the suction disk is firmly
stuck to the piston assembly. If the
suction disk is not stuck firmly, the
piston assembly may fall, resulting in
hand or physical injury.