80-0420-23 POWER TONG
Manual № TM12012
Section 3
Page 3.15
©2008-2017 McCoy Global
Installation & Commissioning
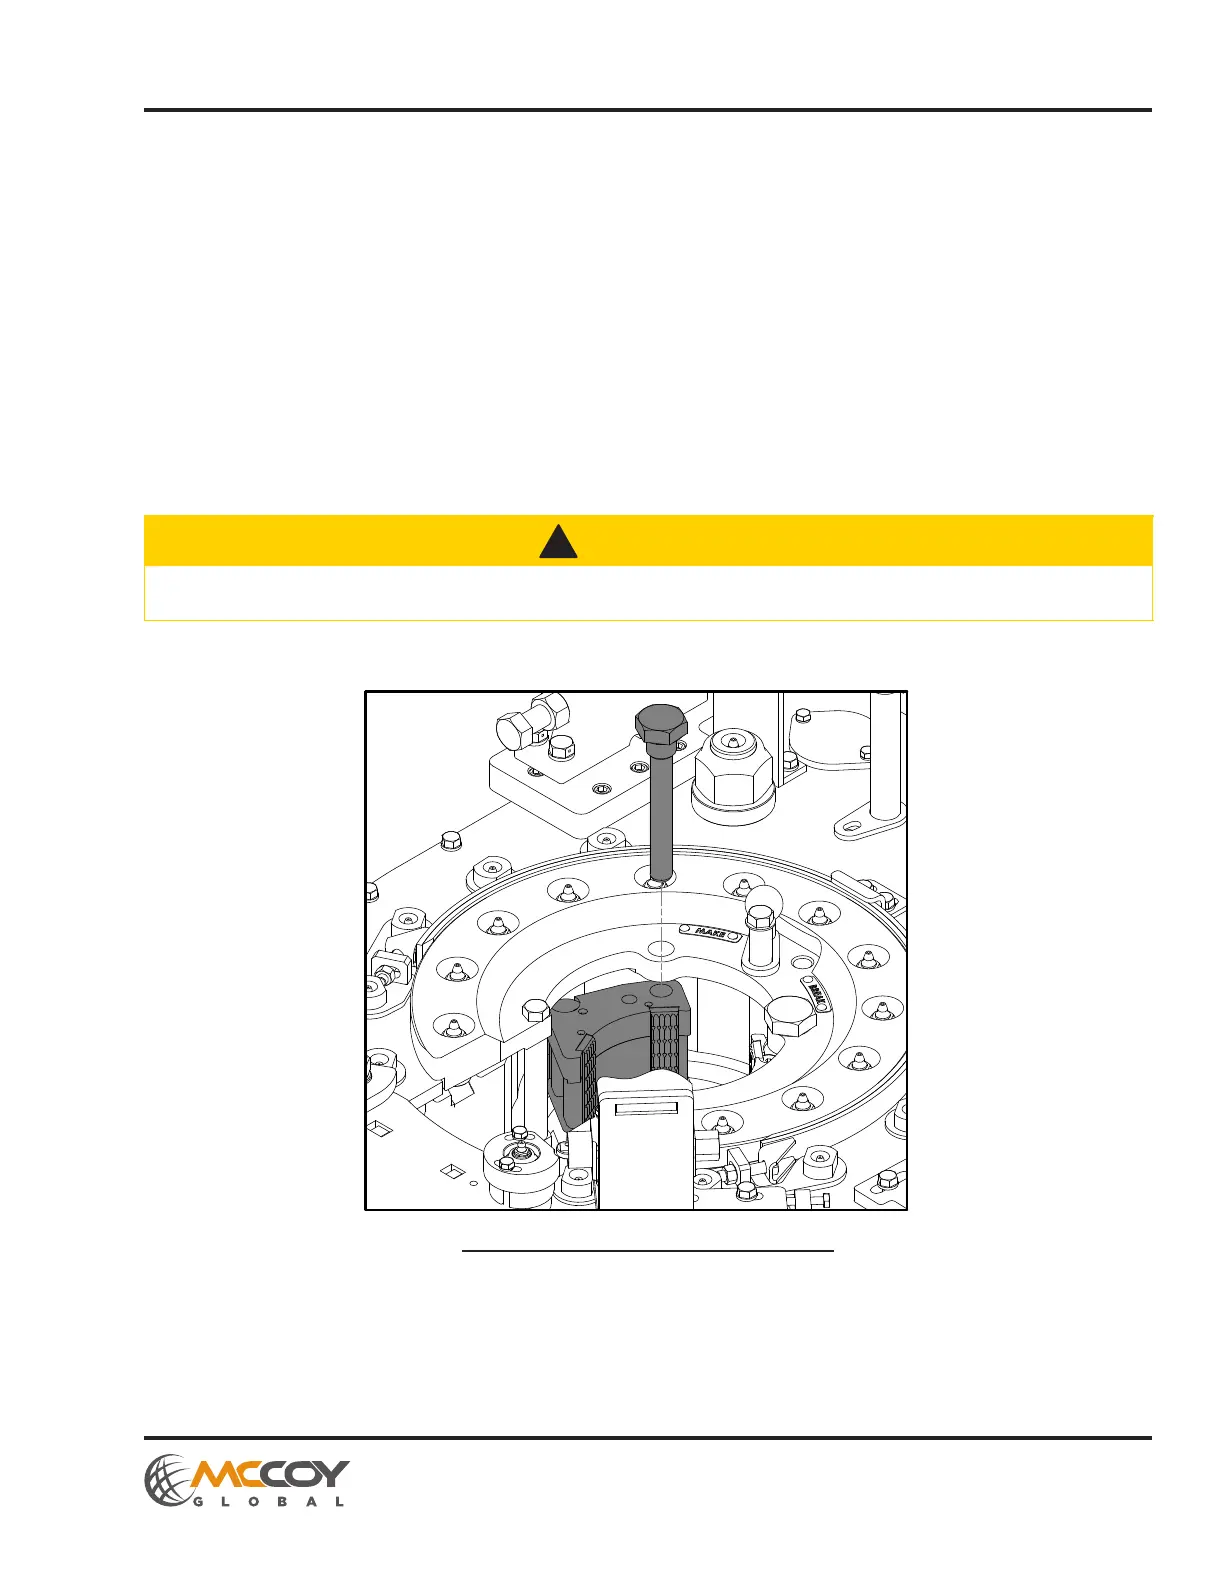
Illustration 3.4.1: Jaw Removal / Installation
3.4.2 Tong Jaw/Jaw Die Installation and Removal (Continued):
4. Clean the dovetail die slots using a metal brush.
5. Treat the new dies with anti-seize compound before installing.
6. Insert the new jaw dies in to the jaw(s), and secure in place using the keeper fasteners.
Tong jaws often require removal to change jaw size or replace worn jaw die inserts. Follow these instructions to
remove tong jaws:
1. Remove hydraulic power from the tool. Although opening the tong door inhibits rotation, McCoy recommends
completely isolating the tool from hydraulic power in order to prevent accidental rotation in the event of
component failure.
2. Remove one jaw at a time. Support the jaw being removed from the bottom. If required use a temporary lifting
sling and crane to support the jaw assembly.
3. Remove the jaw pivot bolt.
4. Slide the jaw assembly toward the centre of the cage plate assembly, and, once clear of the cage plates,
remove and transport to a secure location.
5. Repeat steps 2 through 4 for the second jaw.
6. Inspect each of the two incoming jaw assemblies:
• Inspect each jaw weldment or casting for cracks or other damage, including (but not limited to) chipped metal
and missing welds. Do not use cracked or otherwise damaged jaws. Cracked or otherwise damaged jaws
must be clearly tagged and quarantined. Subcomponents of each jaw assembly (rollers, roller pins, jaw dies)
may be removed and re-used, providing the subcomponents are free of damage.
!
CAUTION
JAWS MAY PRODUCE METAL SLIVERS. WEAR STURDY WORK GLOVES WHEN HANDLING JAW DIE
KITS.