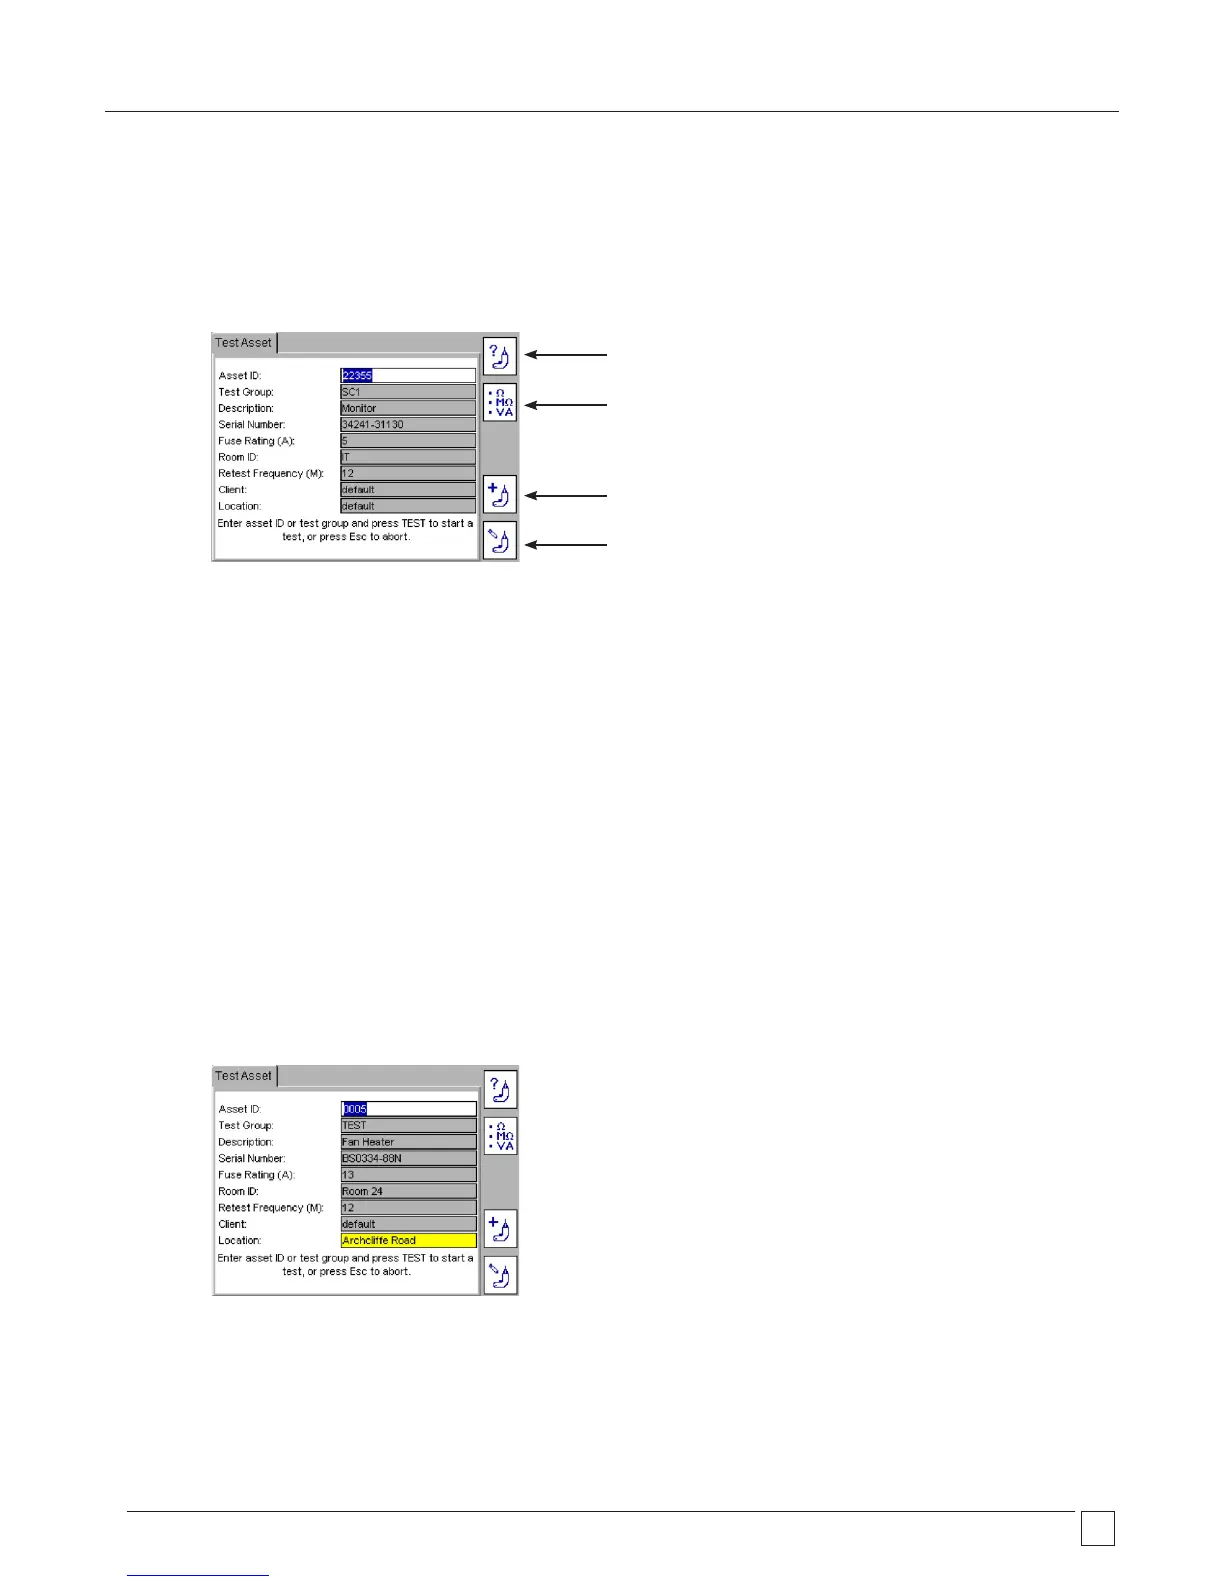
20
Option 3: Starting a TEST – USING A BARCODE SCANNER
.1 From the home page, scan the Asset barcode with the optional barcode scanner.
If the ASSET ID does NOT exist in the PAT database, the PAT will jump to the ADD ASSET screen and the
ASSET ID will appear.
.2 If the asset information matches the asset to be tested the completed TEST ASSET screen will appear as below:
Check the asset information matches the ASSET to be tested. If so, Press TEST and go to section 3.3 TEST PROGRESS.
If the asset information does not match the asset to be tested, check the CLIENT is correct.
The same ASSET ID can be used for different clients, but one client cannot have duplicate asset IDs.
If the asset ID does not exist the screen will jump to Add Asset screen and automatically fill the ASSET ID field with the
scanned barcode data.
.3 Press the DOWN arrow to move to Test Groups.
The TEST GROUP is selected by pressing OK and selecting from a drop down list.
Typing the first letters or numbers of the test group will allow the search engine to jump to those test groups without having to
scroll down the list.
Additional information can also be added, but this is not essential.
NOTE: When scanning an Asset ID that exists in the database under a location that is different to that set in the PATs
current status, a yellow warning indicator will show on the Location field as below. Go to section 10 for additional
information on Clients and locations.
.4 Press the TEST button. Go to section 3.3 TESTING PROGRESS for further information on the test sequence.
Find asset
Search for TEST GROUPS
Press once for direct entry
Press twice for drop down box.
Add ASSET
Edit ASSET
 Loading...