146 of 289
Z-Home Sensor PCB Replacement
•
This repair requires timing and other adjustments and should be performed by an authorized
service technician.
Repair Parts Required:
• Z-Home Sensor PCB Assembly (includes the bracket)
•
WARNING!! Do not take the covers off the machine without either turning the machine off or
engaging the emergency button. The motors might move when the sensor is removed or the
harnesses are disconnected.
1. Either turn the machine off or engage the emergency stop button by pressing it in.
2. Remove the left and right arm covers and set the hardware aside for reuse.
3. Remove the upper arm back cover and set the hardware aside for reuse.
4. Disconnect the z-home harness lead from the PCB connector socket.
5. Remove the two M4x10mm cap head socket screws, M4 split lock washers, and M4 at washers
that mount the bracket to the upper arm and remove the Z-home sensor PCB assembly from the
machine.
6. Install the replacement Z-Home Sensor PCB Assembly using the hardware you removed from the
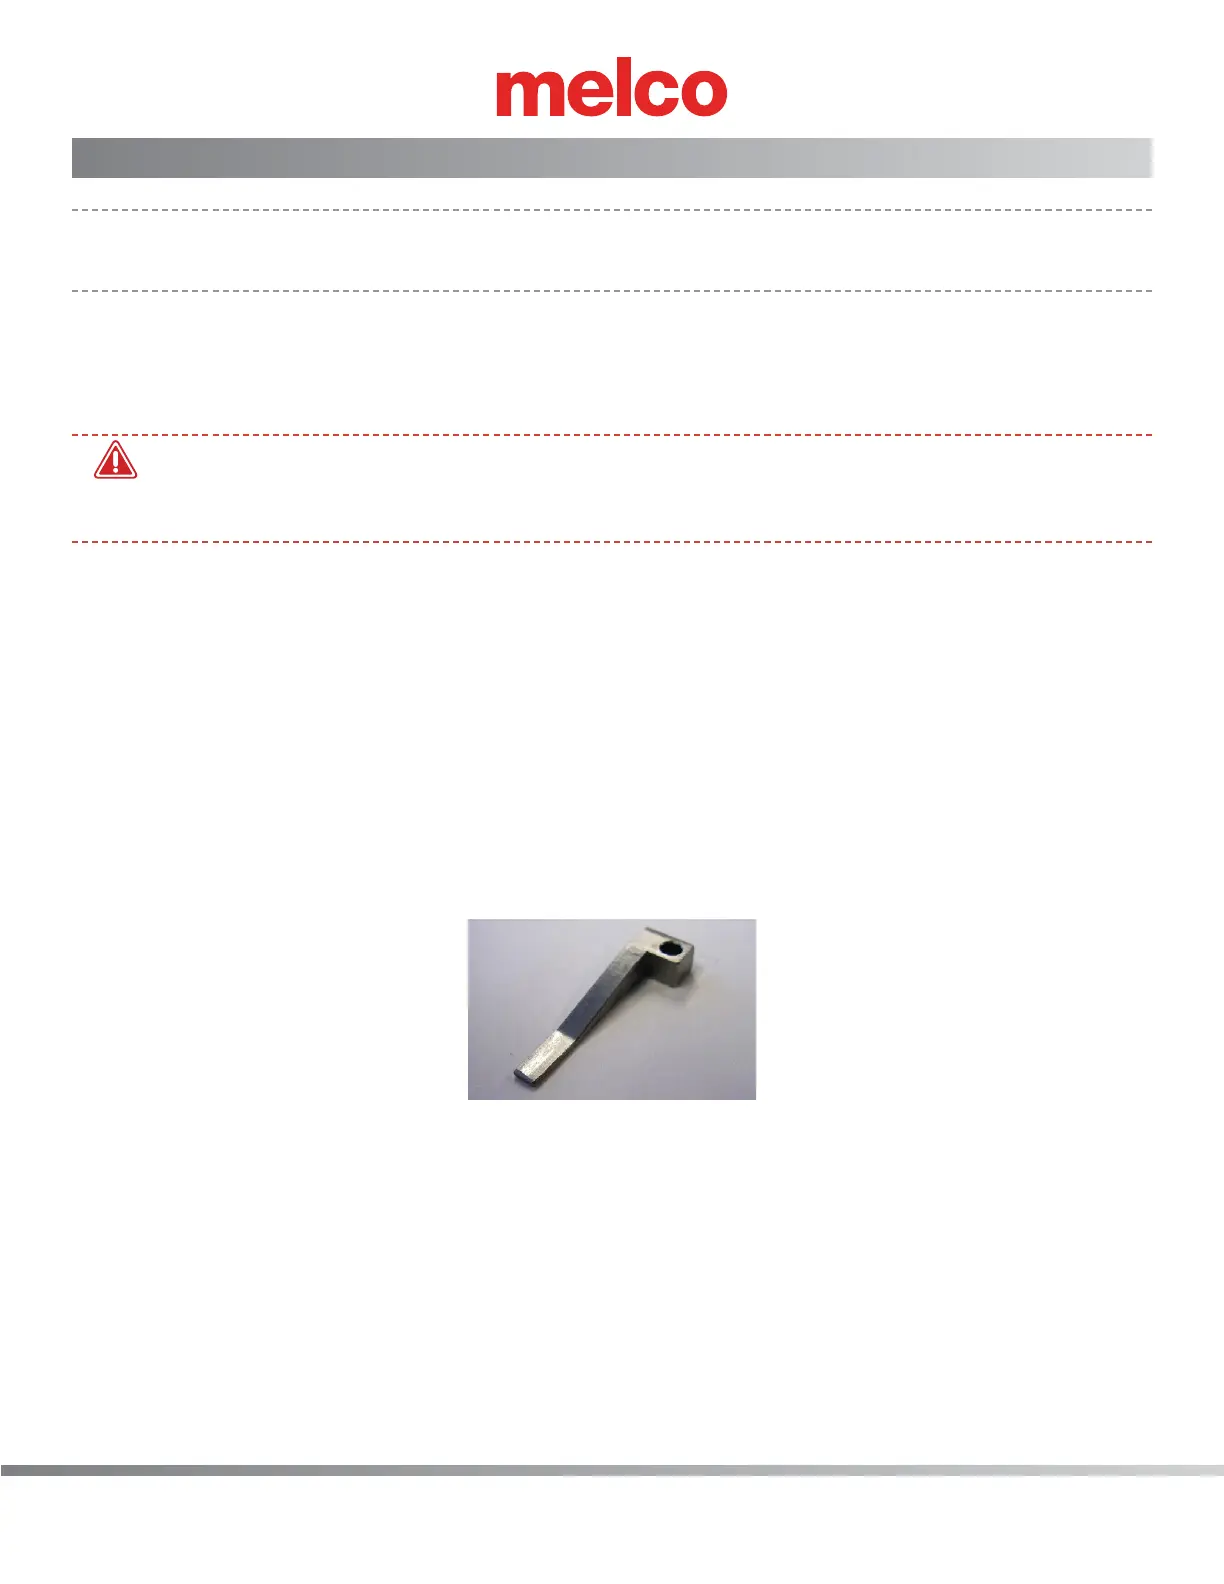
old assembly using the Z Home Sensor Fixture (PN: 32980) to correctly realign the aseembly. See
Figure 1.
Figure 1 - Z-Home Sensor Fixture
7. Align the mounting bracket of the replacement PCB using the Z Home Sensor Fixture (PN: 32980).
Make sure the xture contacts the outside face of the opto sensor on the PCB. Position the brack-
et until the xture contacts the outside diameter of the Z Home Flag. See Figure 2.


 To Next Page