236 of 289
X-Home Optical Switch Assembly Replacement
•
This repair requires timing and other adjustments and should be performed by an authorized
service technician.
The x-home sensor is installed inside the x-beam. It requires replacement when it gets too dirty or if the
cable attached to it is damaged in any manner (chafng, pinched wires, shorts or breaks). The x-home
functionality can be veried by moving the x-carriage right and left and watch the LED on the main PCB
at location D37. The LED should come on just as the carriage reaches the “x-home” position and go off
when the carriage is moved further left or right.
Replacement Part Needed
• X-home optical switch assembly
• 3.2mm IDx9mm ODx.8mm THK fender washer
• M3x0.5mmx10mmLG cap head socket screw
Replacement Procedures
1. This procedure is done with the machine turned ON. However, engage the emergency stop by
pushing it in.
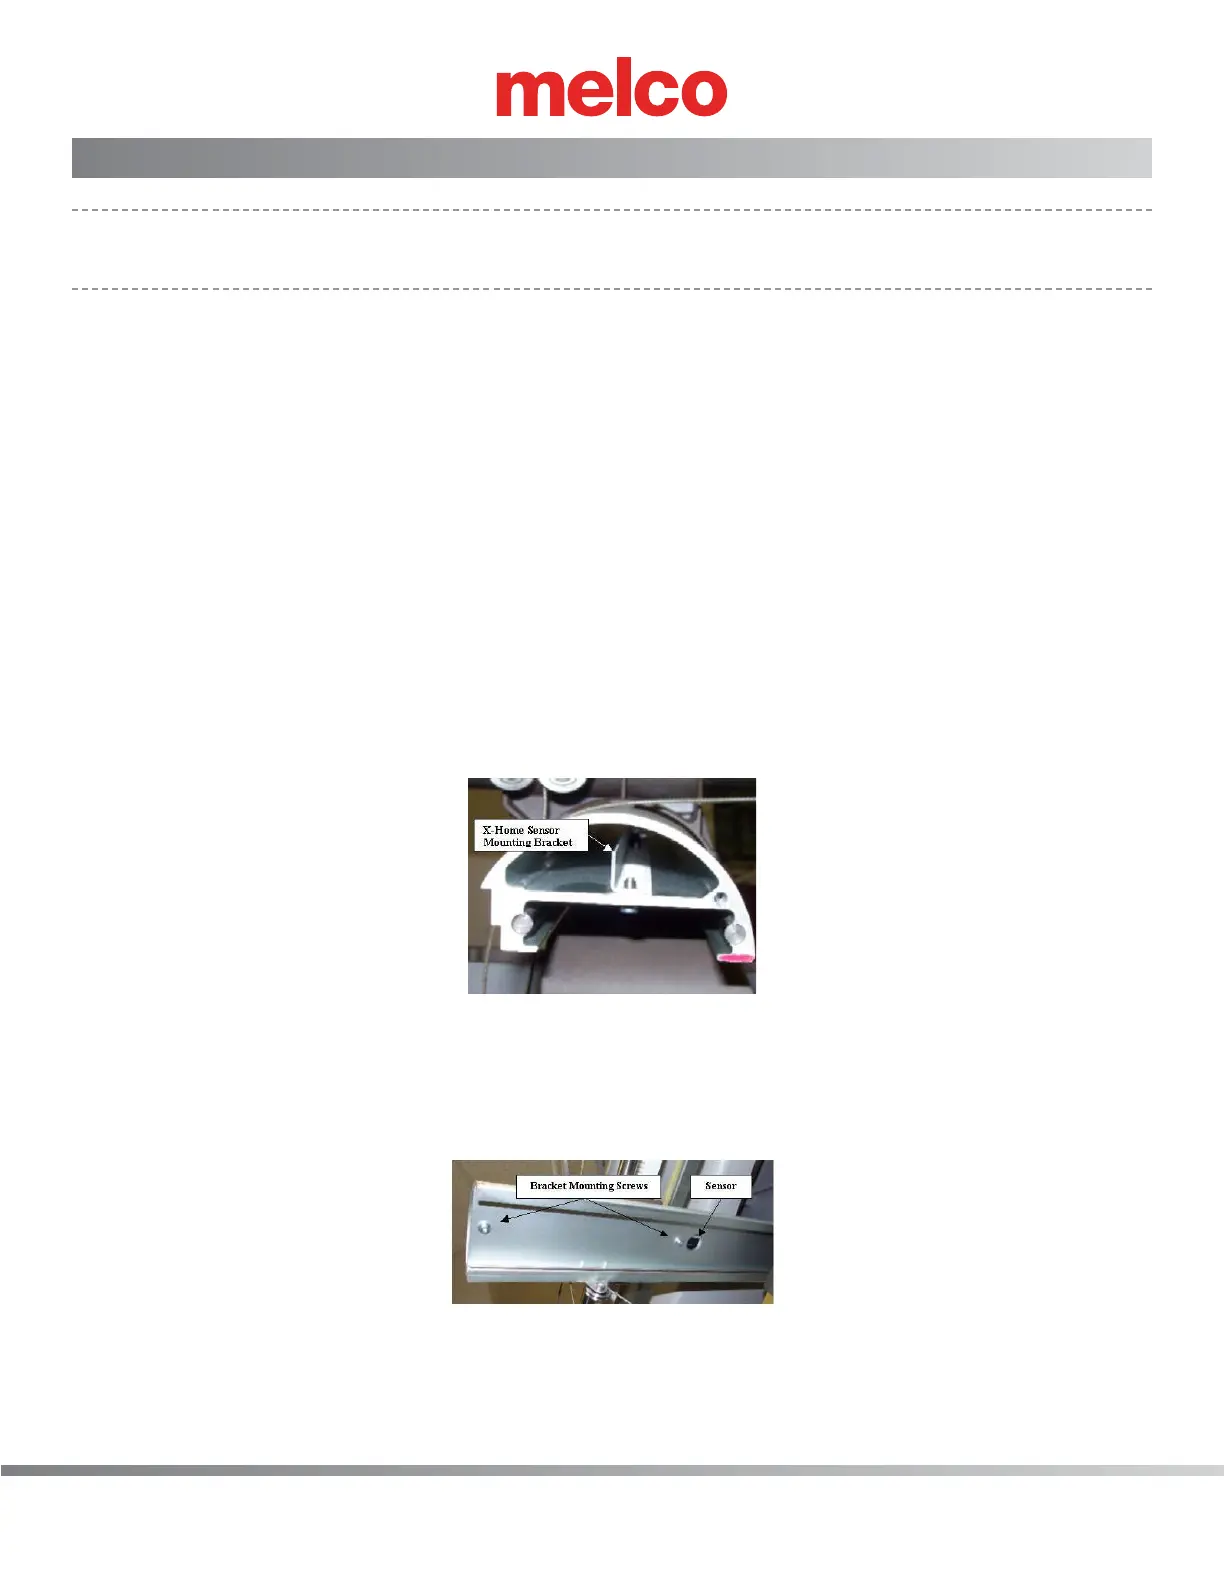
Figure 1 - X-Home Sensor Mounting Bracket
2. Remove the x-beam end cap from the left end of the x-beam.
3. Disconnect the x-home sensor cable from the x-y optical sensor PCB.
4. Move the x-carriage all the way to the right as far as it will go.
Figure 2 - X-Home Sensor and Mounting Screws
5. Remove the screws mounting the x-home sensor mounting bracket to the beam. The screws are
located on the bottom side of the beam as shown in Figure 2 above.