71 of 289
Rotational Hook Timing Inspection Procedure
1. Make sure your machine is turned on and Melco OS is running.
2. Engage the emergency stop button (by pushing it in).
3. Push the x-beam all the way to the back of the machine to ensure that the hoop arms will be out
of the way during the procedure. (As an alternative to this, you could remove the hoop arms.)
4. Remove the needle plate, bobbin case, and rotary hook cover.
5. Disengage the emergency stop button (by twisting it).
6. You now need to determine the machine’s “closest needle.” The closest needle is dened as the
needle that is closest to the hook point.
• The number of the closest and farthest needle are marked underneath the upper casting. Look
past the z-shaft.
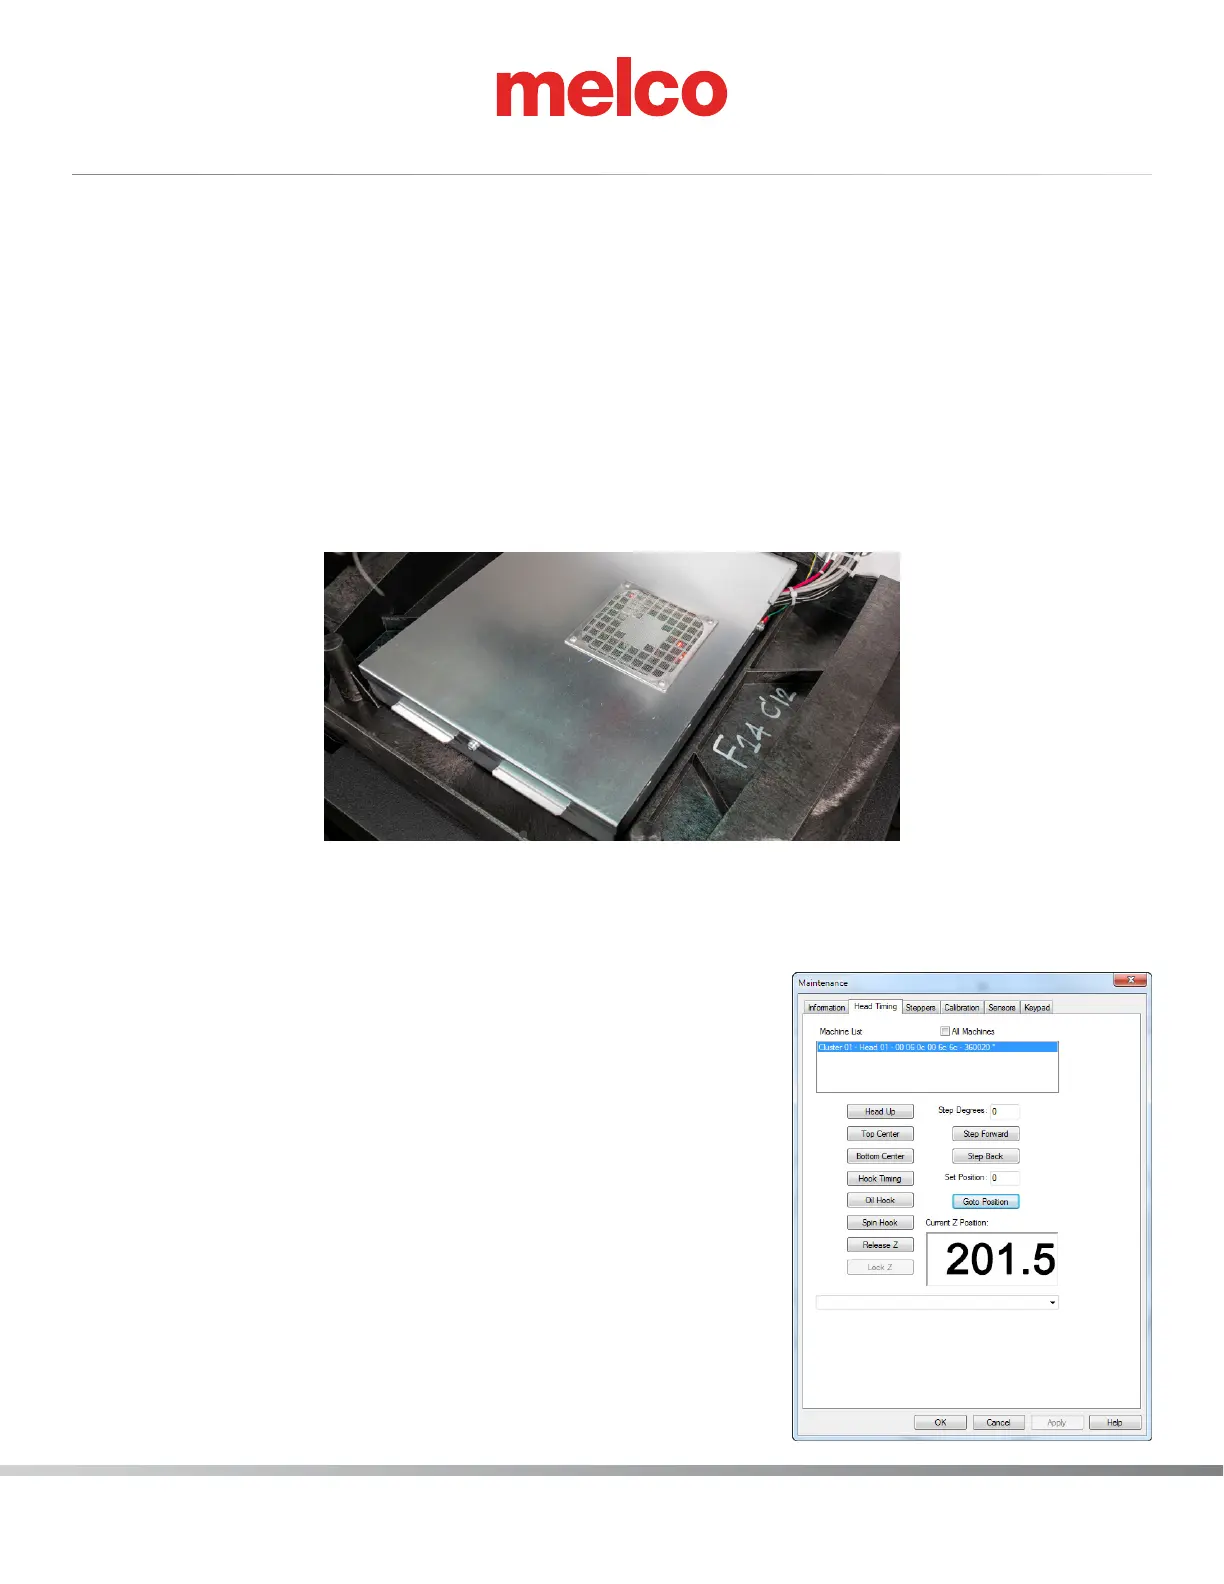
7. Open the Tools>Maintenance menu and then click the Head Timing tab.
8. In the Head Timing tab, click the Head Up button (or on the machine keypad, press the
Adjustment key and the Up Arrow key.
9. Use the machine keypad to move the needle case to the clos-
est needle noted in the machine casting.
10. If the needle is bent or damaged, replace the needle.
11. To inspect hook timing you need to adjust the machine to
201.5° ± 0.5°. To achieve this position, click on the [Hook
Timing] Button.
a. Verify that the current Z Position reads 201.5.
12. You can now inspect the hook timing, which refers to the
rotational position of the hook point in relation to the nee-
dle. To check the hook timing, stand directly in front of the
machine, then locate the needle. The hook point should be
even with the left side of the needle. Use the image below to
locate the hook point behind the needle (it may be helpful to
use a magnifying glass to see this).