219 of 289
6. Remove the x/y home harness from the y-home ag channel and pull it through the 1/2 inch di-
ameter access hole in the casting right above the y-home ag channel.
7. Pull the harness down to the left lower arm access hole to the main PCB, removing any twist-lock
cable ties that tie it to the adjacent harnesses.
8. Power down the machine and disconnect the A/C power input cord and the external Ethernet
cable from the back of the machine.
9. Remove cover for the main PCB.
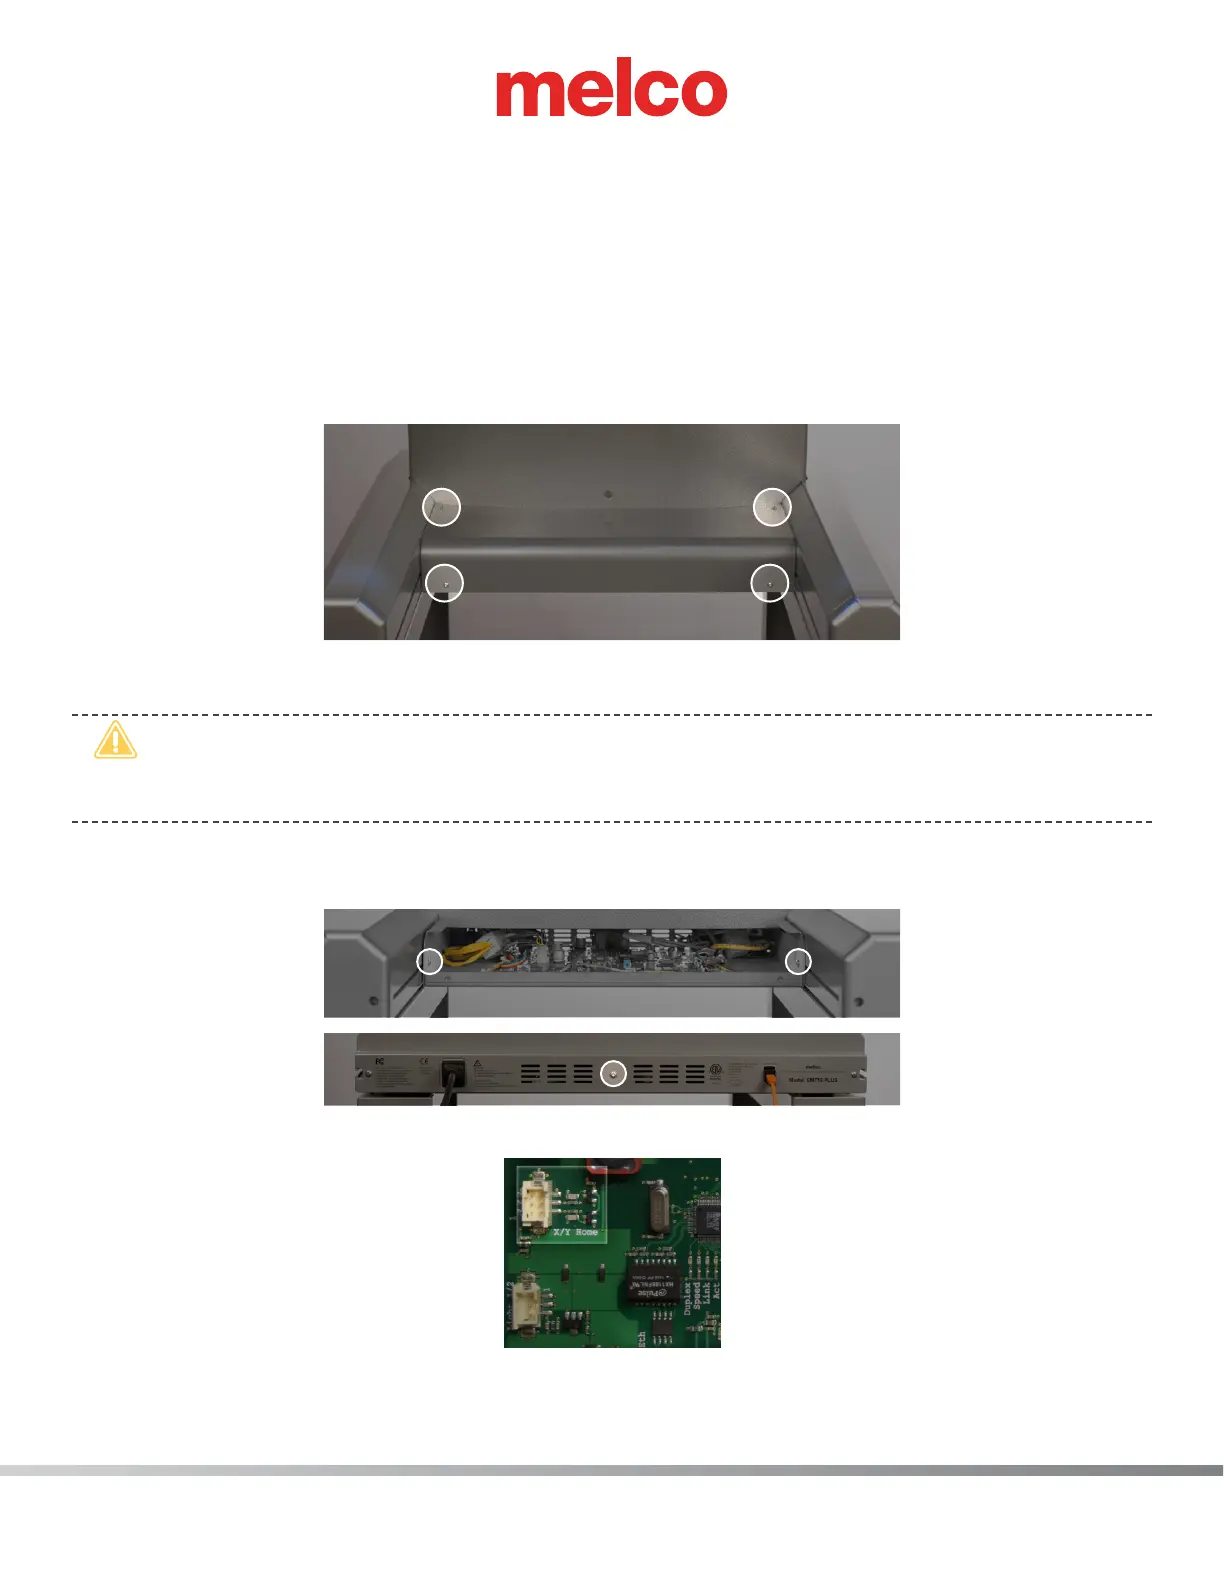
a. Remove the 4 screw(s) that hold the main PCB cover in place.
b. Remove the PCB cover.
•
CAUTION!! Be careful not to drop metallic hardware or tools onto the Main PCB while it is
exposed. Doing so can result in severe damage to the electronics that might be expensive to
repair.
c. Once the main PCB cover is removed loosen but do not remove the 2 PCB securing tray screws
in the front and fully remove the securing plate screw in the rear.
10. Gently slide the main PCB mounting tray forward to gain full access to the main PCB.
Figure 5 - X/Y Harness Connected at Main PCB (“X/Y Home”)
11. Disconnect the harness from the Main PCB at connector location “X/Y Home”.


 To Next Page