74 of 289
•
NOTE: While adjusting the needle to hook gap and/or hook timing, you should periodically
make sure that the z axis position has not changed (check the Current Z Position box). If the z
position has changed, repeat steps 4-6 of this procedure.
7. Repeat step 4, then verify that the rotational hook timing is still correct. If it is not, repeat the rota-
tional hook timing adjustment.
8. While still at 201.5°, check and adjust, if needed, the needle to hook gap.
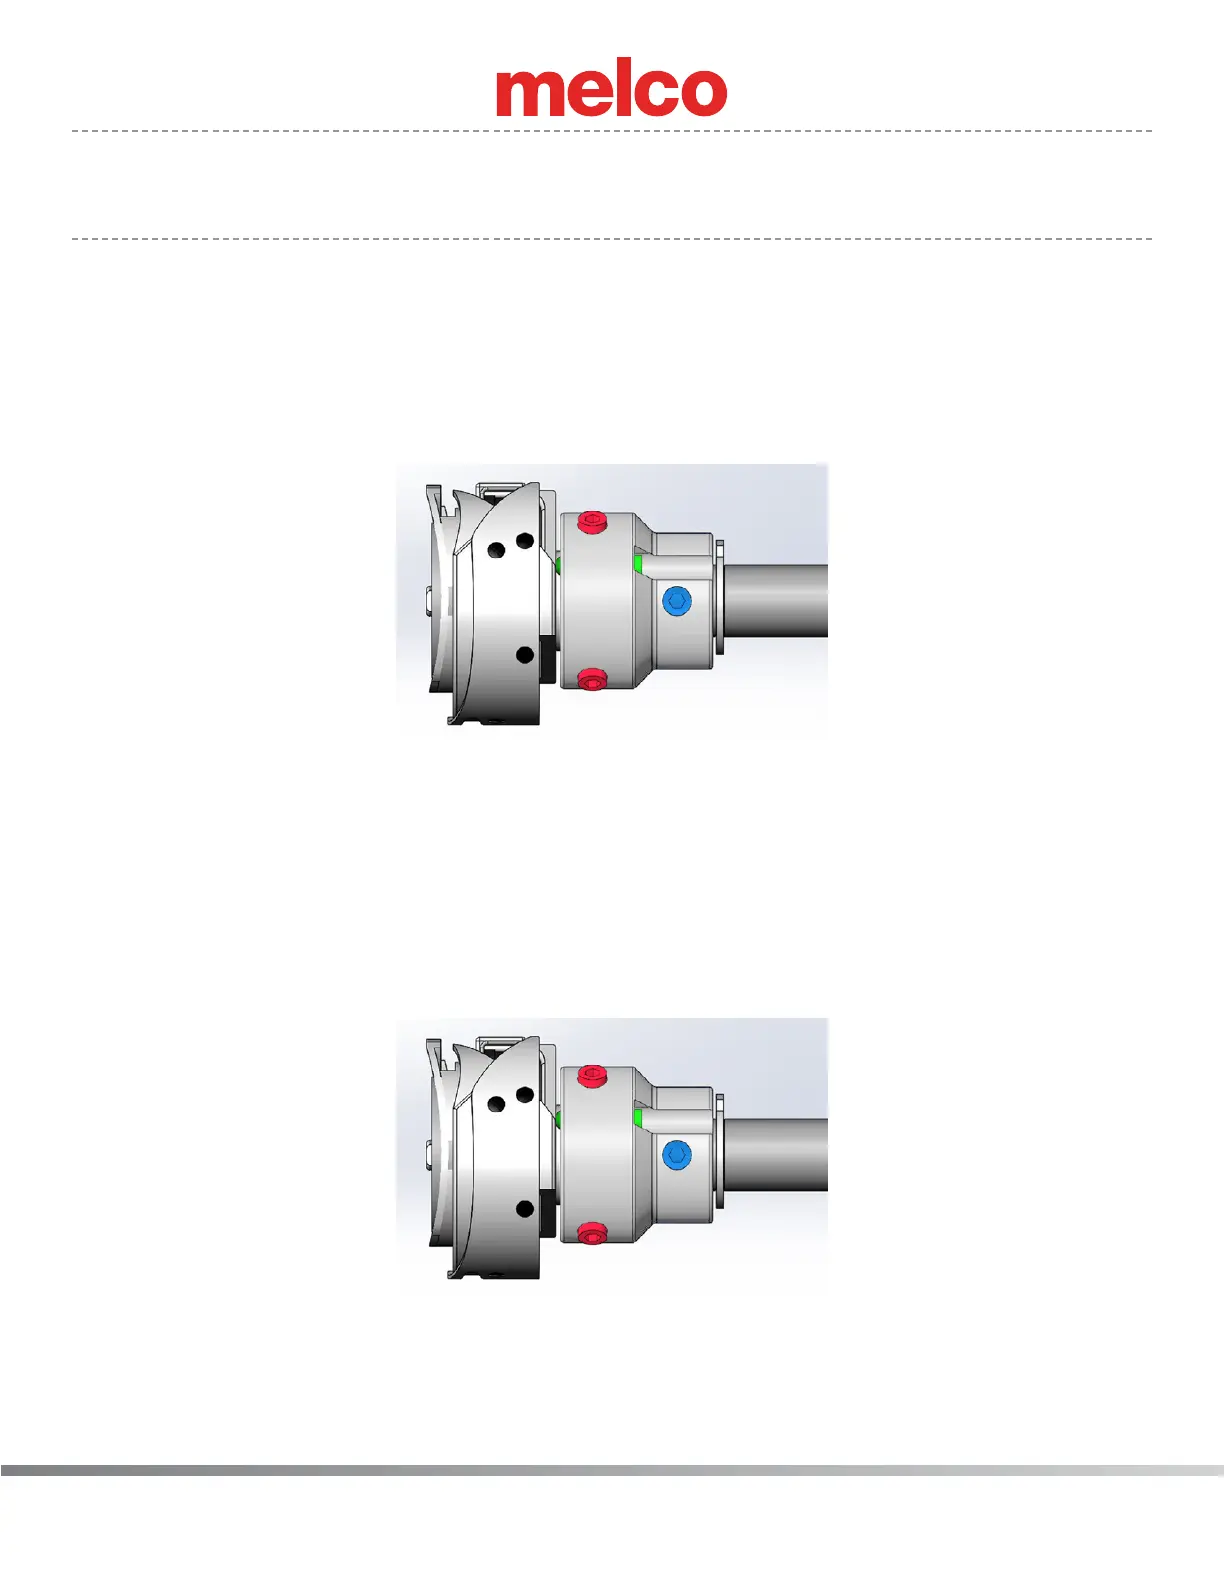
9. Using a 2 mm bent allen wrench, slightly loosen (do not remove) the three exposed screws that
are accessible on either side of the hook. The hook fastening screws are highlighted in red in the
image below.
10. To inspect hook timing you need to adjust the machine to 201.5° ± 0.5°. To achieve this position,
click on the [Hook Timing] Button.
a. Verify that the current Z Position reads 201.5.
11. Adjust the hook to needle gap with a shortened 1.5mm bent Allen key (provided in the operator’s
kit) to access the adjustment set screw (highlighted in green in the image below). As you adjust
the screw, rotating the set screw clockwise moves the hook out, while a counter-clockwise rota-
tion with nger pressure on front of hook moves it backwards. Adjust until the gap between the
needle and hook point is 0.1mm (.004”).
12. Lightly tighten each of the three Hook Fastening Screws before fully tightening them. Press
and hold the Adjustment key, then press the Right Arrow key to provide access to the screws if
needed.