96 of 289
5. Remove the left arm cover.
Figure 2 - X/Y-Home Fixture in Needle Plate Hole
6. Install the X/Y-home xture onto the x-carriage at the third screw hole from both ends so that the
xture is centered on the x-carriage.
7. Align the xture pin over the needle plate hole and push the front of the xture down until the
pin on the bottom of the xture front block is rmly seated in the needle plate hole as shown in
Figure 2 above.
Figure 3 - Y-Home Flag (Bottom View)
8. Loosen the screws mounting the Y-Home Flag to the bottom of the upper arm body on the left
side. The Y-home ag also serves as a wiring channel for the X/Y home harness (the rainbow col-
ored ribbon cable).
9. Move the Y-Home ag all the way to the front to a dead stop, then slowly move the y-home ag
towards the back just until the LED comes on and is brightly illuminated. Tighten the screws to the
Torque Specications as listed in that section.
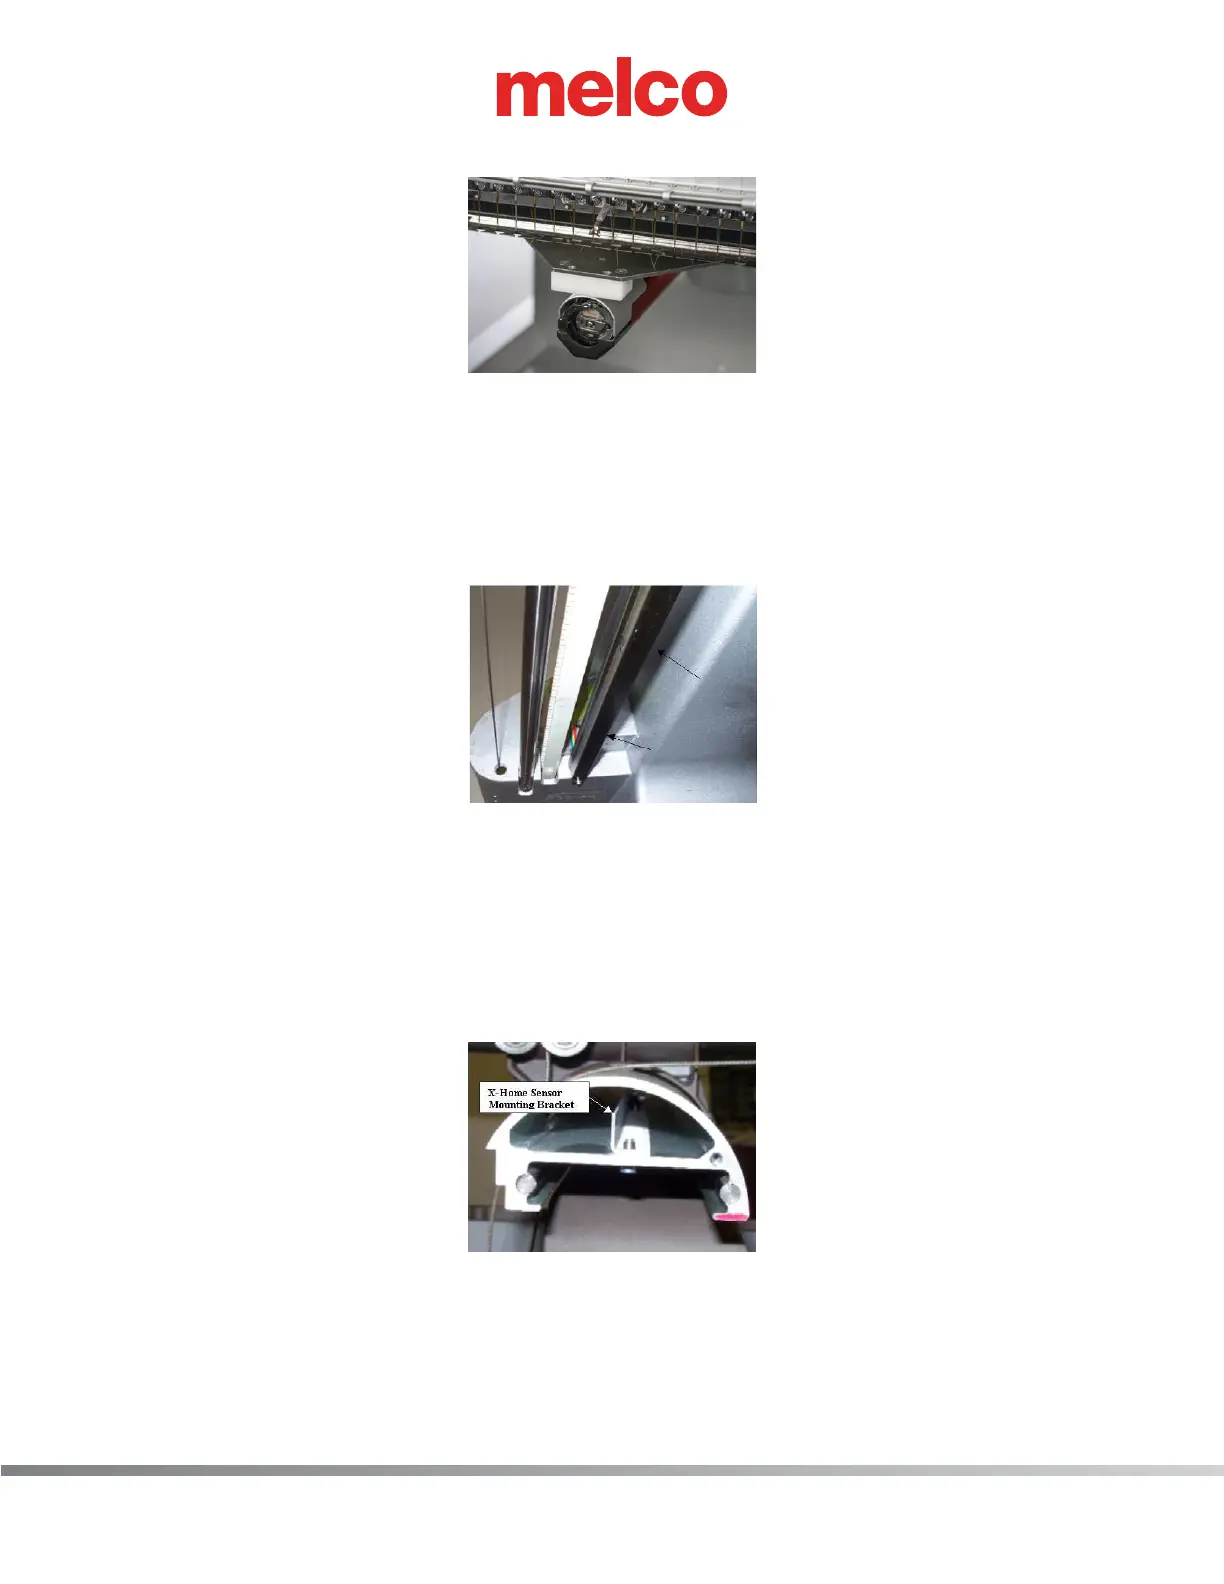
Figure 4 - X-Home Sensor Mounting Bracket
10. Loosen the two screws that mount the x-home sensor mounting bracket inside the x-beam. Move
the mounting bracket all the way to the left end of the beam and then push it back in to the right
just until the X-home LED comes on. Tighten the screws back to The torque specications.