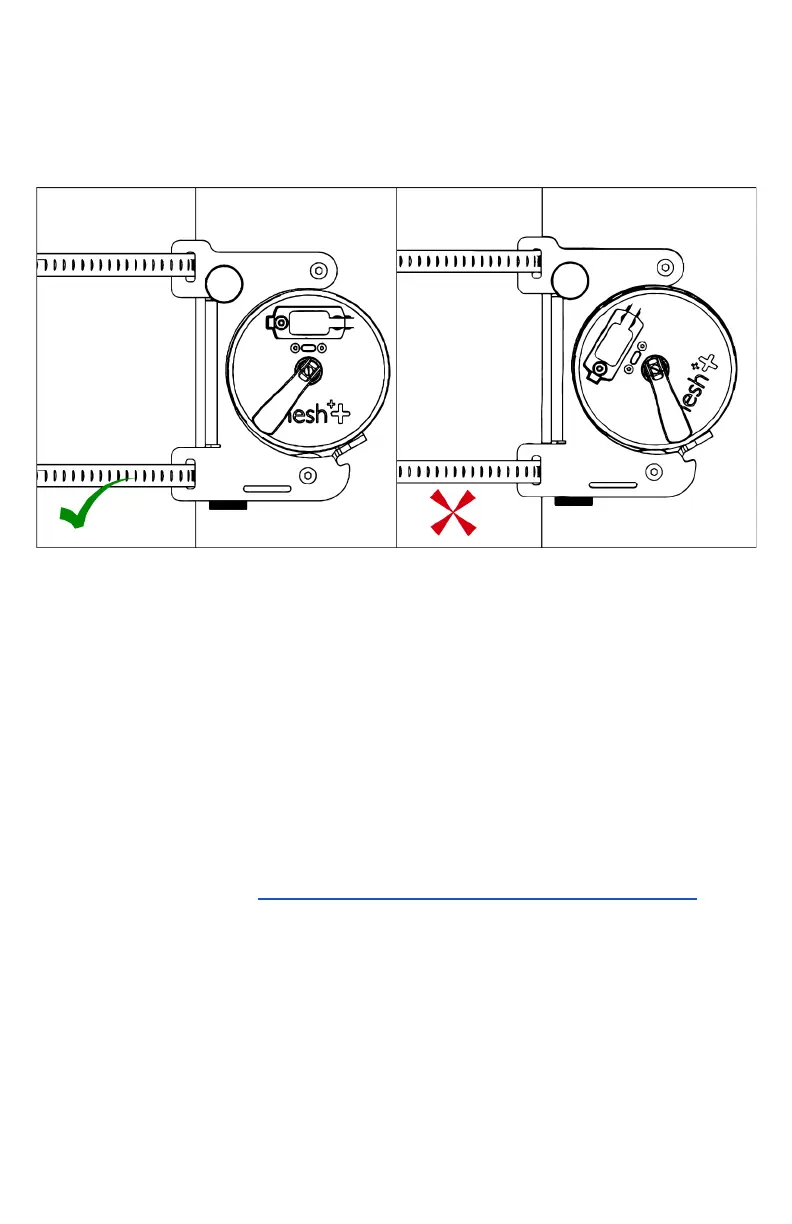
2. The ‘Mesh++’ logos on both sides of the node are facing
right-side up so that they are readable and parallel to
ground level.
3. The LED windows on the node’s outer case are centered
within the mount.
iv. Use your fingers to begin tightening the silver clamp knob
enough so that the node is held in place, but still adjustable
if needed. Once confirmed that the requirements above are
met, use the 4 mm hex key included in the accessories pack
to tighten the knob. Torque it enough so that the knob
cannot be loosened by only using your fingers.
b. Using a node in Gateway Mode
The USB Hub included is required to use a node in Gateway
Mode or with any other cabled peripherals.
i. Install the USB Hub with its required cables onto the mount.
Please refer to section 4.d - Overview of USB Hub Ports .
Separate the two covers of the USB Hub, exposing the PCB
and its inputs.
ii. Insert the USB-C data transfer cable into the node and into
the furthest USB-C port of the hub. If the data transfer cable
has blue dots on them, they should both be facing up when
being connected.
iii. Insert an ethernet (RJ45) cable into the ethernet port of the
USB Hub. Ensure that it is connected to a reliable internet