8. Installing the Solar Panel
a. Preparing to install
i. Verify that your node has
been clamped properly
and the mount is affixed
to the pole or wall
securely. Unbox the solar
panel, ensuring that all
packaging has been
removed, and locate the
mounting arm.
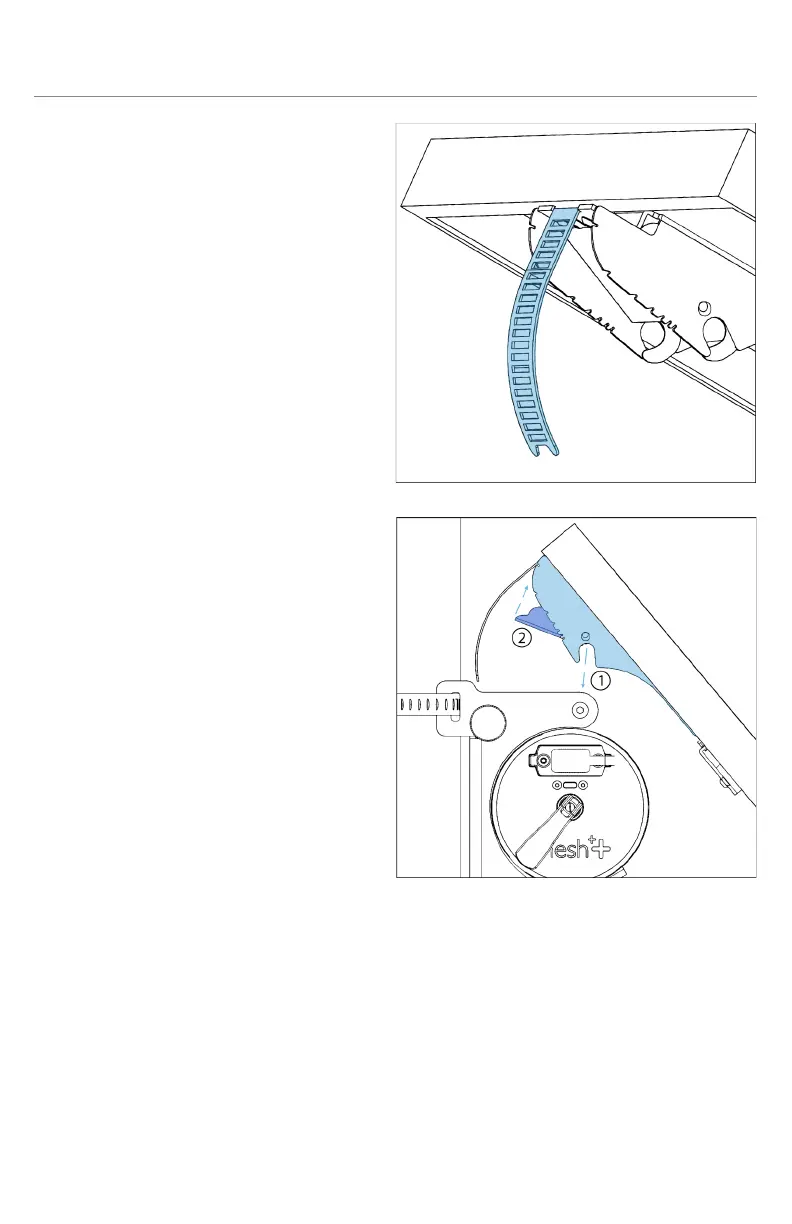
ii. Bend the notched metal
ribbon on the panel’s
mounting arm so that it
becomes rounded and
the end points inward
parallel to the panel. This
is to create a secure path
for the panel to tilt once
installed to the mount.
iii. Flip the solar arm lock (2)
open so that the circular
notches on each end are
clearly open to fit on the
mount’s axle.
iv. Connect one end of the
included SAE to SAE cable into the port on the panel’s arm
and the other side to the SAE port on either end of the node.
Both SAE ports on the node are equivalent.
v. Rest the open solar arm lock onto the mount’s axle (1) with
the sides of the solar arm fitting in between the sides of the
mount. Both sides of the solar arm lock should fit snugly
onto the axle.