source if the node is intended to be an Ethernet Gateway -
an established network or router with DHCP server.
iv. If you plan to charge your node via USB-C Power Delivery,
the adapter must be rated for at least 60W of output power
(20V, 3A minimum) in order to properly function.
1. Insert the USB-C charging cable into the middle USB-C
port of the hub. This cable may also be unidirectional like
the data transfer cable, so flipping its orientation may be
necessary. It is best to verify that the node is charging via
blinking LEDs or change in battery percentage on the
app before proceeding.
2. If you plan to charge a node in Repeater Mode via USB-C
Power Delivery, you may insert the charging cable directly
into the node. No USB Hub is required.
v. Before installing the USB Hub onto the mount, ensure that
the node is functioning properly to prevent having to unclip
it at a later time.
1. Turn the node on via the mobile app. After booting, the
node’s LEDs should be blue - if you cannot reach this
mode, please see Issue #7 in section 11.c -Common Issues.
2. If your node is supposed to be charging as well, revert to
the previous step - if you are having issues charging your
node via USB-C, please see Issue #4. The node’s LEDs
should be blue and blinking at a certain speed correlating
to the amount of charge.
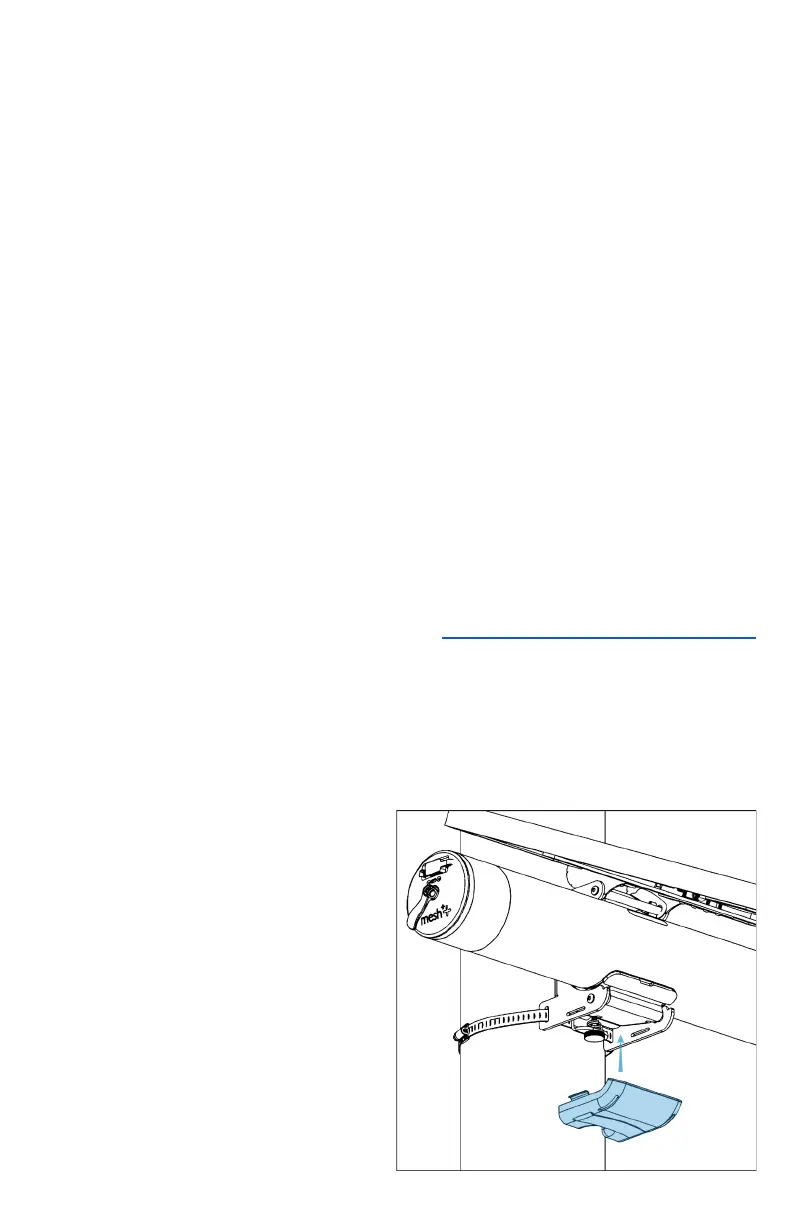
vi. Route all the cables
passing through the hub
between the circular
cutouts on the edges of
the USB Hub’s bottom
plate; attach the top cover
securely. The 2 halves of
the USB hub should fit
securely around each of
the cables.