disconnect and reconnect it into the node to see if the
battery level changes on the mobile app.
iii. If the USB Hub is being used:
1. The USB-C data transfer cable should be fully inserted into
the node and the furthest USB-C port of the USB Hub.
2. If the USB-C data transfer cable has blue dots on them,
they should both be facing up. If it still does not work,
their directions should be reconfigured in different
orientations (one of each dot down, both dots down) to be
tested again.
3. USB-C charging cable should be fully inserted into the
USB Hub in the middle USB-C port.
4. The USB-C charging cable should also be tested with
different orientations, similar to USB-C data transfer cable.
This is dependent on the orientation requirements of the
purchased power adapter.
5. The USB-C charger needs to be able to provide 20V and a
minimum of 60W. Separately, the charging cable must
also be rated at a minimum of 60W.
6. Test the USB-C charger to verify that it works with a
phone or laptop.
iv. The batteries may be in a failure state due to a very low
voltage. Charge the node using a solar panel or PoE (if
applicable) for at least 3 hours to reach a safe battery
threshold.
v. Open the node’s core to verify that the internal USB-C cable
is fully plugged into the node’s PCB.
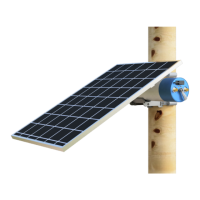
Issue 5: Charging the node via its solar panel is not working.
i. The solar panel must have a clear view of the sky on all cells
in the panel. Any of its surface being covered can ruin the
functionality of an entire row of cells. This also includes the
removal of any packaging material on the panel itself.
ii. There must be visible sun during the day - not just
brightness through the clouds.