24
This procedure is used to verify the calibration of the system.
In order to achieve accurate mea sure ments, each step in this
fine tun ing procedure should be performed as pre cise ly as
possible.
PREPARATION
• Once the system is fully installed and calibrated, se lect a
straight tract of ground that is similar to your ac tu al field
conditions and as level as possible.
NOTE: Us ing a course with a different ground sur-
face, such as a hard-surface road, will re sult in dif-
fer ent read ings than exact field con di tions.
• Measure a distance of 1000 feet (500 meters). Clear ly
mark the beginning and end points with flags or some-
thing highly visible to the operator.
PROCEDURE
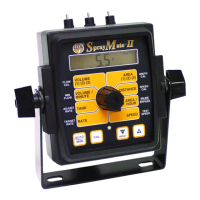
1. With the console turned ON, place the Run/Hold switch
in the HOLD position. The display will read HOLD. Turn
the ro ta ry dial to the “DIS TANCE” po si tion. Be sure the
dis play shows 0. If not, reset the distance counter by
press ing and hold ing “RE SET” until the display au to mat-
i cal ly re turns to 0 (ap prox i mate ly three seconds).
2. You are now ready to drive the measured course. Pick
a location on the vehicle to use as a marker for start-
ing and stopping the distance counting function (door
han dle, mirror, step, etc.). You should begin driving the
course well ahead of the starting flag and drive past the
end ing flag, us ing the Run/Hold switch to start and stop
the count ing function. It is not rec om mend ed to start
from a dead stop at the starting flag and stop at the
ending flag.
3. Place the Run/Hold switch in RUN when the marker
on the vehicle passes the starting flag to ac ti vate the
distance count ing func tion. The con sole dis play num-
bers will in crease, adding to the dis tance total as you
drive. Drive the pre-mea sured course and place the
Run/Hold switch in HOLD when the mark er on the ve hi-
cle passes the ending flag to stop the distance count ing
function. The con sole dis play should read “HOLD”. See
Il lus tra tion 21. Stop the vehicle in a lev el and safe area
and continue with this procedure.
4. With the rotary dial still at DISTANCE (CIRC), press and
hold the “CAL” key for three seconds. Once the con sole
is in “CAL,” the display will alternate be tween the cir-
cum fer ence value and the distance measured at about
three-second intervals. (When the word “CAL” appears,
the num ber dis played is the wheel circumference (CIRC)
value. When “CAL” does not appear, this is the dis tance
value). See Illustration 21.
5. When the display shows distance (“CAL” is not
displayed), ver i fy wheth er the number displayed is the
ex act dis tance you drove (with in “+” or “-” 1 - 2 %). If
not, while the display shows distance, press the “+” or
“-” keys to ad just the fig ure to match the dis tance you
ac tu al ly drove. If the display reads too high, use the “-”
key to lower the dis played value. If the display reads too
low, use the “+” key to raise the displayed value.
6. When the number shown on the display match es (as
closely as possible) the ac tu al dis tance driv en, you have
arrived at the cor rect cal i bra tion val ue. If you can not
adjust the displayed distance to exactly match the actual
dis tance driven, adjust the figure as close as possible to
the actual distance. Then exit “CAL” by pressing “CAL”
for three seconds.
NOTE: If you let go of the “+” and “-” keys
while you are adjust ing the distance value, the
console will wait to make sure you are finished.
After 64 sec onds, the dis play will start al ter nat ing
be tween the dis tance and wheel circumference
(CIRC) values again. Make sure you know which
value you are adjusting.
The speed sen sor is now calibrated. To verify proper
calibration, repeat the procedure a sec ond time. Write down
the new wheel cir cum fer ence (CIRC) number and keep it in
a safe place. If the cal i bra tion values are ever accidentally
changed, you can simply re-en ter this num ber.
Calibration (cont)
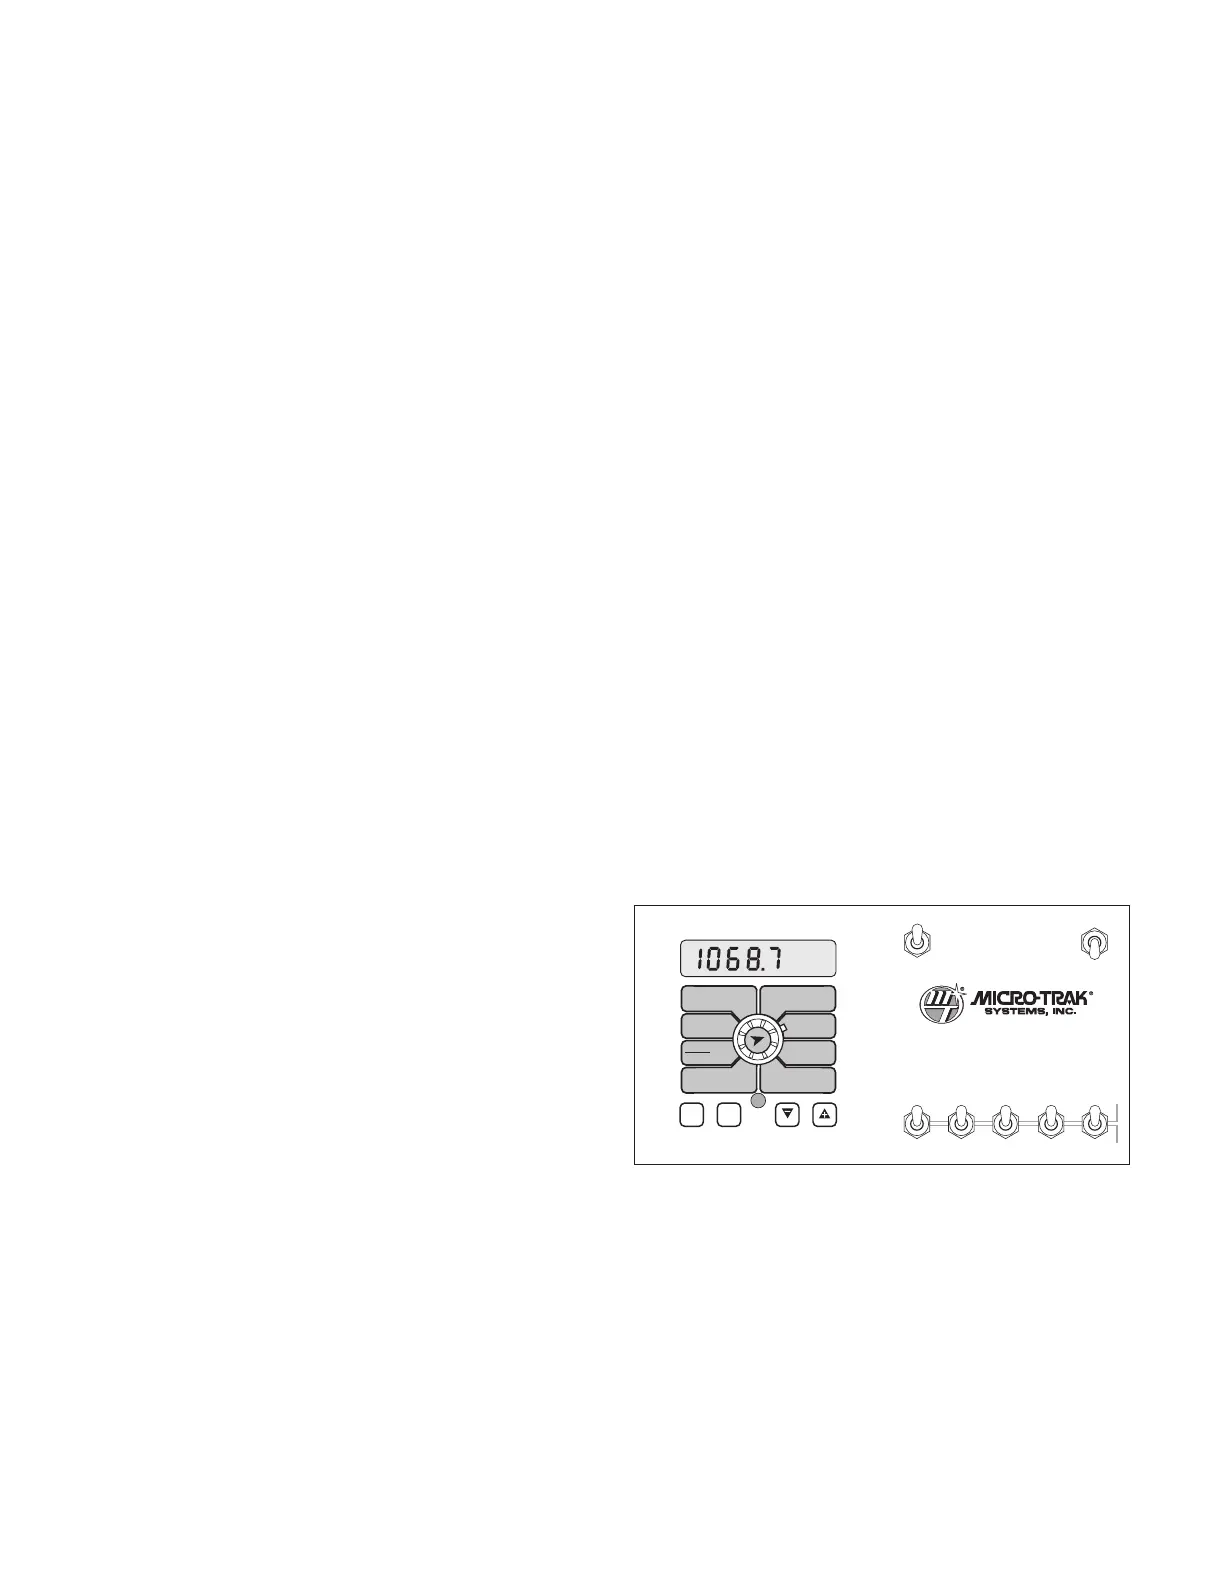
Fine Tuning Speed/Distance Calibration Val ue
Illustration 21
WIDTHBOOM
SELECT
TEST
SPEED
ADJUST
RATE
TARGET
RATE
CIRC
MIN
FLOW
FLOW
CAL
SPEED
DISTANCE
FLOW
RATE
TOTAL AREA
APP. RATE TOTAL FLOW
SUB AREA
ON
OFF
ON
OFF
12345
B O O M S
RUN
HOLD
AREA
HOUR
CAL
AUTO
MAN
RESET
MT-3405
™
F
AUTOMATIC RATE CONTROLLER
MANAUTO
CALHOLD
V 1 2 3 4 5