• 38 •
In Figure 3, step 1 the test pattern shows the clamps/probes connection between the fi rst set of posi-
tive and negative posts. Step 2 shows the clamps/probes connection between the negative post and
the end of the strap that attaches to the next jar. Step 2 ensures that you test the entire strap and
its connections. Steps 3 through 6 repeat the process. (Refer to Attaching the cable to jar posts and
Attaching the cable to a strap in this chapter.)
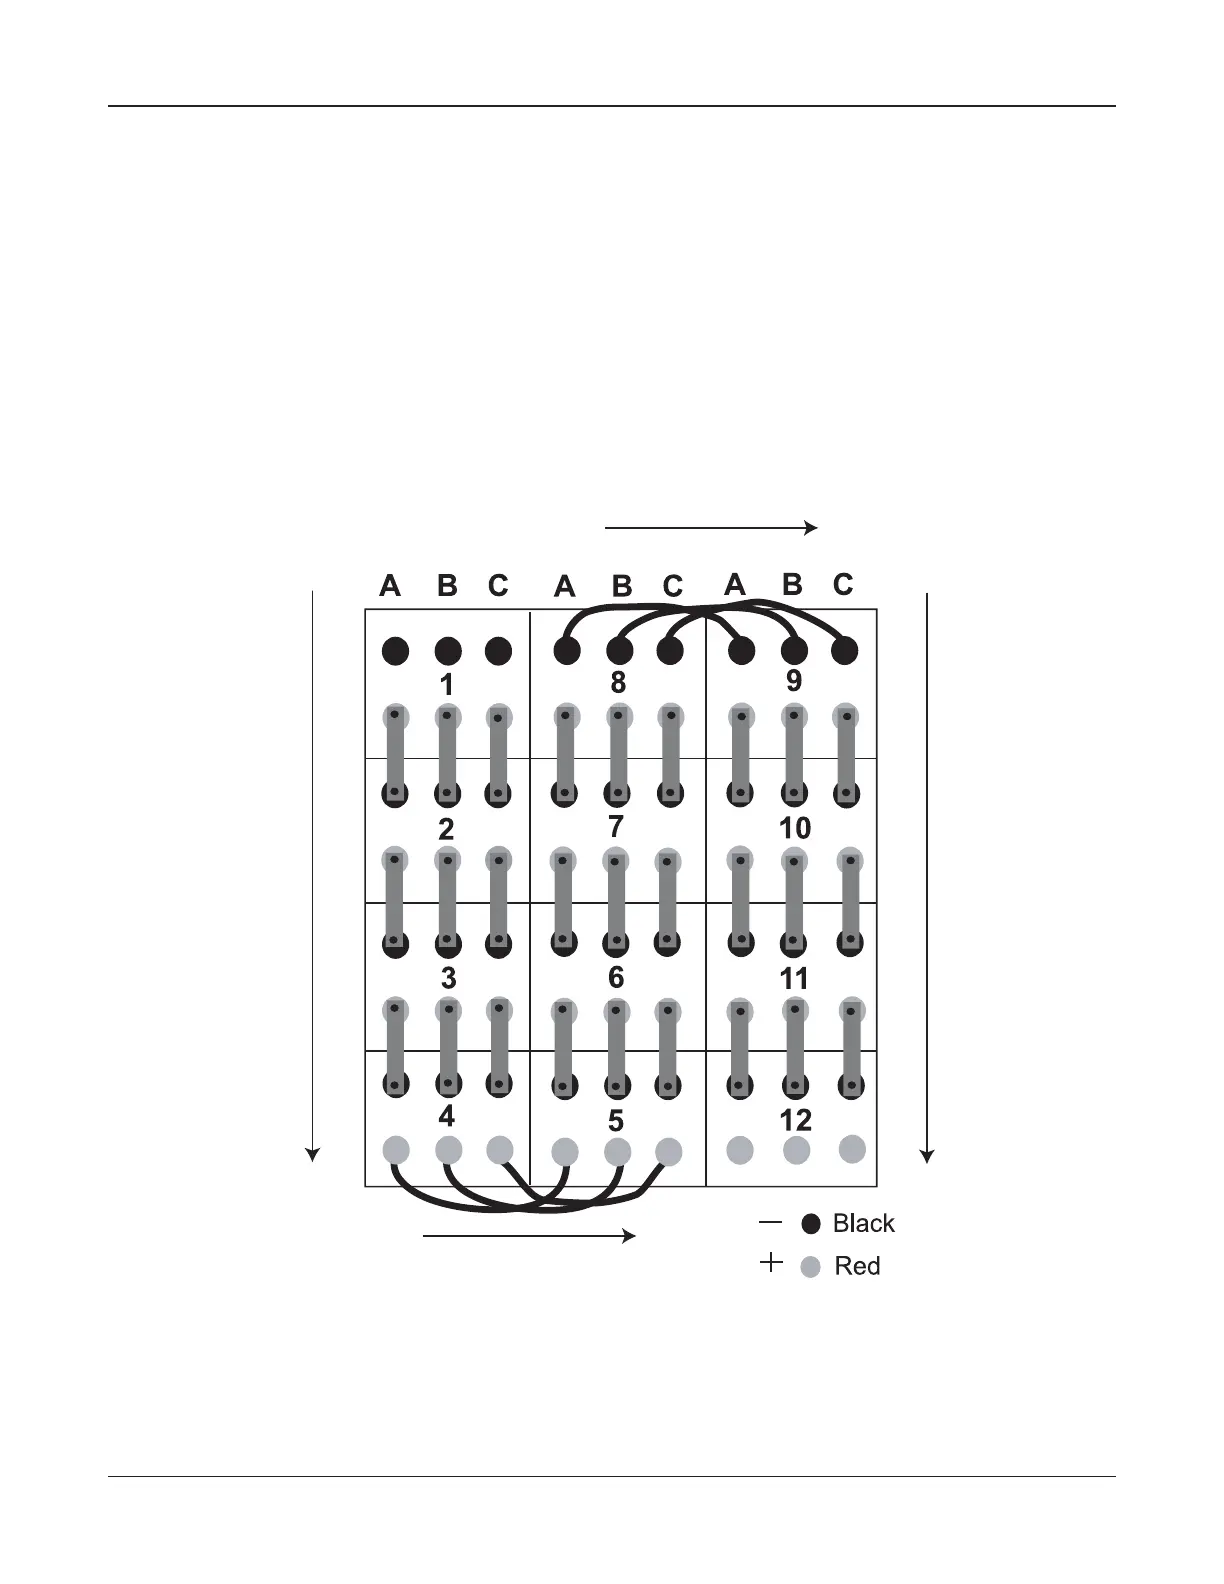
The test pattern for a string
First test at the jar post, then at the strap. After testing the jar posts and straps, test the next jar in the
direction in which the straps and jar cables connect the jars (Figure 4).
The numbers on the jars indicate the direction you should test based on the connections. The straps
connect the jars from top to bottom, and the cables connect the jars from side to side.
Figure 4: Pattern for testing jars in a string
Chapter 6: Testing Celltron ULTRA