4-11
Cutting out Data with Register Marks
4
Extended Functions – Cutting –
Setting Register Mark Detection
When you want to cut the data with register marks, set the following without fail.
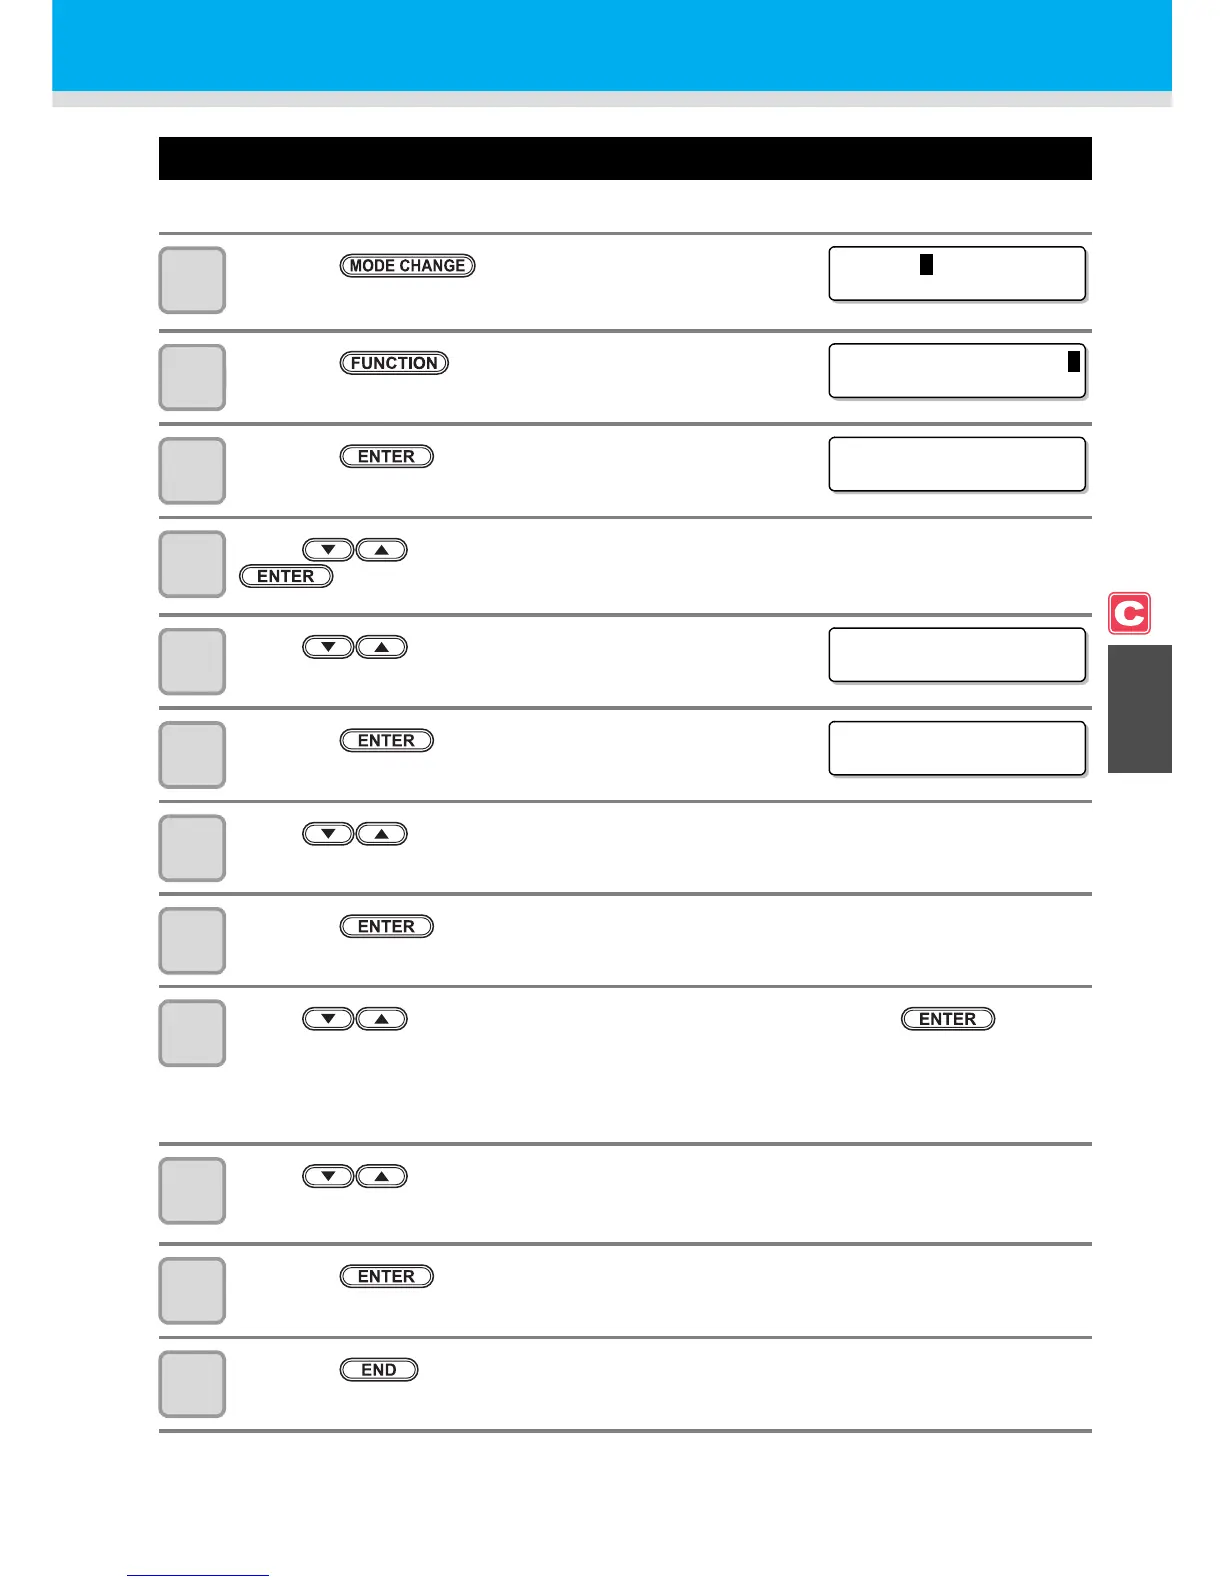
1
Press the key in LOCAL to select cutting
mode.
2
Press the key.
3
Press the key.
4
Press to select a tool condition (CUT1 to CUT3, HALF, PEN) and press the
key.
5
Press to select [MARK DETECT].
6
Press the key.
7
Press to select number of detected register marks.
• Set values: OFF, 1pt, 2ptX, 2ptY, 3pt, 4pt
8
Press the key.
• In case you selected "OFF" in Step 7, proceed to Step 12.
9
Press to select the following items, and then press the key.
• The following items are provided for the register mark detection setting.
Mark detect, Register mark size, offset Y, offset X, form of register mark, number of continuous cutting in
direction Y, number of continuous cutting in direction X, high speed limi, and skew check
• See pages P.4-12 through P.4-14 for details of each set item.
10
Press to select a set value.
• See pages P.4-12 through P.4-14 for set values for each set item.
11
Press the key to enter the value.
12
Press the key several times to return to LOCAL.

 Loading...


