2-14 Measure Preset
2. Select the 2D, M or Doppler scanning mode.
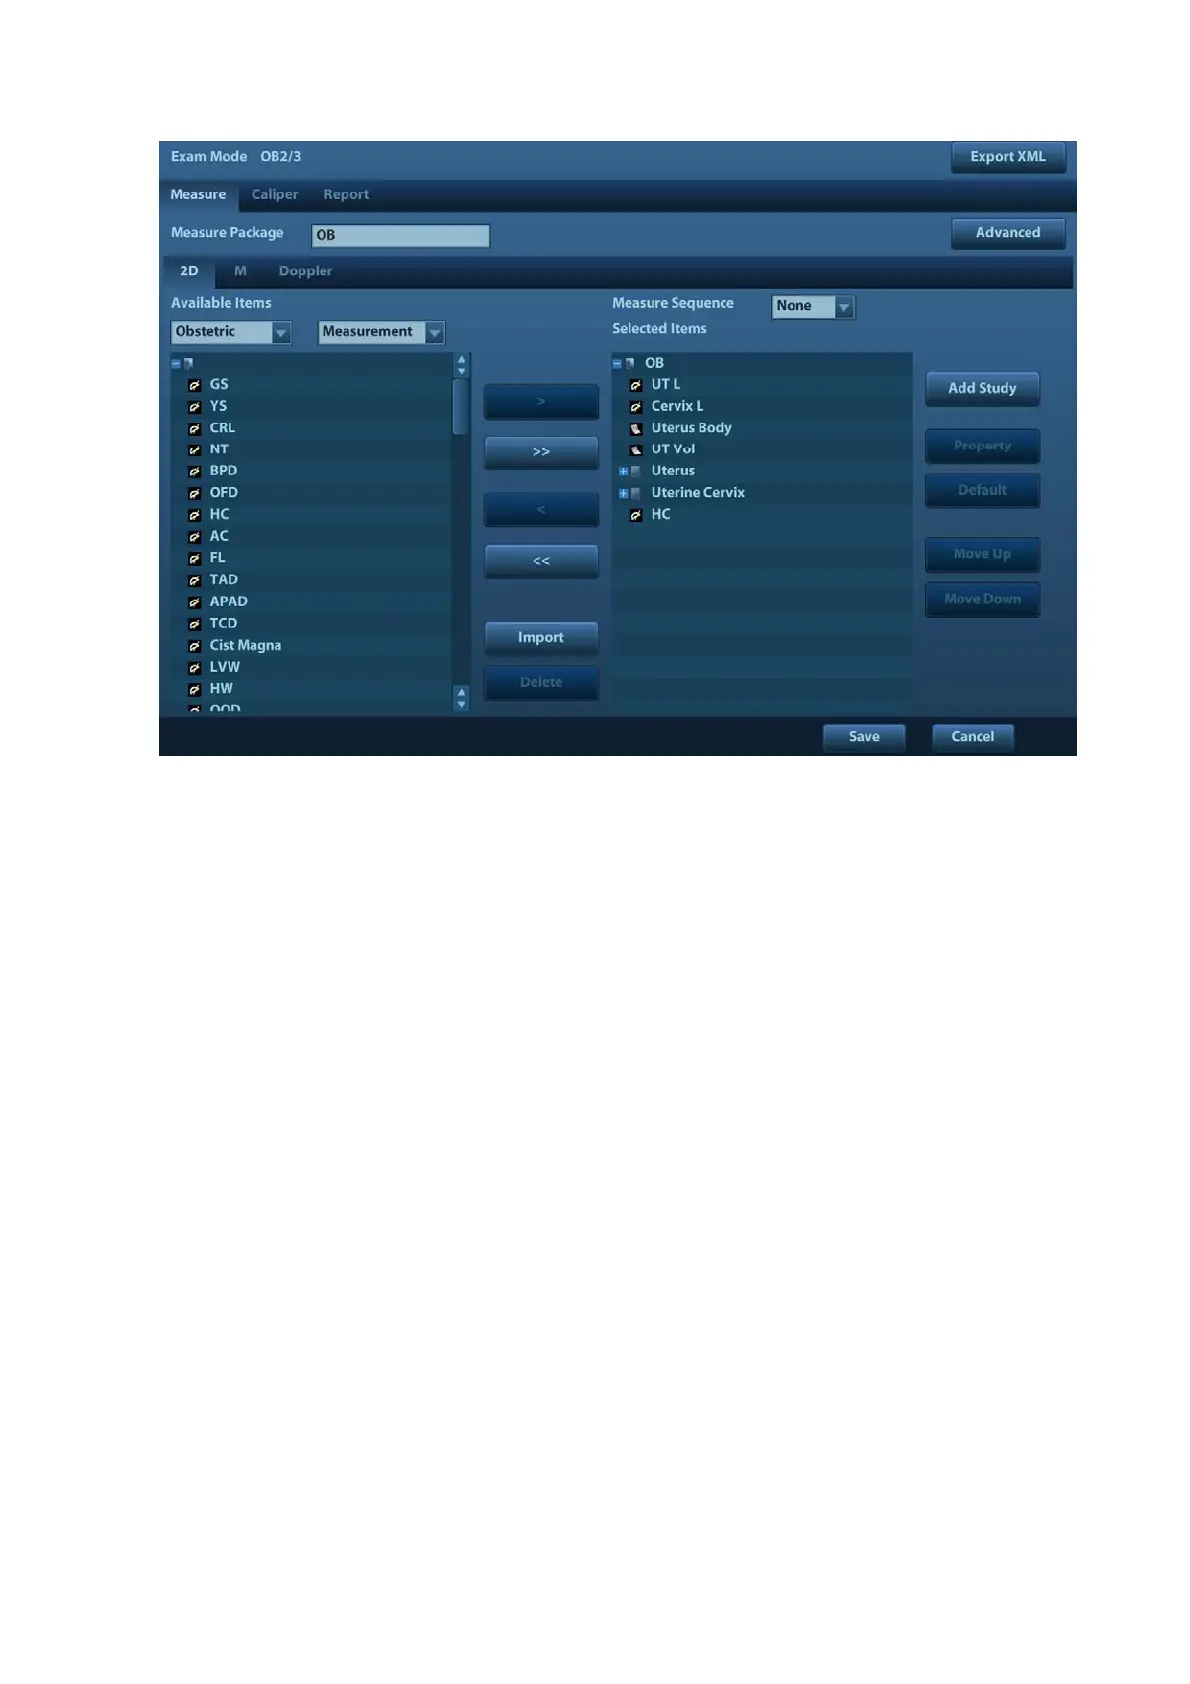
3. Choose or edit the Measurement Package.
Generally, the corresponding package appears in the [Measure Package] when the [Exam
Mode] is selected.
z If no package appears, you can input the package name directly in the [Measure Package]
text box then add items to edit the current package.
z Or, click [Advanced] to add or select a package.
For details about creating, deleting and setting default package, see “2.4.2.2 Measurement
Package Preset”.
4. Select an application region from the drop-down list under [Available Items].
5. Select [Measurement], [Calculate], [Study] or [All] from the drop-down list under [Available
Items], the corresponding items appear in the list.
For details about measurement, calculation and study, refer to "1.3 Measurement, Calculation
and Study".
6. Preset the measurement menu.
For details on adding, creating and setting default item, see “2.4.2.3 Preset of Measurement
Menu”.
For details on measurement tool property setting, see “2.4.1 General Measurement Preset”.
7. Select the measure sequence.
h [Repeat]: after the current measurement is completed, the system automatically
activates the current tool again.
h [Next]: after the current measurement is completed, the system automatically
activates the next tool in the menu.
h [None]: after the current measurement is completed, the cursor can be moved on the
whole screen. And the cursor will automatically return to the menu of the
corresponding measurement.
8. Click [Save] to confirm.