CONTENTS
53
Discrimination Pattern (Continued)
ACCEPT / REJECT AN ID
UPON DETECTION
Before you can Accept / Reject an ID upon detection:
You must be in the Detect Screen, and;
Accept / Reject must be assigned to a Soft Key.
You can assign Accept / Reject as a Soft Key Action
— see page 35. Accept / Reject is assigned by
default to the Right Soft Key.
Reject a Target Upon Detection
When an Accepted Target ID is detected, immediately press
the Soft Key ( Reject). The Target ID on the ID Map will
turn grey. That Target ID will no longer give a
target response.
If the same Target ID is detected, and the Soft Key
(
Reject) is pressed again, the Target ID will remain
Rejected. This means you can keep swinging over the
target while repeatedly pressing the Soft Key ( Reject)
to ensure the target is completely rejected. This is useful
for targets that have a spread-out Target Trace/slightly
varying Target ID.
Accept a Target Upon Detection
Enable All Metal mode. When a Rejected Target ID is
detected, immediately press the Soft Key ( Accept). The
Target ID on the ID Map will turn white. That Target ID will
now give a target response.
If the same Target ID is detected, and the Soft Key
(
Accept) is pressed again, the Target ID will remain
Accepted. This means you can keep swinging over the
target while repeatedly pressing the Soft Key to ensure the
target is completely Accepted. This is useful for targets
that have a spread-out Target Trace/slightly varying
Target ID.
ALL METAL
All Metal mode disables the Discrimination Pattern so that
all metal objects (ferrous and conductive) will be detected.
All Metal is global, and is Off by default.
NOTE: When All Metal is enabled, ferrous targets display a
Target ID with ferrous indication, and give ferrous detection
tones (rather than remaining silent). How they will sound is
defined by the Ferrous Tones and Audio Theme settings.
You can assign All Metal as a Soft Key Action —
see page 35. All Metal is assigned by default to
the Left Soft Key.
Enable All Metal
All Metal can be enabled in two ways — via an assigned
Soft Key from the Detect Screen, or via the Settings Menu:
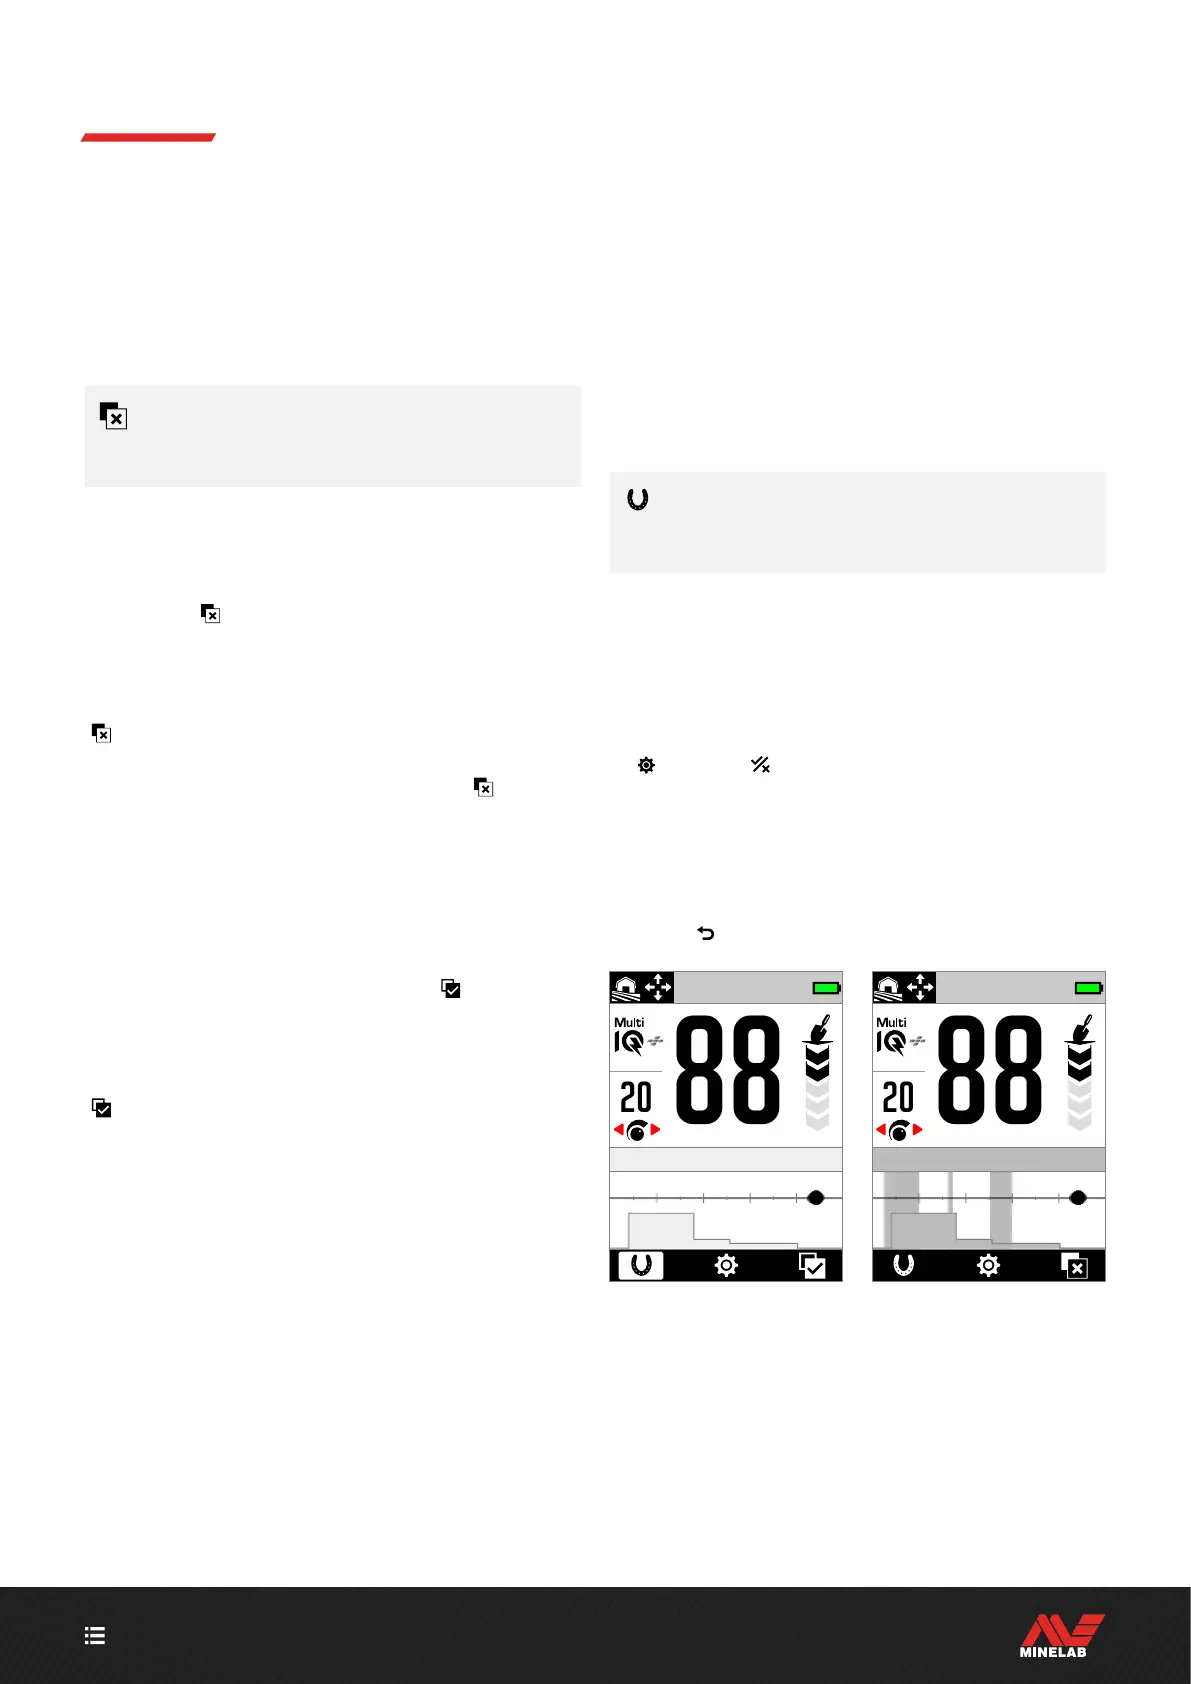
1. Navigate to Discrimination Pattern:
Settings > Discrimination Pattern
2. Press / to select All Metal.
When All Metal is enabled, the Discrimination Pattern
is turned Off and is not shown on the ID Map, and the
Ferrous Limits change to a lighter shade of grey.
3. Press (
Back) to return to the Detect Screen.
All Metal On — The Discrimination
Pattern is turned Off.
All Metal Off — The Discrimination
Pattern is turned On.