CONTENTS
57
Noise Cancel
Detectors can become noisy due to
electrical interference from power lines,
electrical equipment or other detectors
operating nearby. The detector interprets
this interference as inconsistent, erratic
detections or 'noise'.
The Noise Cancel setting allows you to change the noise
cancel channel. This slightly shifts the detector transmit
frequency to be less responsive to sources of noise.
Noise Cancel affects both the audible detection noise level
and pinpointing performance.
The Noise Cancel setting has 19 channels with a range from
−9 to 9. It has a default setting of 0 (zero) for all
Search Modes.
Noise Cancel adjustment is local; only the current Search
Mode is affected by changes to this setting.
Auto is the recommended Noise Cancel method.
Perform a Noise Cancel each time the Frequency
setting or Seach Mode is changed.
You can assign Noise Cancel as a Soft Key Action
— see page 35.
Noise Cancel in the Settings Menu.
AUTO NOISE CANCEL
Auto Noise Cancel automatically scans and listens to every
frequency channel and then selects the one with the
least interference.
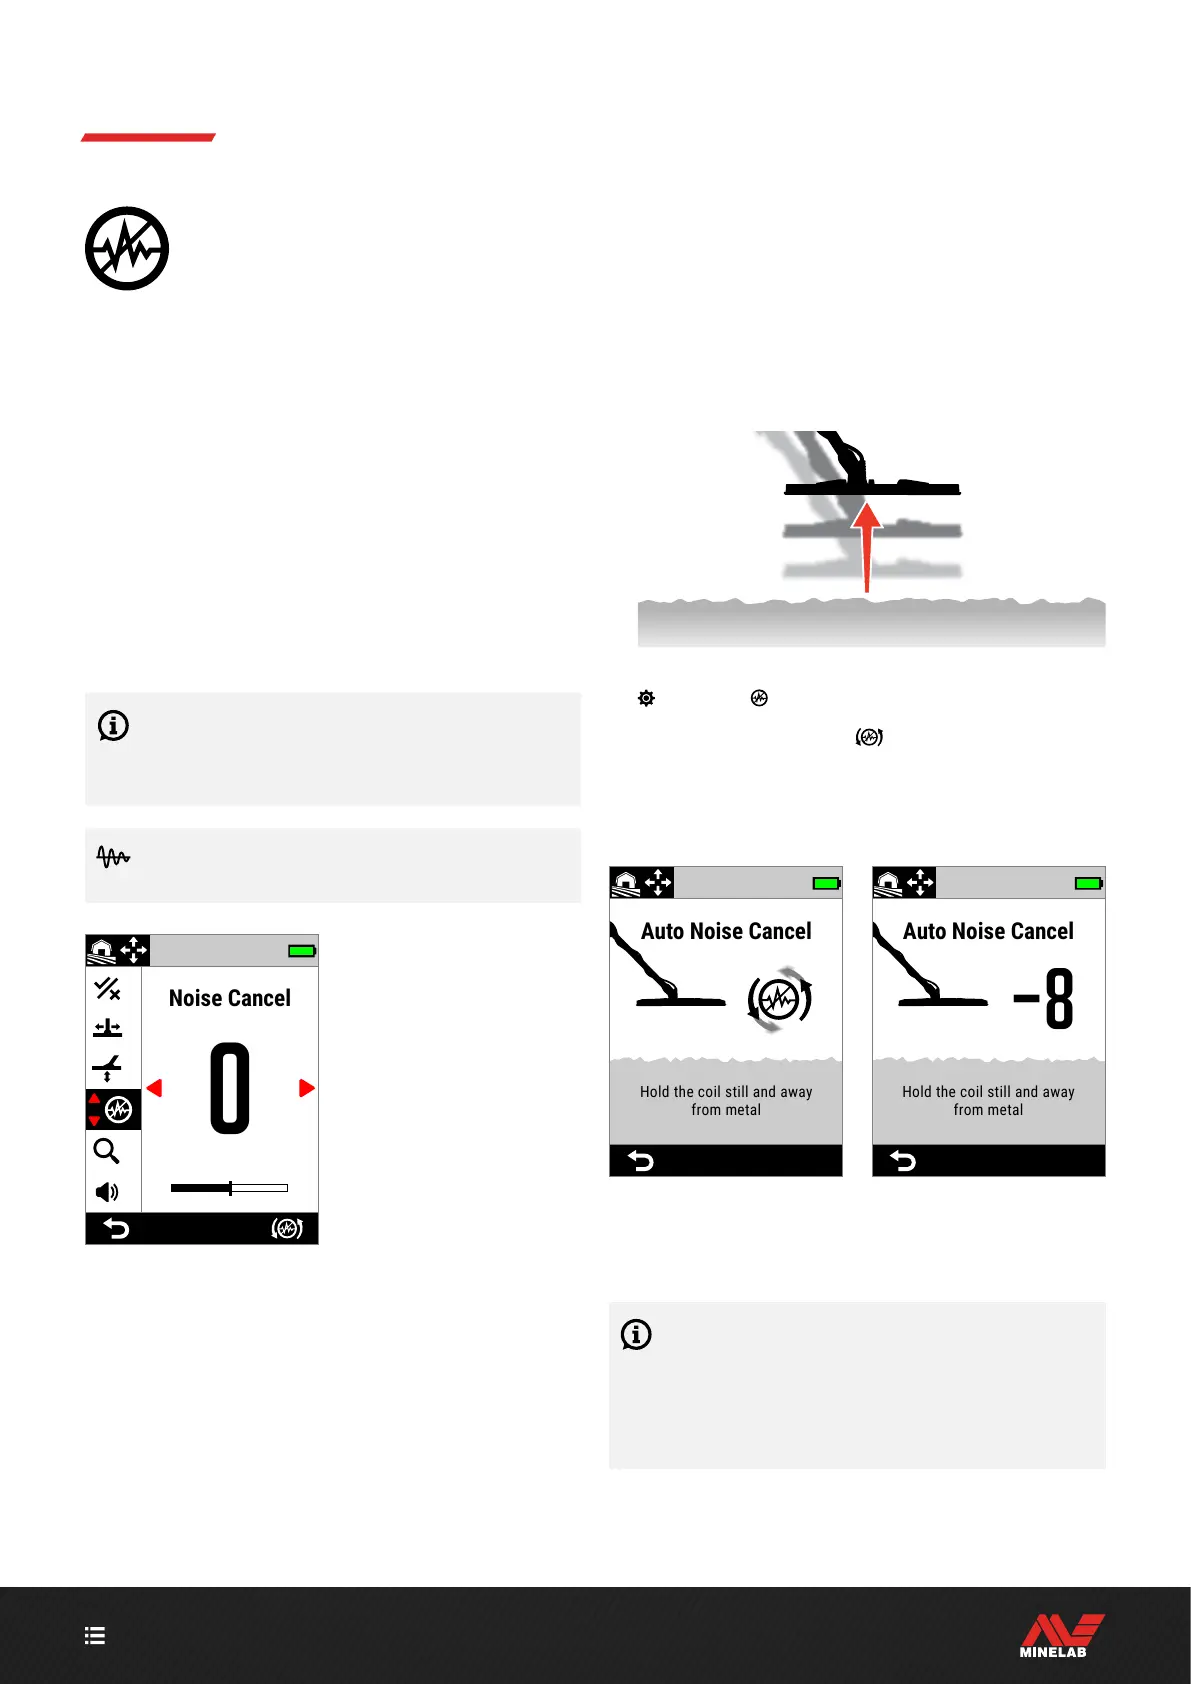
Auto Noise Cancel Procedure
1. Hold the Coil stationary and away from metal.
2. Navigate to Noise Cancel:
Settings > Noise Cancel
3. Press the Right Soft Key (
Auto Noise Cancel) to
start the Auto Noise Cancel process.
An animation will appear on the screen and there will be
a series of ascending tones.
Hold the coil still and away
from metal
Hold the coil still and away
from metal
Auto Noise Cancel in progress. Auto Noise Cancel complete.
4. After approximately 3 seconds, the selected channel will
be displayed before returning you to the Settings Menu.
NOTE: While Auto Noise Cancel selects the quietest
channel based on several criteria, the selected
channel may still have some audible noise.
Repeat Auto Noise Cancel or try Continuous Auto Noise
Cancel to see if it will further reduce noise.