Mini-Cam CCU210
Switching the CCU On
NOTE!
If you are using the SOLOPro
+
control unit with the Pan & Rotate
Camera (CAM026) or Axial Camera (CAM025) the system must
be fully connected before turning the system on.
The SOLOPro
+
control unit will automatically detect whether a standard
Self-
levelling camera or a Pan & Rotate camera is connected. This is done at
power up.
Should the SOLOPro
+
control unit be powered up without being connected
to the coiler without Pan & Rotate camera then it is assumed that a standard
Self-Levelling Axial camera is attached. You will not be able to control the
Pan & Rotate camera functions unless you reboot the control unit.
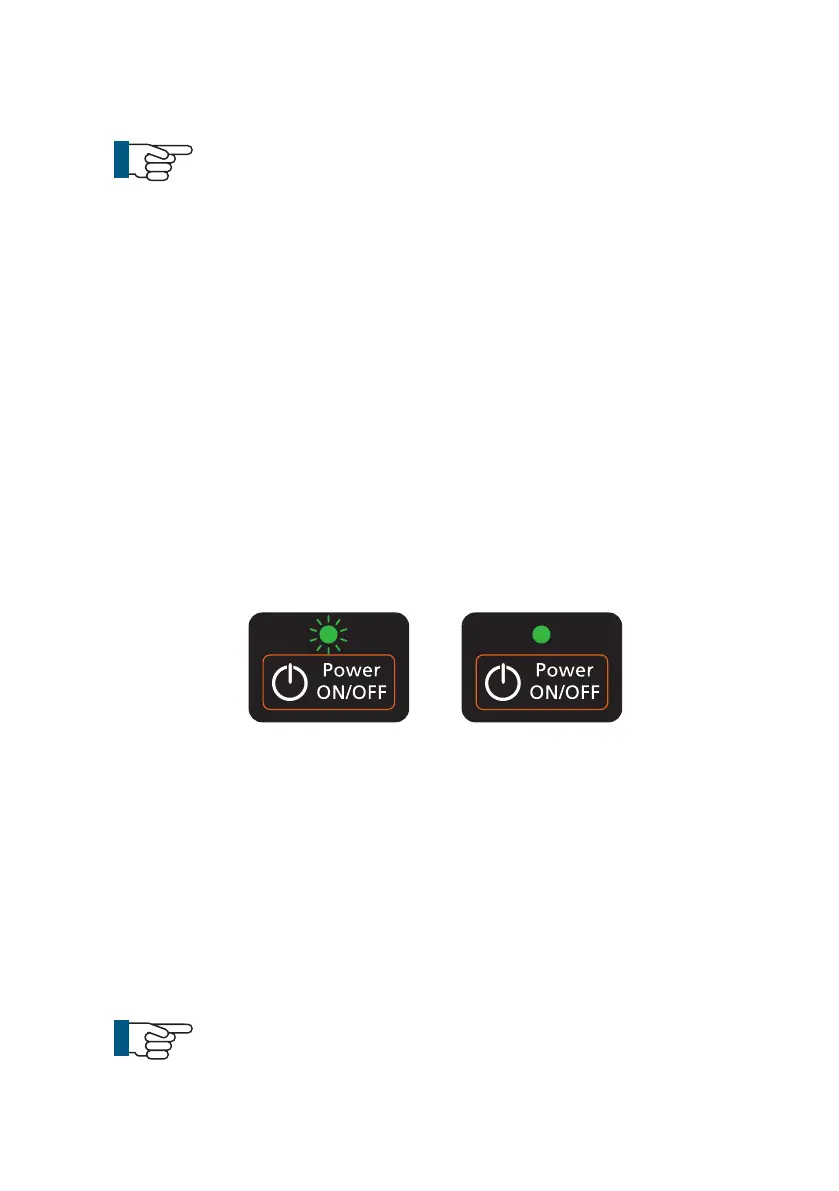
To switch the SOLOPro
+
on, press the Power ON/OFF button on the keypad
once only. The green coloured LED indicator will start to flash to show that the
unit is initialising. This will take approximately 35 seconds. Nothing will appear
on the screen until this process has completed.
When the SOLOPro
+
control unit has initialised the green coloured LED indicator
stops flashing and is permanently illuminated, and the Mini-Cam splash-screen
will show on the LCD display. When the splash-screen disappears you will be
asked to press OK to acknowledge that you are familiar with the operational
requirements of the equipment. Press OK to confirm
The live video picture from the push-rod camera will be shown, surrounded by a
selection of icons showing system status, see page 31.
NOTE!
If a camera or coiler is not connected then the screen will remain
blue but the icons will still be displayed.
Initialising Initialised
29
Version G