110
LCD PC E
LCD PC E
-
-
8590 MAINTENANCE
8590 MAINTENANCE
Reassembly
1. Carefully, Align the arrowhead corner of the CPU with the beveled corner of the socket, then insert the CPU pins
into the holes. Place the lever back to the horizontal position and push the lever to the left .
2. Connect the fan’s power cord to the system board, fit the heatsink onto the top of the CPU and secure with four
spring screws.
3. Replace the housing shielding with five screws.
4. Fit the CPU cover and secure with four screws.
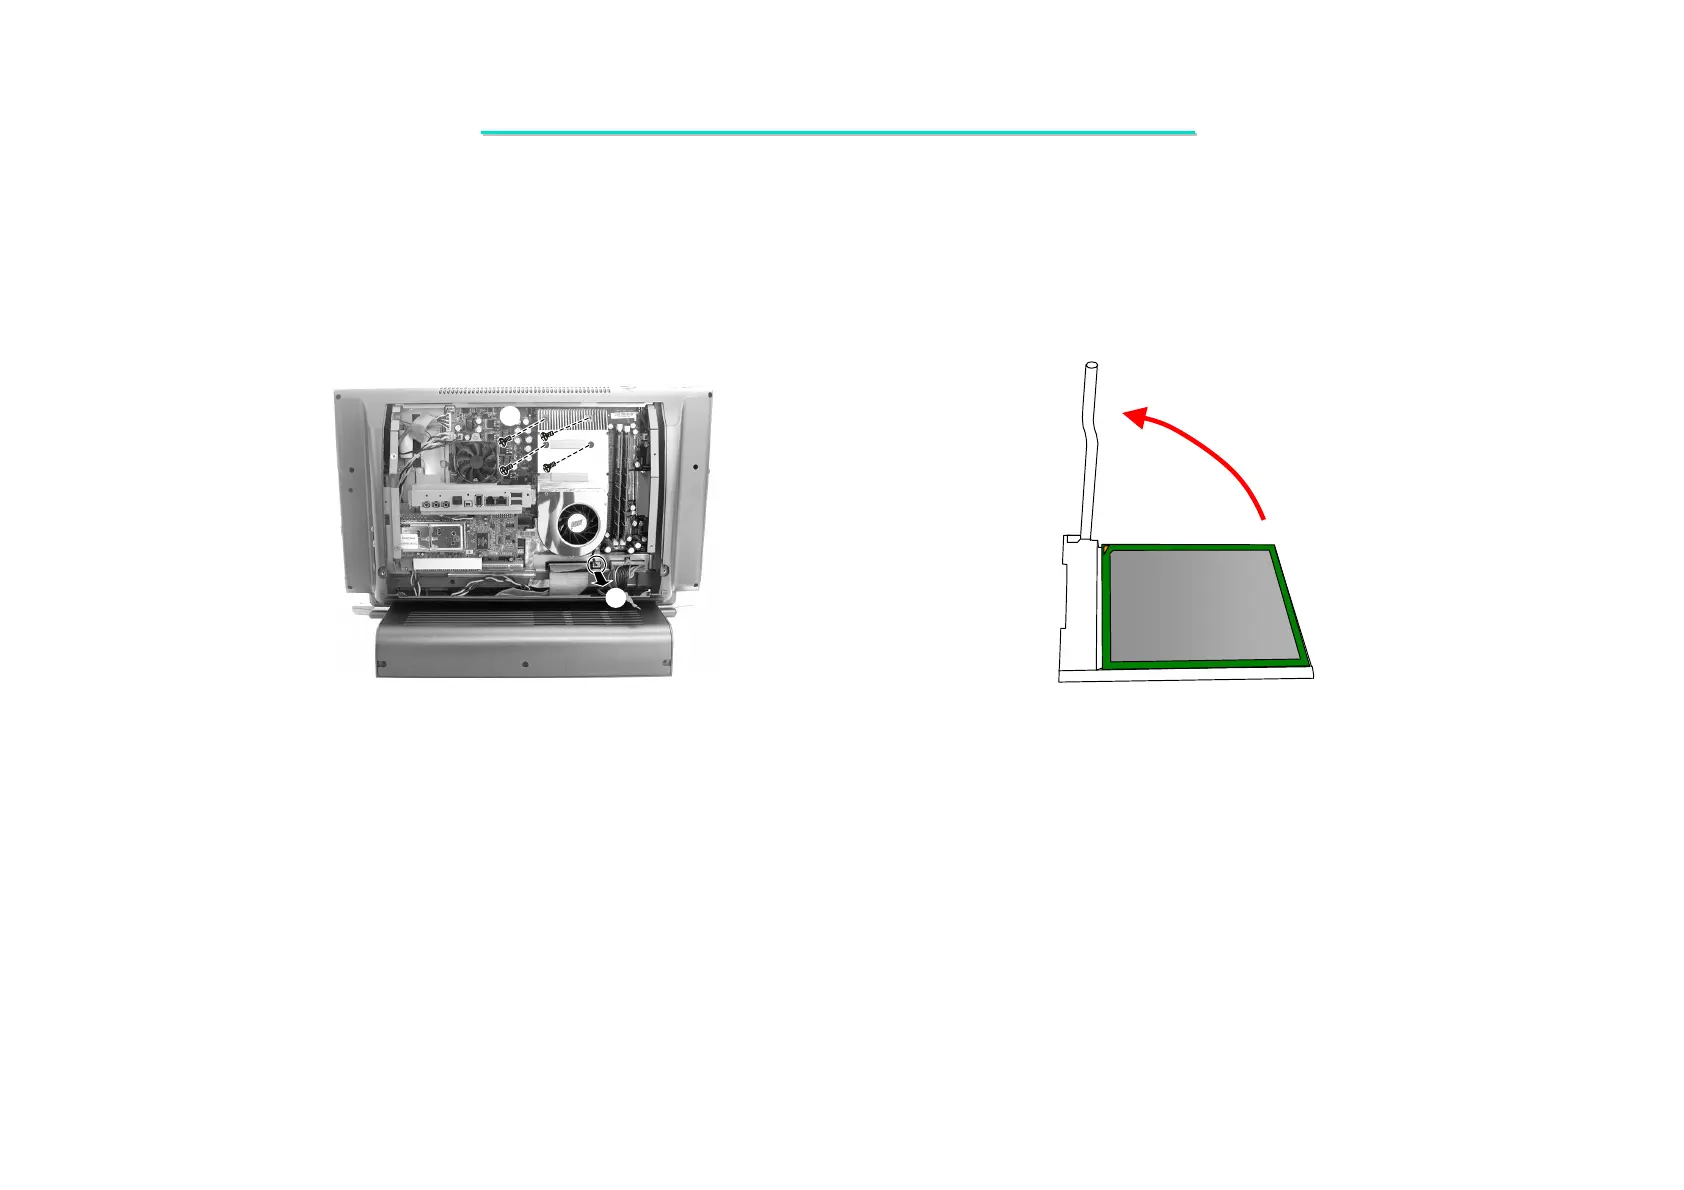
3. Disconnect the fan’s power cords from system board (). (Figure 2-5)
4. Unscrew four spring screws to remove the heatsink (). (Figure 2-5)
5. To remove the existing CPU, lift the socket arm up to the vertical position. (Figure 2-6)
Figure 2-5 Remove the heatsink Figure 2-6 Remove the CPU