F940GOT Handy Series Installation 3
3-7
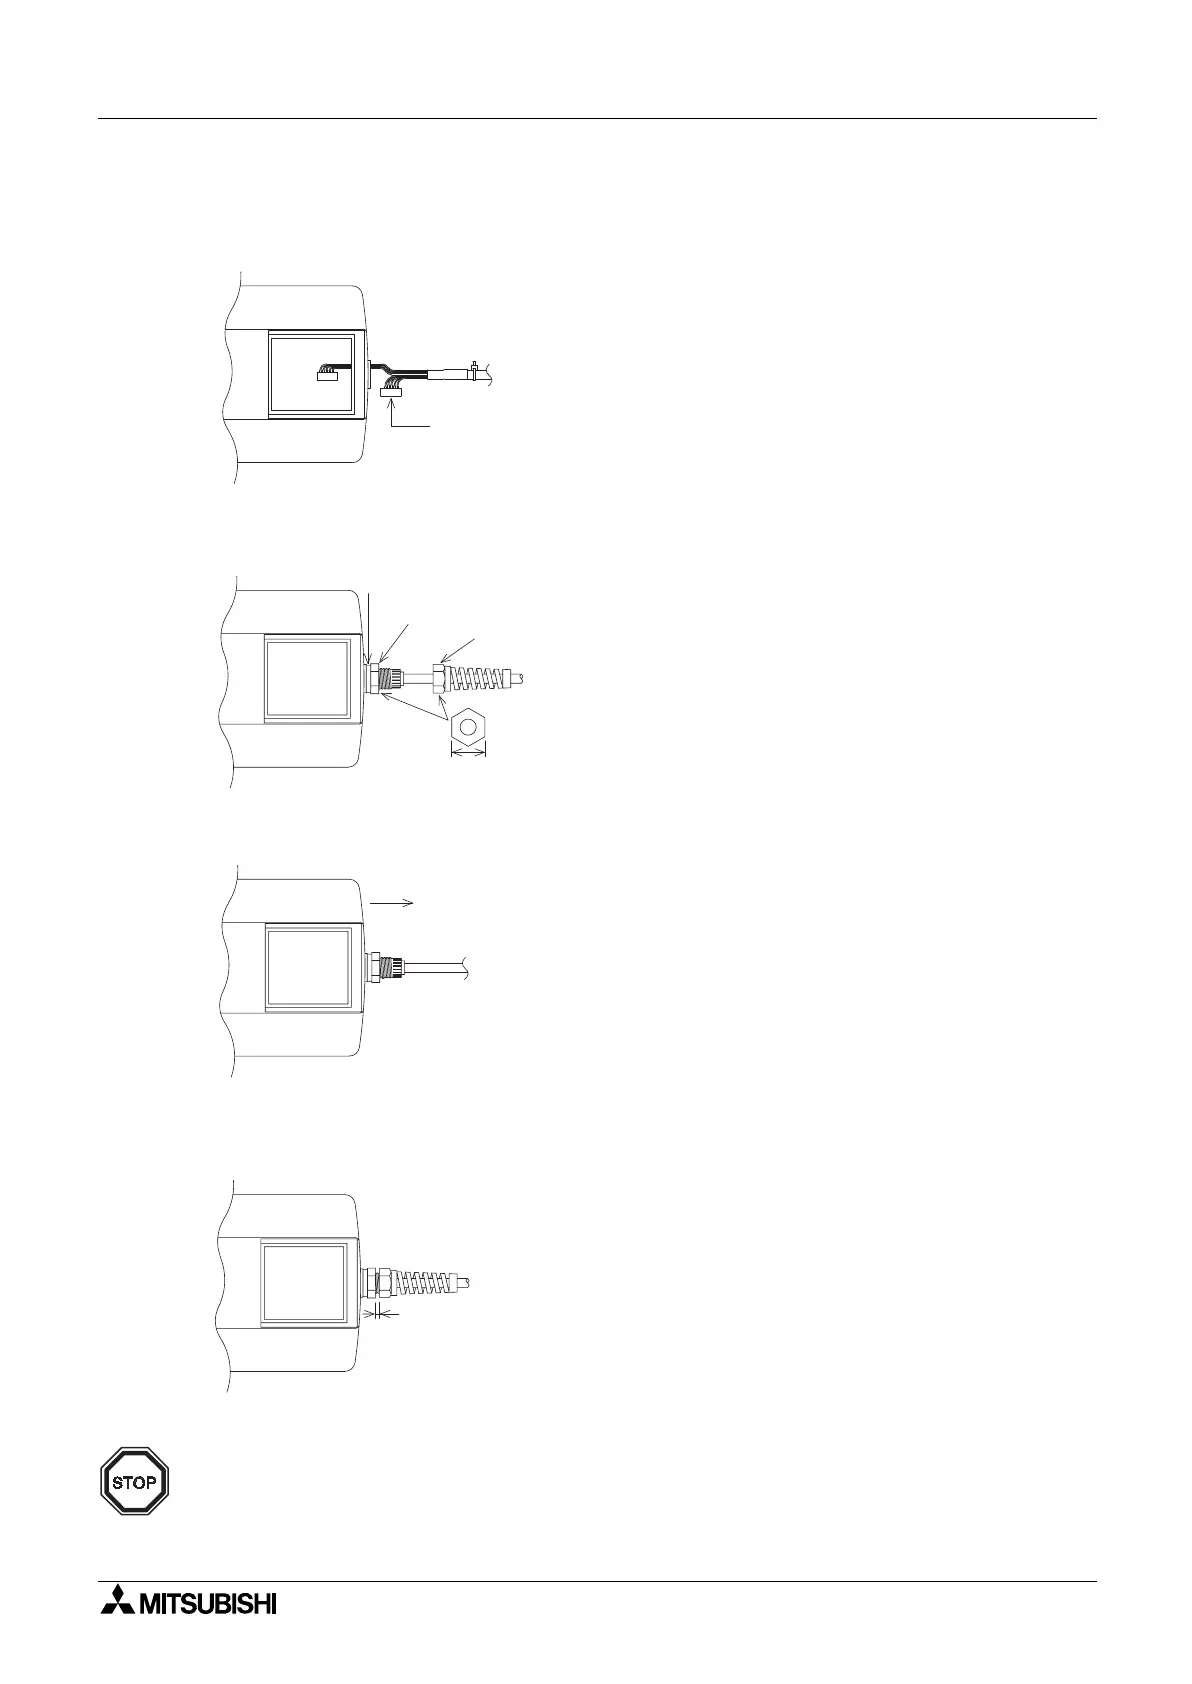
2) Connect the external cable
Insert the external cable through hole “c)” of the Handy GOT main unit, and connect it to “e)”
and “d)”.
3) Tighten the hexagon nut.
Make sure to tighten the hexagon nut for cable
mounting with sufficient force to avoid
loosening.
As guideline, tighten it until the packing is
crushed by 0.5 mm (0.02
"
) or more.
4) Pull lightly on the cable until excess cable is with dawn from inside the unit.
5) Securely tighten the hexagon nut for so that the cable will not come out and the waterproof
integrity is maintained.
Note:
As guideline, make sure that the clearance is 3.5 mm (0.14
") or less.
W hen pushing the cable through,
m ake each connector face dow nw ards.
P acking
22m m (0.87")
H exagon nut for
cable m ounting
H exagon nut
for securing cable.
Pulling direction
Note
 Loading...