F940GOT Handy Series Installation 3
3-13
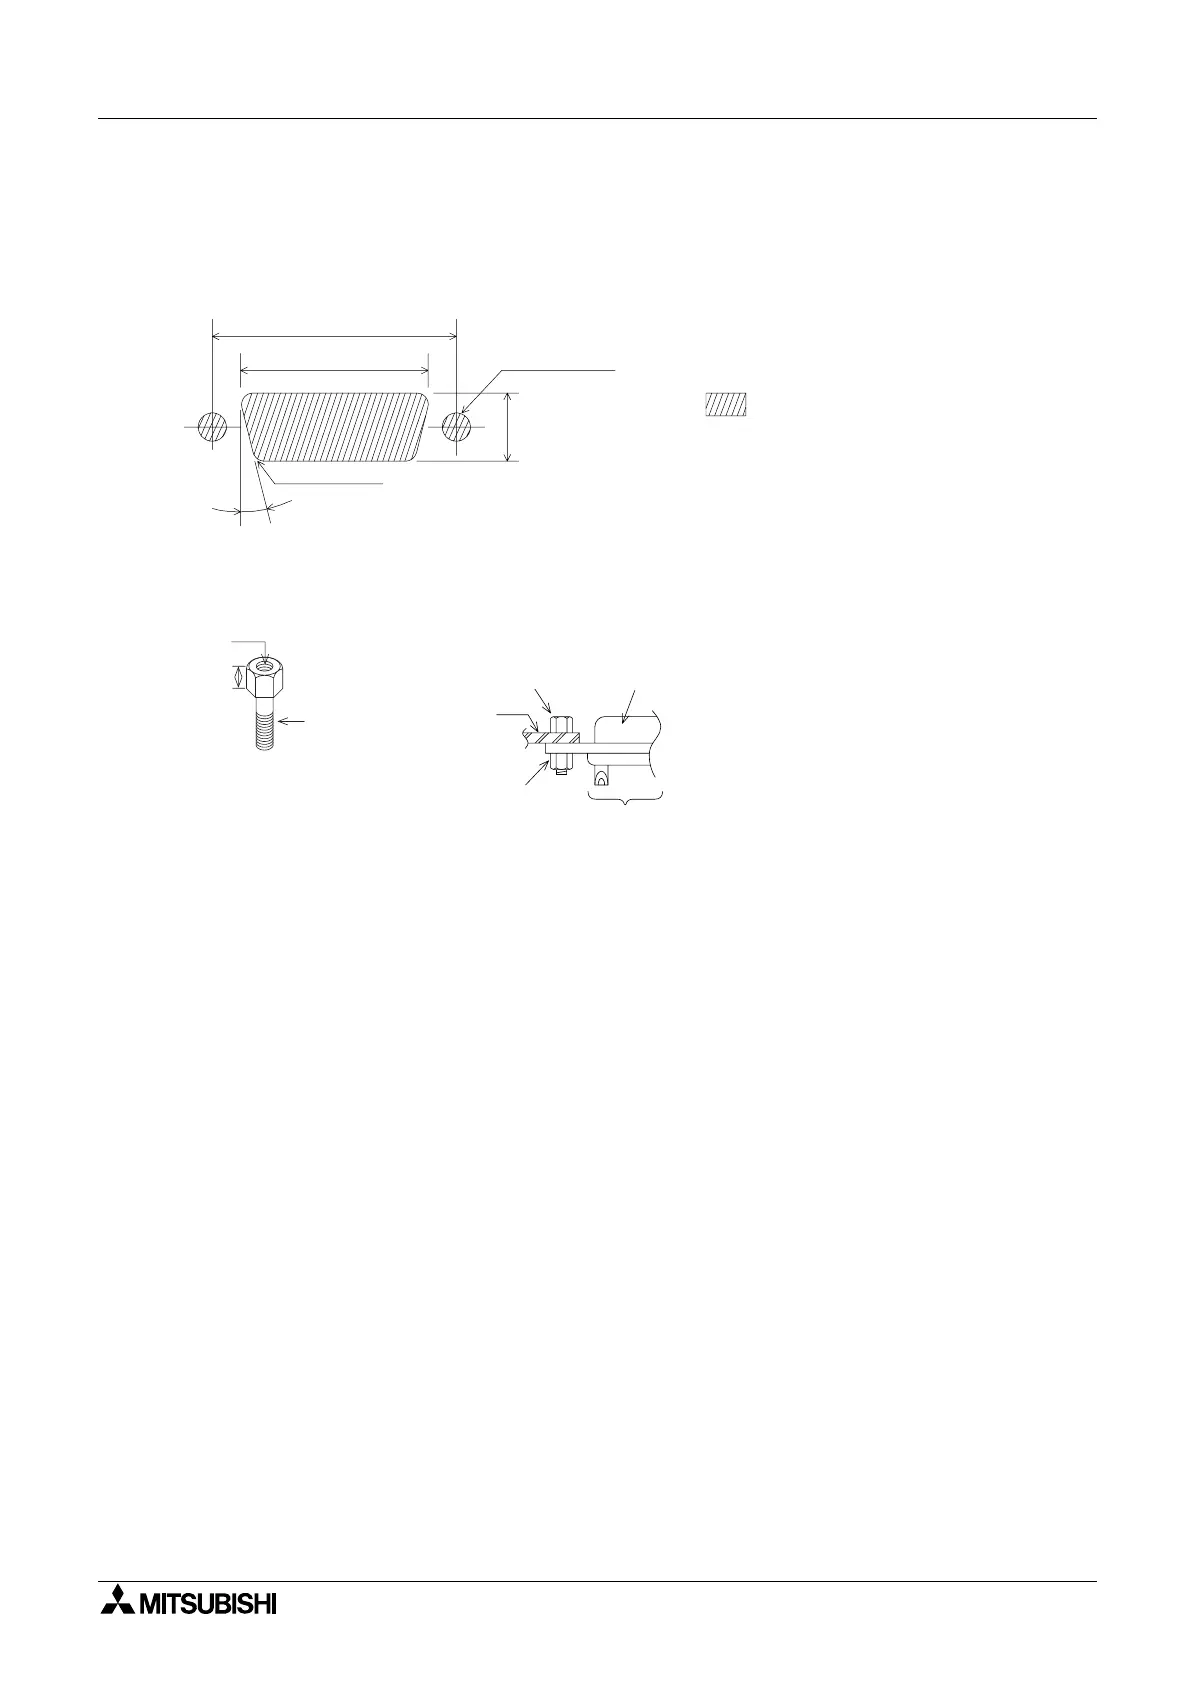
3.4.4 Panel Cut Dimensions for the Relay Cable
When mounting the relay cable connector on the panel of a control box or cabinet, prepare the
panel of the control box or cabinet as follows.
Panel cut size
Insert a jack socket into the hole shown above, and tighten it with M3 (0.12”) nuts.
10°
42.5 (1.67") or more
47.04 (1.85")
2-
φ
3.2±0.1
(0.13"±0.004")
11.4 (0.45") or more
indicates the cut area.
Unit: mm (inches)
4-R3.4 (0.13")
(Panel thickness: 0.8 ~ 1.3mm / 0.03" ~ 0.05")
M2.6
M3
Jack socket
4.8
(0.19")
Jack socket
Connected to
external
connection cable
Cable side
Nut (M3)
Panel face on
which cable
is mounted
 Loading...