−39−
7
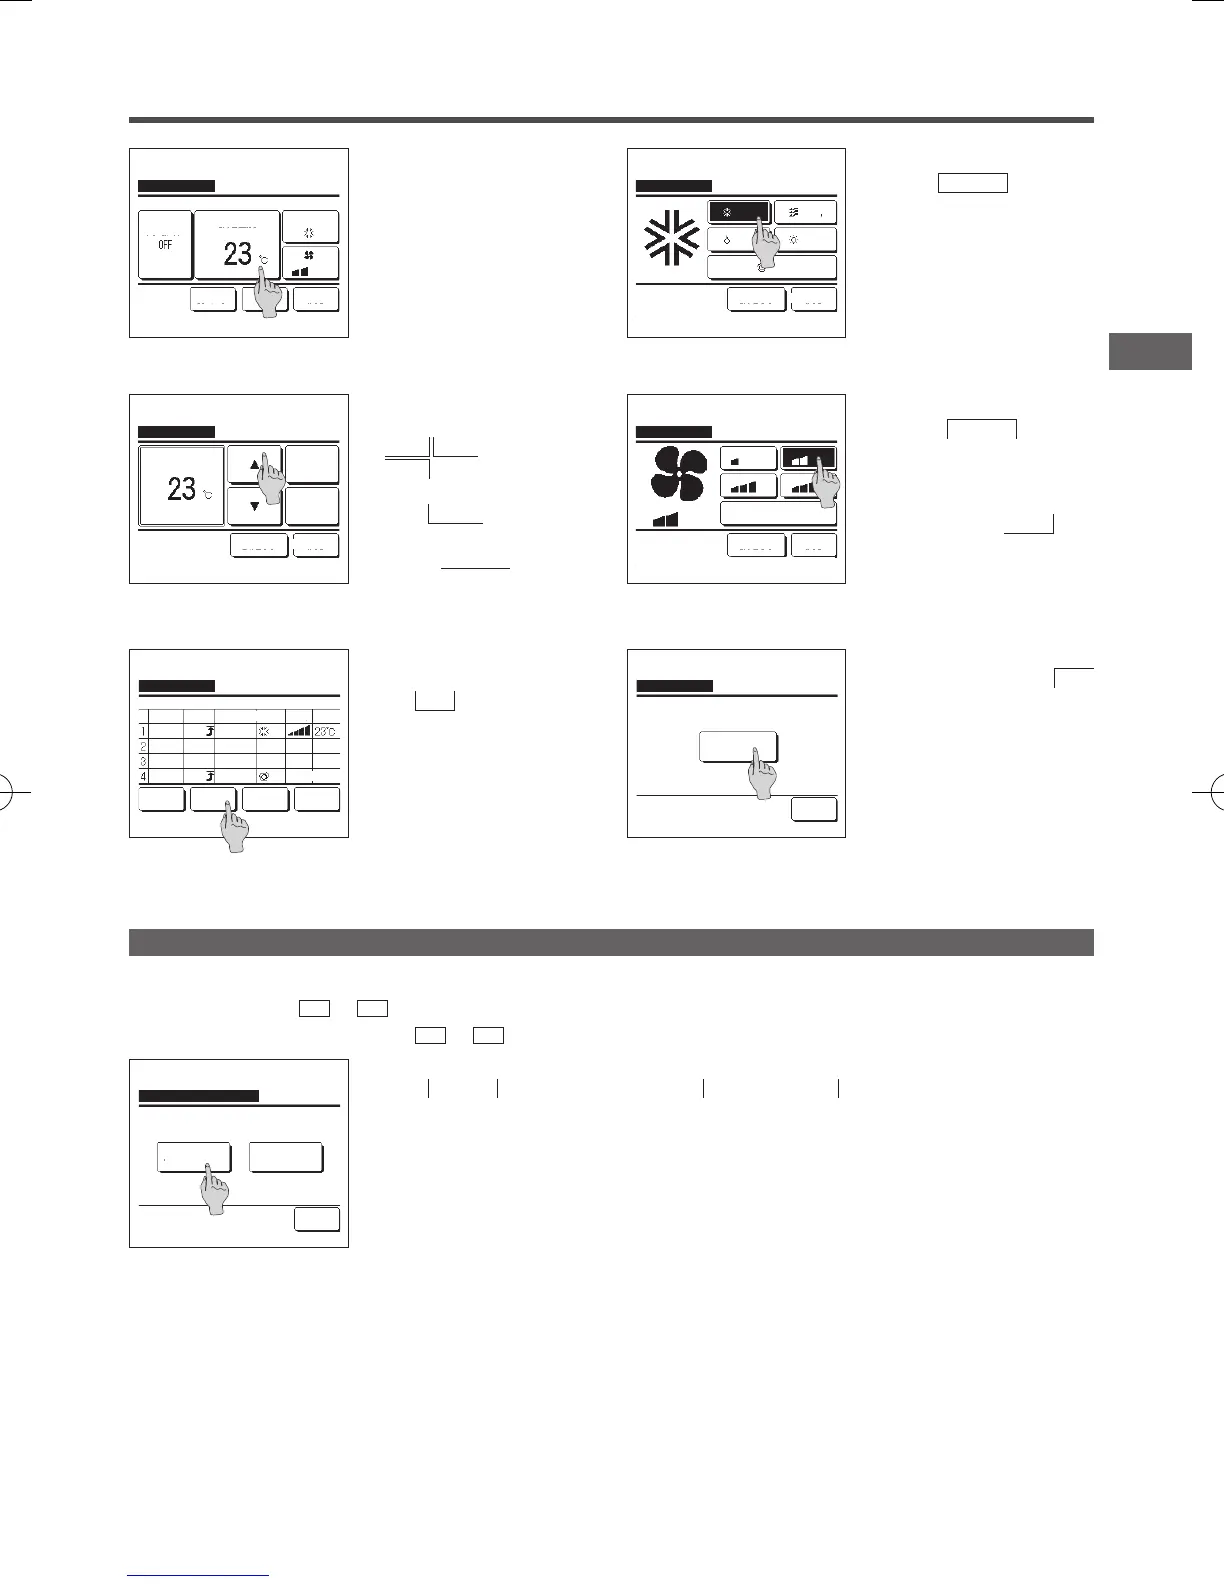
Set the following operating conditions.
①
Warming up ON/OFF
(Operation starts 5 to 60 minutes
earlier in order to warm up the room
temperature closed to the set temp
at the set start time of operation.)
②
Operation mode …
☞
8
③
Set temp …
☞
9
④
Fan speed …
☞
10
■Set the operation mode before setting the
set temperature.
9
Select a desired temperature (at 1°C
intervals) with the
▲
▼
buttons. Or tap the
Auto
button to select the Auto temp
setting.
Tap the
Set
button after the
selection. (
☞
7 )
When the
No setting
button is
tapped, “
--
°C” is displayed, and it
starts operation at the last setting
temperature.
8
Tap a desired operation mode.
When the
No setting
button is
tapped, it operates with the same
operation mode at the last action. (
☞
7 )
Weekly timer
No setting Back
Tap
▲▼
to set temp & tap [Set].
Auto
Set
Cooling
Weekly timer
Set Back
Set temp
Select the item to change.
Details
Previous
Warming up
Cooling
Weekly timer
No setting Back
Please select operation mode.
Fan
Heating
Dry
Auto
10
Tap a desired fan speed.
When the
No setting button is
tapped, starts operation at the last
fan speed. (☞7 )
11
After setting desired contents at the
screen of 7 , tap the Set button.
12
Display the setting contents check
screen. To register the setting, tap
the Enter button.
(1) In case of group setting (2-①
Weekdays, 2-②Sat/Sun, 2-③All
days setting), move to the group
setting screen. (☞13)
(2) In case of the individual setting
(2-④Each day setting), save the
setting and move to a day of the
week selection screen. (☞3 )
13
Display the group setting
acknowledge screen. Tap the Yes
button and save the setting.
The display changes to a day of the
week setting check screen after
saving. (☞3 )
When making the setting after
changing a day of the week, repeat
the setting from the step 3 .
Weekly timer
No setting Back
Select the fan speed.
Auto
Weekly timer
Yes
Back
Do you want to apply group setting?
Select a line & tap [Change].
Change
Weekdays
Weekly timer
State
Enable
Enable
Enable
Enable
Type Time
Enter Back
Next
ON
ON
ON
OFF
Mode Fan Temp
AutoAuto
11:00 AM
0:00 AM
0:00 AM
0:00 AM
1
On the TOP screen, set the desired operation mode, set temp, fan speed, and ap direction.
Tap the
Menu
button on the TOP screen and select
Useful functions
⇒
Favorite setting
.
The administrator password input screen is displayed.
Enter the administrator password.
■ You cannot register the favorite settings during high power and energy-saving operations.
2
The save location selection screen for favorite settings is displayed.
Select the save location.
If there is any data that was previously saved, that data will be overwritten.
Registering favorite settings
Operation mode, set temp, fan speed, fan direction can be registered as Favorite set 1 and Favorite set 2.
Allocating these settings to the
F1
and
F2
switches allows you to perform operations with these registered settings with a single tap of the button.
Refer to the F1/F2 function setting on how to set the
F1
and
F2
switches.
Favorite set 2
Favorite set 1
Favorite setting
Back
Saving current state of operation
Saving where?
 Loading...