External Flow Control Cha
ter Four: O
eration
68
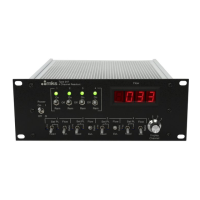
How To Setup the 247 Unit for Pressure Control
1. Place the SET POINT SOURCE SWITCHES on all channels of the 247 unit with an
MFC attached to the RATIO position.
2. Place the FLOW CONTROL SWITCHES on all channels with an MFC attached to the
ON position.
This produces flow through all the MFCs.
3. Adjust the flow rate for each channel with the 247 unit’s SET POINT CONTROL to
achieve the desired flow rate and ratio between the channels and the desired pressure
(within a factor of 2) in the chamber.
The flow rate displays on the Digital Panel Meter which is controlled with the
CHANNEL SELECTOR SWITCH.
4. Read the chamber pressure on the controller’s Digital Panel Meter.
To read pressure on a controller without a meter, adjust the controller’s set point until the
error meter reads zero, then multiply the Set Point reading times the Full Scale of the
transducer (1000 counts = full scale). When the pressure is within the desired 2 to 1
range, the system is ready for automatic control.
If the pressure cannot be adjusted to within the factor of 2, then modification of the
system may be necessary.
•
Too high of a pressure requires increased pumping capacity or smaller MFCs for less
total flow
•
Too low of a pressure requires reduced pumping capacity or larger MFCs for greater
total flow
5. Move the CMAE switch on the controller to the AUTO position.
Note
The controller will var
the
ressure control si
nal to ad
ust the total flow
to achieve the control pressure. Although the total flow rate will change,
the
ratio
between the gases will remain constant.
6. Adjust the controller’s GAIN and PHASE LEAD settings as needed.
The controller settings listed in Table 16, page 67, are used as a starting point for control.
These settings should be properly tuned to provide accurate control, free from
oscillations. Refer to the appropriate instruction manual for complete tuning
information.