Troubleshooting Cha
ter Five: Maintenance and Troubleshootin
76
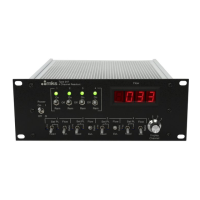
Digital Panel Meter
The Digital Panel Meter (DPM) is a 3½ digit, 2 V full scale device. The meter is powered by a
+5 V supply located on the Main PC board.
To measure the supply voltage to the meter:
1. Connect a voltmeter to the +5 V supply jumper on the Main PC board.
2. Reference the meter to the TP1 ground, located on the center of the Main PC board.
The voltage should be between +4.7 and +5.3 Volts.
3. Setup Channel 1 for +1 V output.
Refer to
How To Change the Dipswitch Settings
, page 64.
4. Ensure that the CHANNEL SELECTOR is on position 1.
5. Measure the output of the channel on pin 2 of Interface connector P5.
The voltage on the DPM should match the voltmeter reading from pin 2 of Interface
connector P5, ±1 count. If it does not, you must adjust the span pot on the right rear of
the DPM until the readings agree. To access the span pot you must remove the top cover
of the 247 unit; proceed to step 6.
6. Remove the two screws on the top corners of the rear panel of the 247 unit and slide the
top cover towards the back of the unit until the entire digital panel meter box is visible.
7. Adjust the span pot on the rear of the DPM with a small flathead screwdriver until the
meter reading agrees with the voltmeter reading from pin 2 of Interface connector P5, ±1
count.
If the range of this adjustment is insufficient to bring the two meter readings into
agreement, the DPM must be replaced.
8. Slide the top cover back into position and replace the two screws on the rear panel to
secure it in place.