Operating Instructions
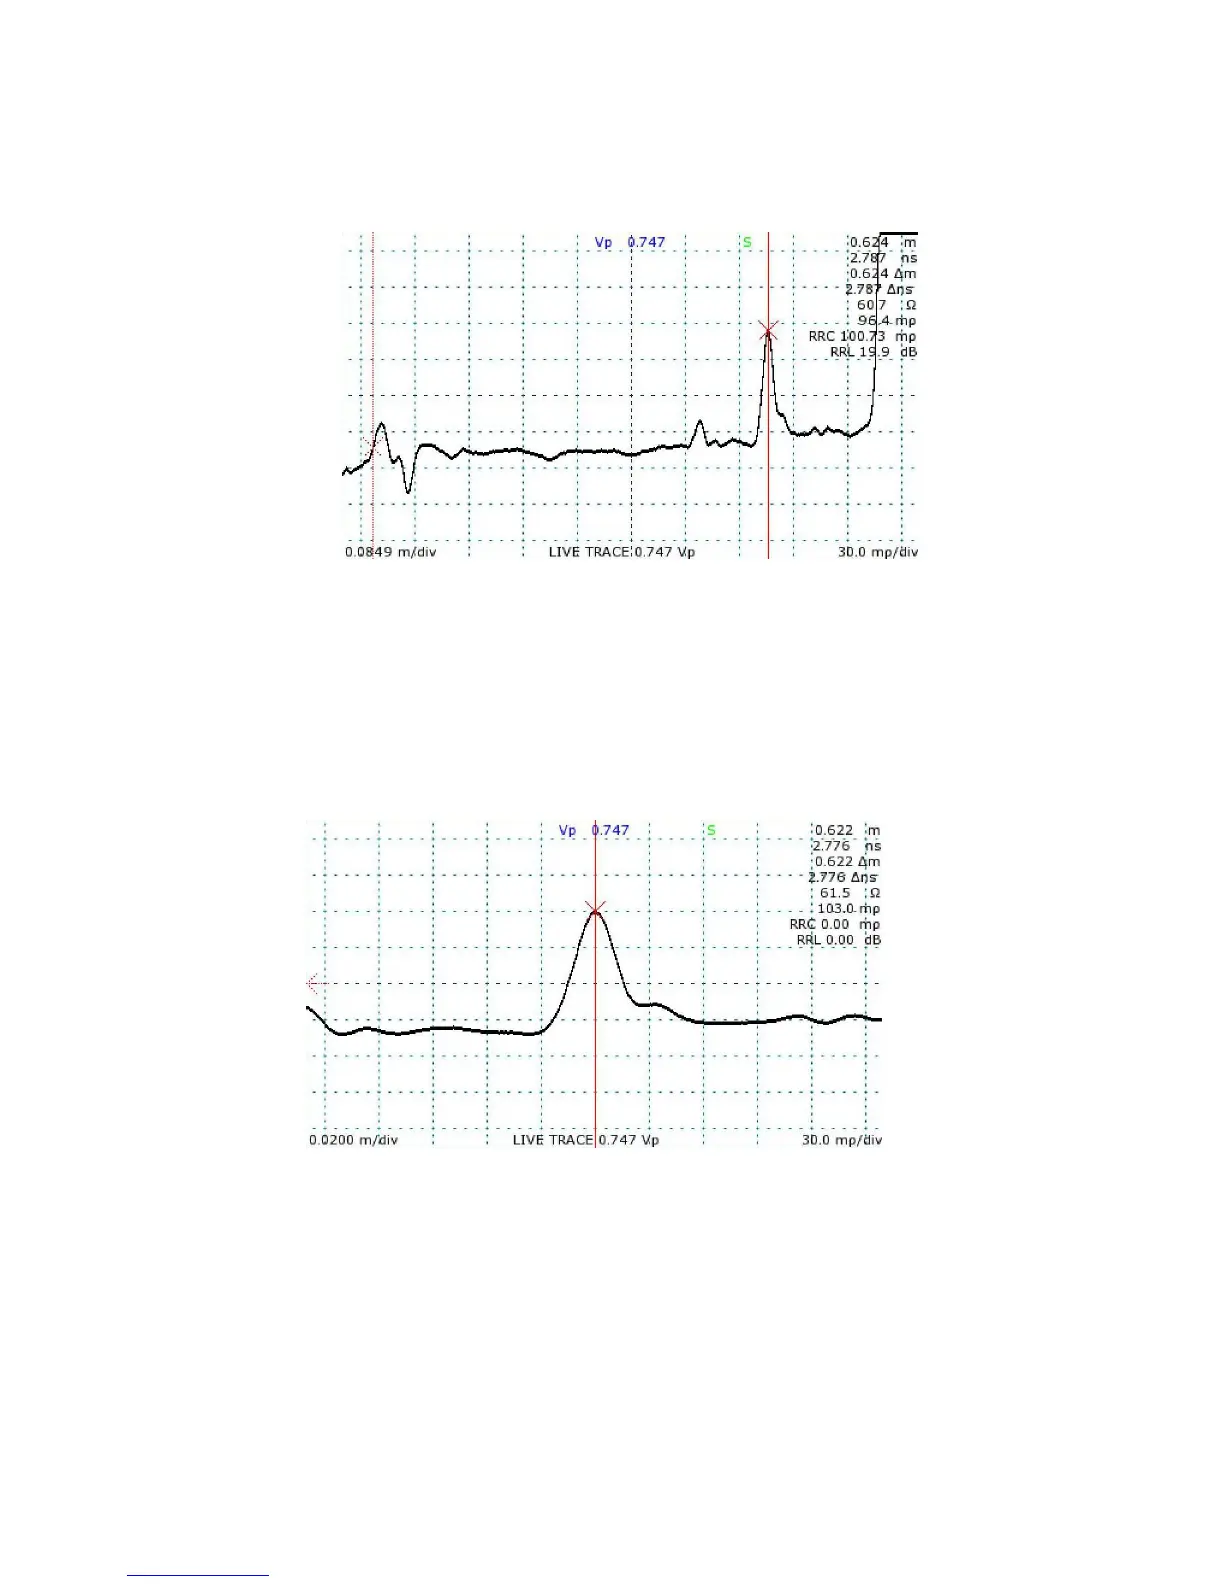
4) Position the active cursor on the reflection caused by the fault. Adjusting the vertical scale
helps make cable faults more obvious, as in Figure 7.
5) Use the HORIZONTAL SCALE knob to zoom in on the fault to get a more accurate
measurement. The distance measurement to the active cursor is the distance to the fault.
See Figure 8.
36 Mohr CT100 / CT100HF Operator's Manual
Figure 8: A zoomed-in view of the cable fault in the previous figure,
in this case a standard 50 Ω cable with a bad cut in the shielding.
Figure 7: After adjusting the vertical scale, the cable fault marked
by the active cursor is more apparent.