Operating Instructions
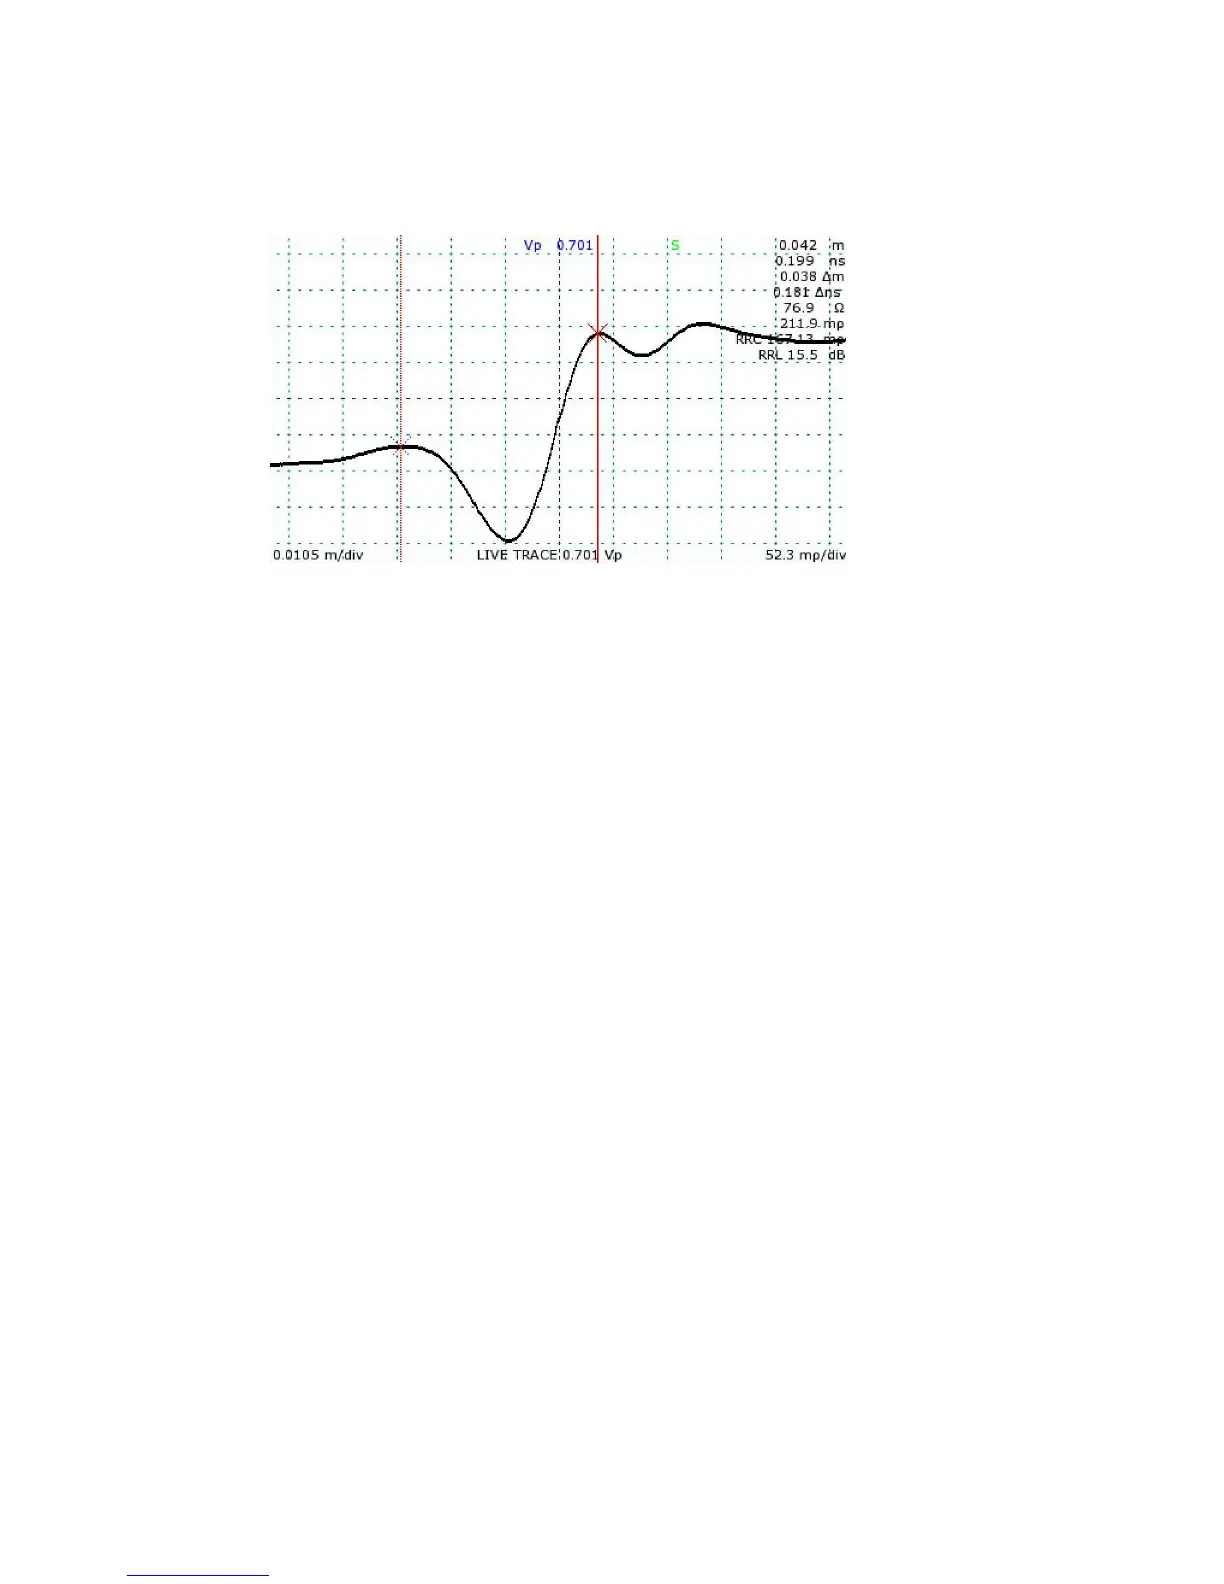
4) The CT100 displays the distance measured between the two cursors as a “Δ” value below
the absolute distance measurement. See Figure 12.
Scan a trace
The CT100 can scan and save a trace into memory. Saved traces can appear on the screen
in addition to the live trace. New traces can be selected by repeatedly pressing the SELECT
button, and traces can be adjusted vertically independent of other traces.
To scan a cable or cable segment, press the SCAN button to bring up the Scan and Trace
menu, then choose the Scan option from the menu to begin the cable scan.
There are three main types of scans: Screen scans, Cursor scans, and Custom scans.
Screen scans capture the live trace as it appears on the screen. Cursor scans capture the
entire trace between the two cursors at the current horizontal resolution. In this way, long
lengths of cable can be captured at high resolutions with a single scan. Custom scans scan
between the cursors as well, but use a custom horizontal resolution that can be configured and
saved. A scanned trace is created with a smoothing factor as set at the time of the scan.
Cursor or Custom scans that cover a long distance at a high resolution may take a long time.
During a scan, a menu will appear with a Cancel option. Select Cancel to immediately abort
the scan.
Select a trace
The CT100 always shows one trace on the screen in bold. This is the selected trace.
VERTICAL POSITION and VERTICAL SCALE knobs as well as the Save, Delete, Hide, and
Math options on the Scan and Trace menu are all actions that only operate on the selected
trace, leaving other traces on the screen unchanged. Vertical measurements such as
reflection coefficient, return loss, and impedance are always based off of the selected trace
and may disappear if the cursor scrolls beyond a scanned boundary.
Mohr CT100 / CT100HF Operator's Manual 41
Figure 12: A 50 Ω to 75 Ω BNC to SMA interconnect measuring
approximately 3.8 cm and return loss estimated at 15.5 dB.