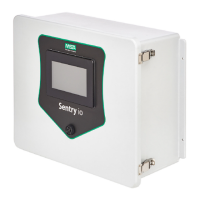
16 SENTRY io US
3 Installation
3 Installation
3.1 Warnings
WARNING!
l
A qualified electrician must do electrical wiring.
l
All wiring must comply with all applicable NEC/CEC and local electrical safety codes.
l
To prevent electrostatic discharge (ESD), connect an ESD wrist strap to the ESD connection point inside the
SENTRY io enclosure before doing work inside the enclosure. ESD can damage the SENTRY io.
l
The input/output modules are NOT field serviceable. Do NOT disassemble or modify the modules.
l
Do NOT install or operate the SENTRY io if it is damaged.
l
Disconnect AC power before opening the SENTRY io enclosure. Failure to do so can result in electrical shock.
Electrical shock can damage the SENTRY io and injure personnel.
l
Ensure the enclosure door seal is free from debris before closing and latching the SENTRY io door.
l
Never operate the SENTRY io without a connection to ground. Failure to connect the device to ground can result in
electrical shock. Electrical shock can cause damage to the SENTRY io and injury to personnel.
l
Do NOT use the SENTRY io in hazardous environments beyond the limits indicated on the product label.
l
Ensure the SENTRY io is NOT located in areas that contain a flammable mixture of gas and air. Otherwise, an
explosion can occur.
Failure to follow these warnings can result in serious personal injury or death.
3.2 Preparing for Installation
Before installation, ensure the following:
l
Packaging materials are removed from inside the SENTRY io
CAUTION!
Due to the weight of the SENTRY io, unpacking and removing it from the container may require an additional person to
assist.
Failure to follow this caution can result in minor or moderate injury.
l
The Quick Start Guide and film are removed from over the touchscreen
l
Modules are locked in place with no red displaying on the module locking tabs
l
All module and wiring terminal blocks are secured
l
Module dust covers are secured
l
Buzzer shutter is open or not dampened
l
Hinges and latches are intact and operational
l
All internal components are attached to a DIN rail
l
Enclosure door seal is intact
NOTE: To prevent unauthorized or untrained personnel from opening the SENTRY io enclosure, it is recommended that
you install a locking mechanism through the metal loop on either latch on the right side of the device.
3.3 Mechanical Installation
3.3.1 Mounting Guidelines
When mounting the SENTRY io:

 Loading...