24 SENTRY io US
4 Configuration
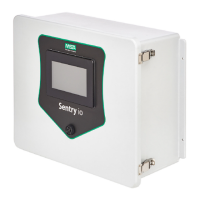
4.1.4 Setting the Administration Password
The SENTRY io must have an administration password. The password is required for updating the settings and
configuration in the future.
1. Tap the Password textbox.
2. Enter a 4-6 digit password and tap Ok.
3. Tap the Confirm Password textbox, enter the same 4-6 digit
password, and tap Ok.
4. Tap Apply to save the password.
—or—
Tap Discard to cancel the changes to the password and
revert to the password on file in the database.
5. Tap Next to end the General Settings configuration and
proceed to the I/O configuration.
NOTE: You cannot go back in the process once you tap
Next.
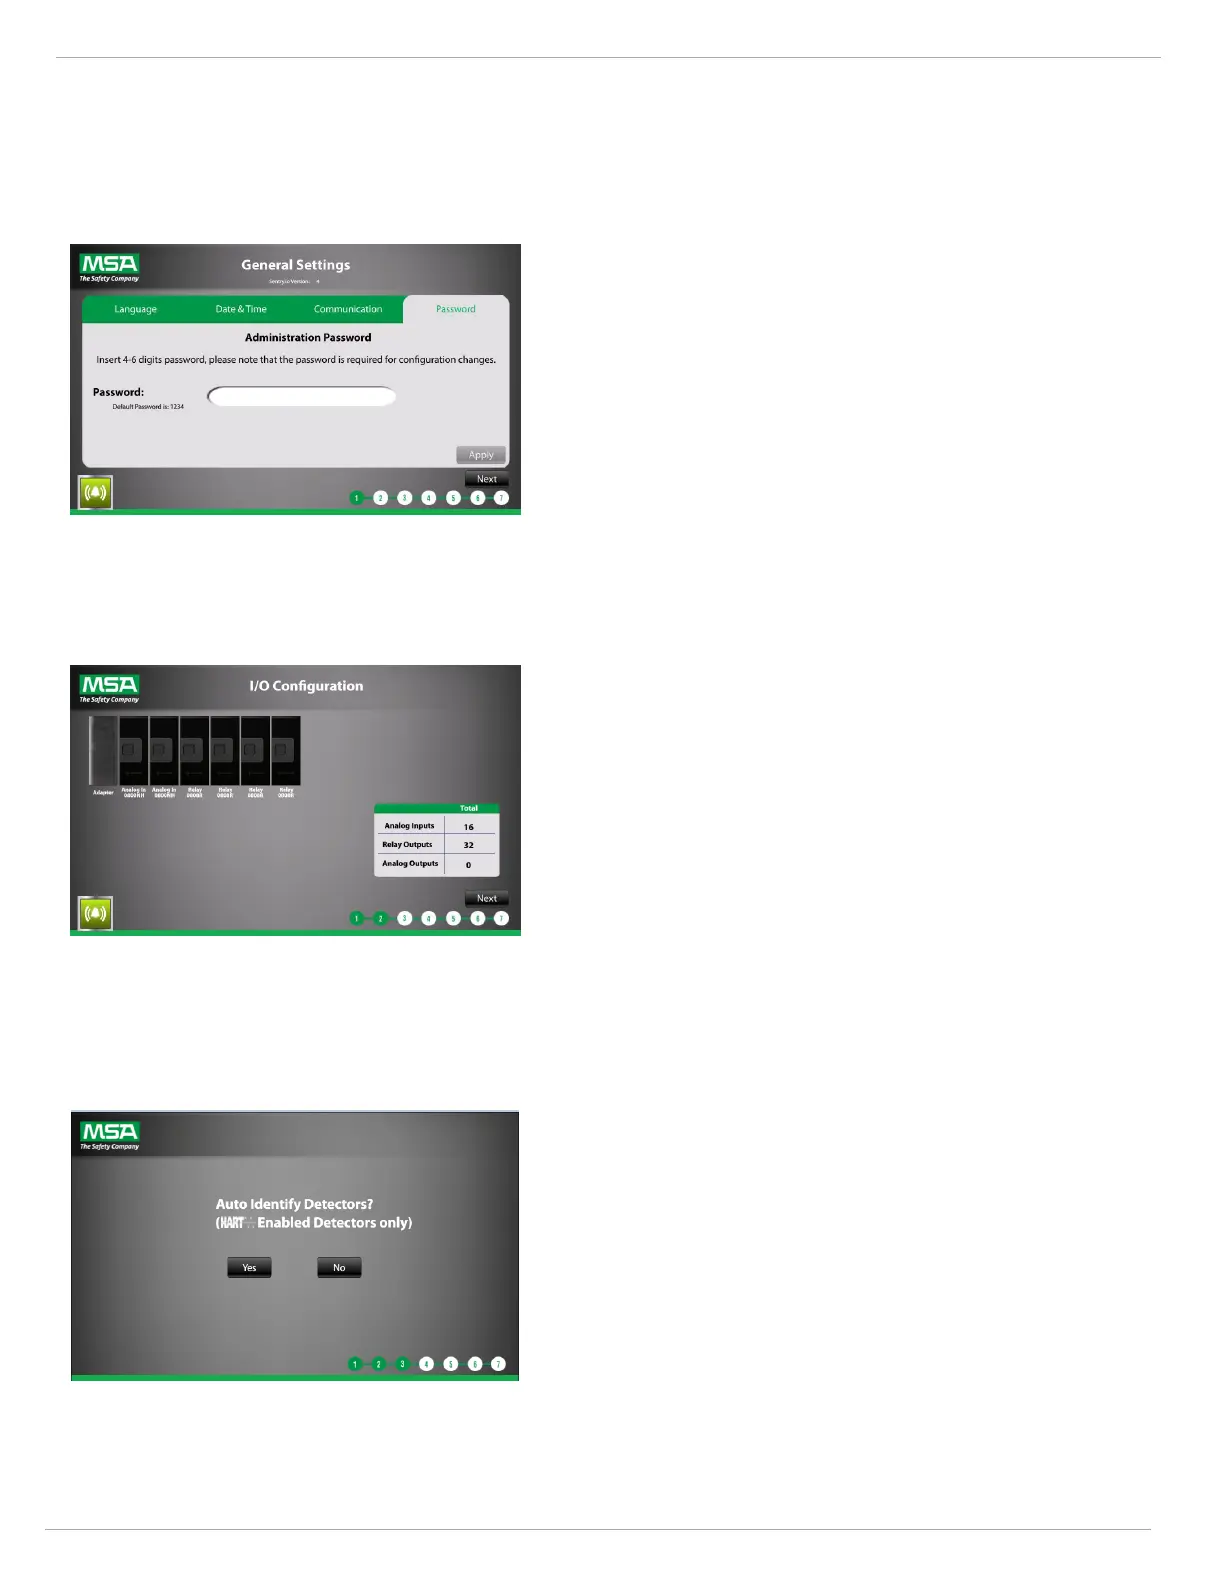
4.2 Input/Output Configuration
1. Verify the number and type of Input/Output modules
displayed on the screen match those inside the SENTRY io.
2. Tap Next to end the I/O configuration and proceed to the
Detectors and Alarm Setpoints configuration.
NOTE: You cannot go back in the process once you tap
Next.
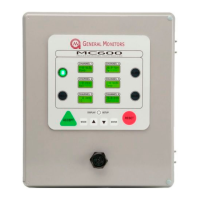
4.3 Detectors and Alarm Setpoints
4.3.1 Auto Identifying Detectors
Select whether or not you want to auto identify the detectors.
l
Yes—Initiate EZ-ID to auto identify MSA HART-enabled
detectors. The EZ-ID runs and then the Detector Summary
screen displays. See 4.3.3 Detectors Summary for more
information.
NOTE: If you have a mix of HART and non-HART enabled
detectors, you can initiate EZ-ID for your HART detectors,
and then manually identify the non-HART enabled detectors
after.
l
No—Manually set detector type, gas, units, and scale. See
4.3.2 Manually Identifying Detectors for more information.
NOTE: The SENTRY io EZ-ID process uses preset full-scale instrument ranges, therefore do not rescale the range at
instrument. If rescaling is necessary, manual identification may be needed.
NOTE: For auto-identified sensors, the SENTRY io uses default mA fault levels for instruments. Therefore the default mA