22 SENTRY io US
4 Configuration
4 Configuration
The first time the SENTRY io is connected to power, the SmartStart configuration wizard displays upon initialization. Before
normal operation of the SENTRY io, you must proceed through the steps of the SmartStart configuration wizard.
The configuration involves input steps for the following system parameters:
1. General Settings: Language, Date & Time, Communications, and Password
2. I/O Configuration: Analog Input, Relay Outputs, and Analog Outputs
3. Detectors and Alarm Setpoints
4. Digital Inputs
5. Relays
6. Voting
7. Cause and Effect
4.1 General Settings
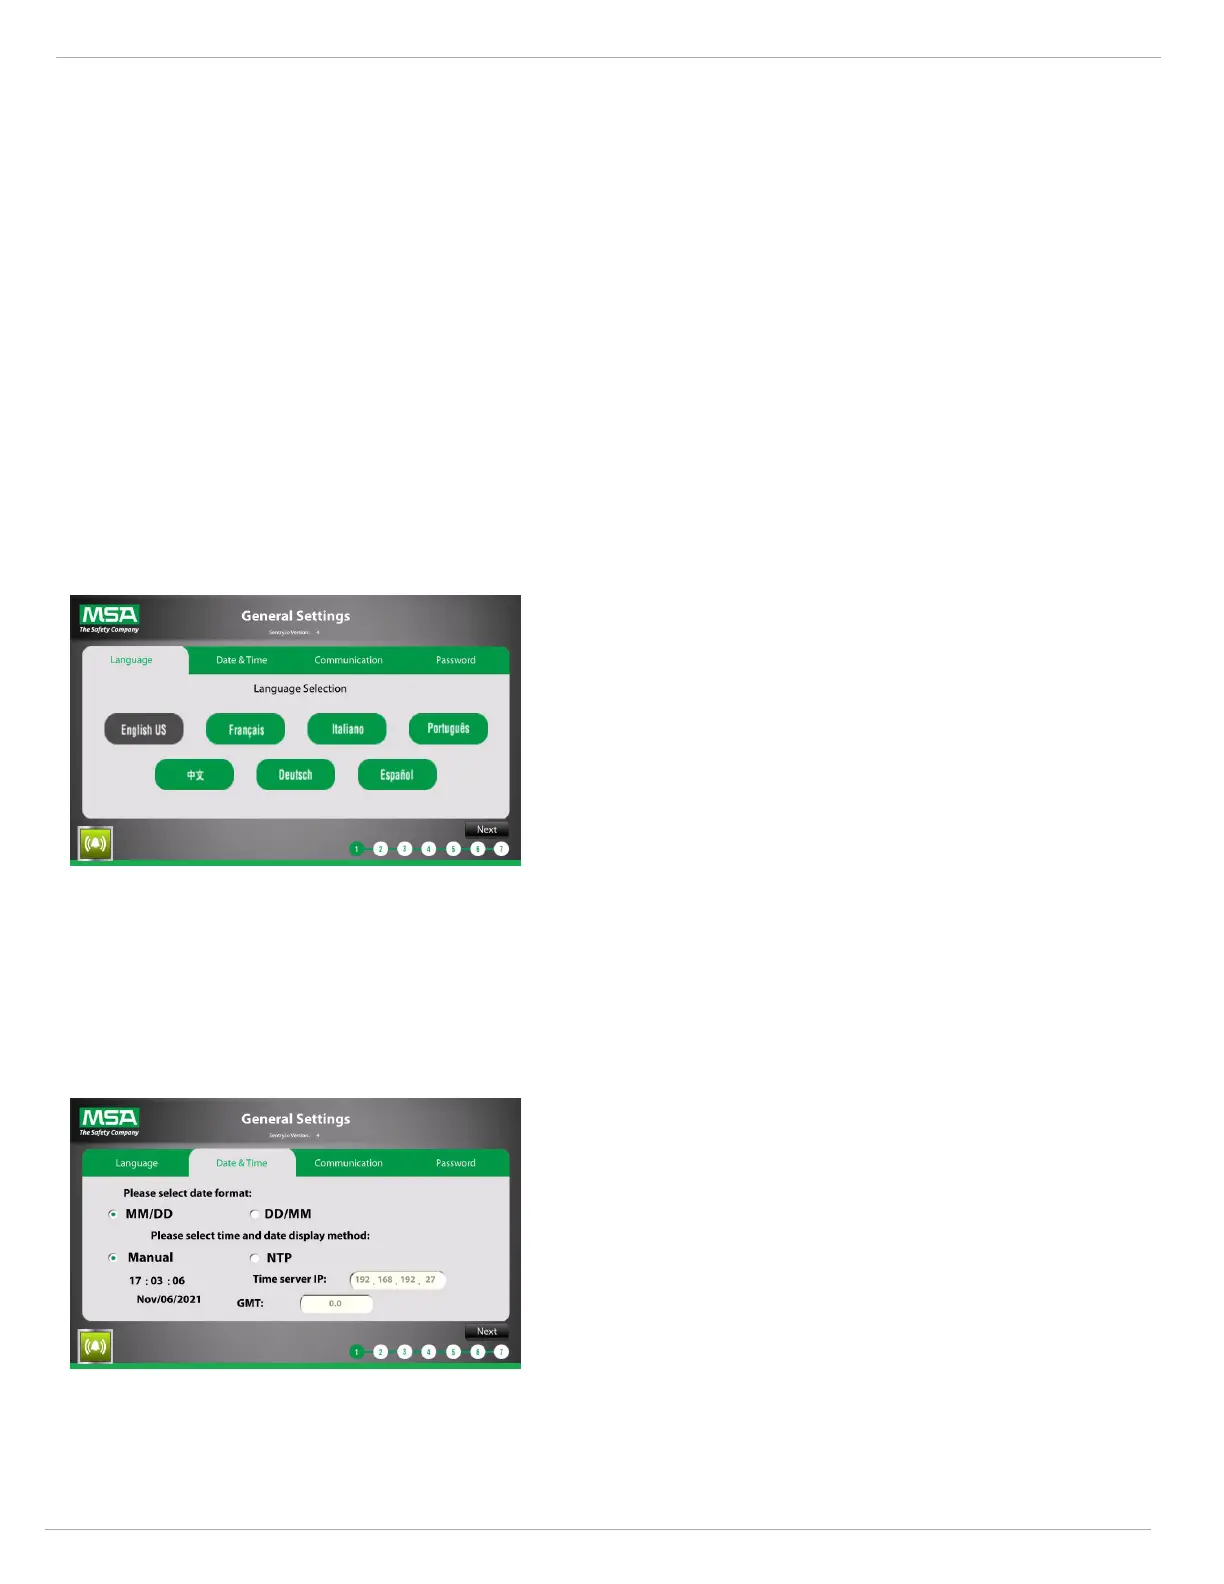
4.1.1 Setting the System Language
1. Select the language in which you want to configure and
operate the SENTRY io.
2. Tap the Date & Time tab to proceed to the Date and Time
screen.
—or—
Tap Next to end the General Settings configuration and
proceed to the I/O configuration.
NOTE: You cannot go back in the process once you tap
Next.
4.1.2 Setting the Date and Time
1. Select a date format.
2. Select the time and date setting method:
○ Manual—Manually set the time and date.
○ NTP—Network Time Protocol (NTP). If using NTP,
select the method, the IP, and the GMT. An example
time server address is 132.163.97.4, which is located
at NIST WWV, Fort Collins, Colorado, USA. See the
table below4.1.2 for GMT zones.
NOTE: NTP cannot be used if your site employs a firewall
that blocks communication with external servers.
3. Tap the Communication tab to proceed to the
Communication screen.
—or—
Tap Next to end the General Settings configuration and
proceed to the I/O configuration.
NOTE: You cannot go back in the process once you tap
Next.