49
7.2 NAS and UPnP Server Installation
Step 1. Install the NAS
Your NAS will come with an installation manual and a program to access the NAS through a
web browser on your computer or laptop for setup and maintenance purposes. Follow the
instructions closely and install the software on your computer or laptop. Attach the NAS via
quality Ethernet cable to your network. The Synology comes with the Synology Assistant which
was installed on the laptop also connected to the network. The laptop is only used for installation
and setup purposes and not any audio related streaming activities.
There is much additional functionality the NAS can be used for, but below we will focus only on
those setups pertaining to setting it up as a UPnP music file server.
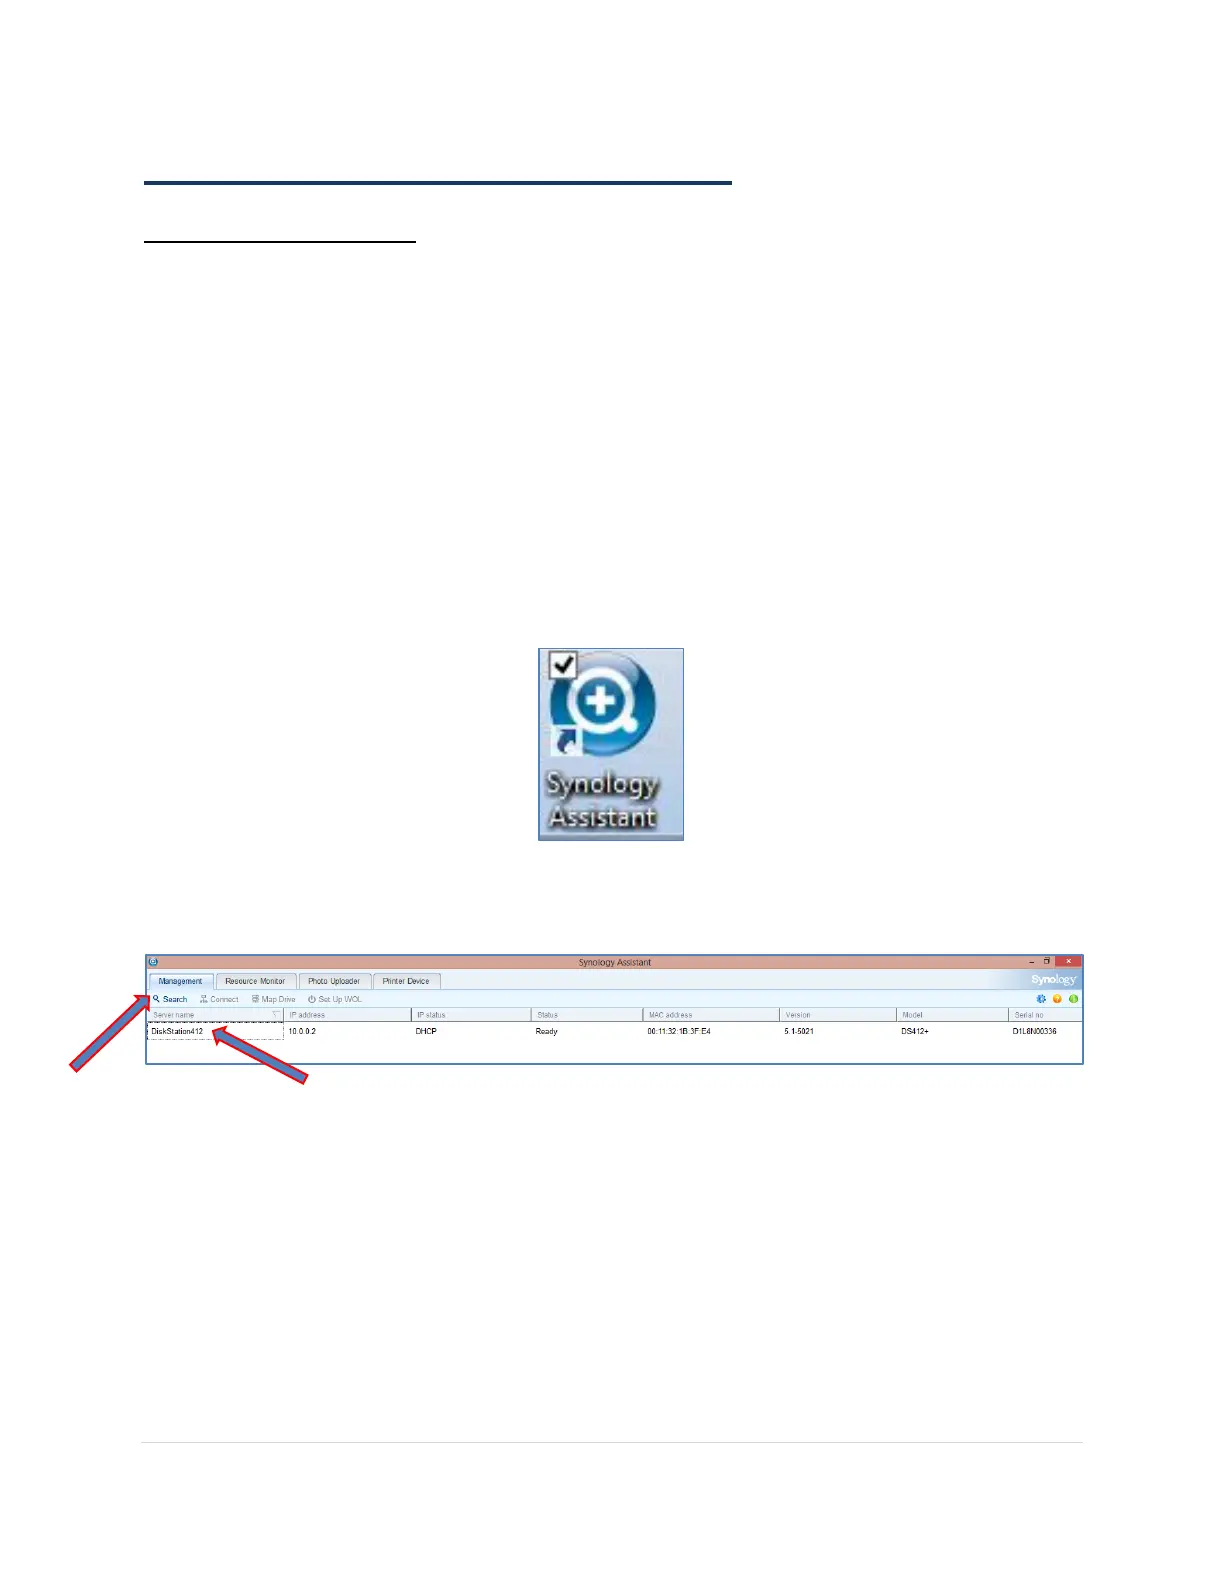
1. Click on the Synology Assistant desktop shortcut that was created during the installation on
the laptop.
The Synology Assistant will search for your NAS on the network in the Management tab. Just
click on the Search button and wait for a few moments.
Once found, the NAS will be listed and the status will show Ready when it is up and running.