104
5. Using On-Screen Menu
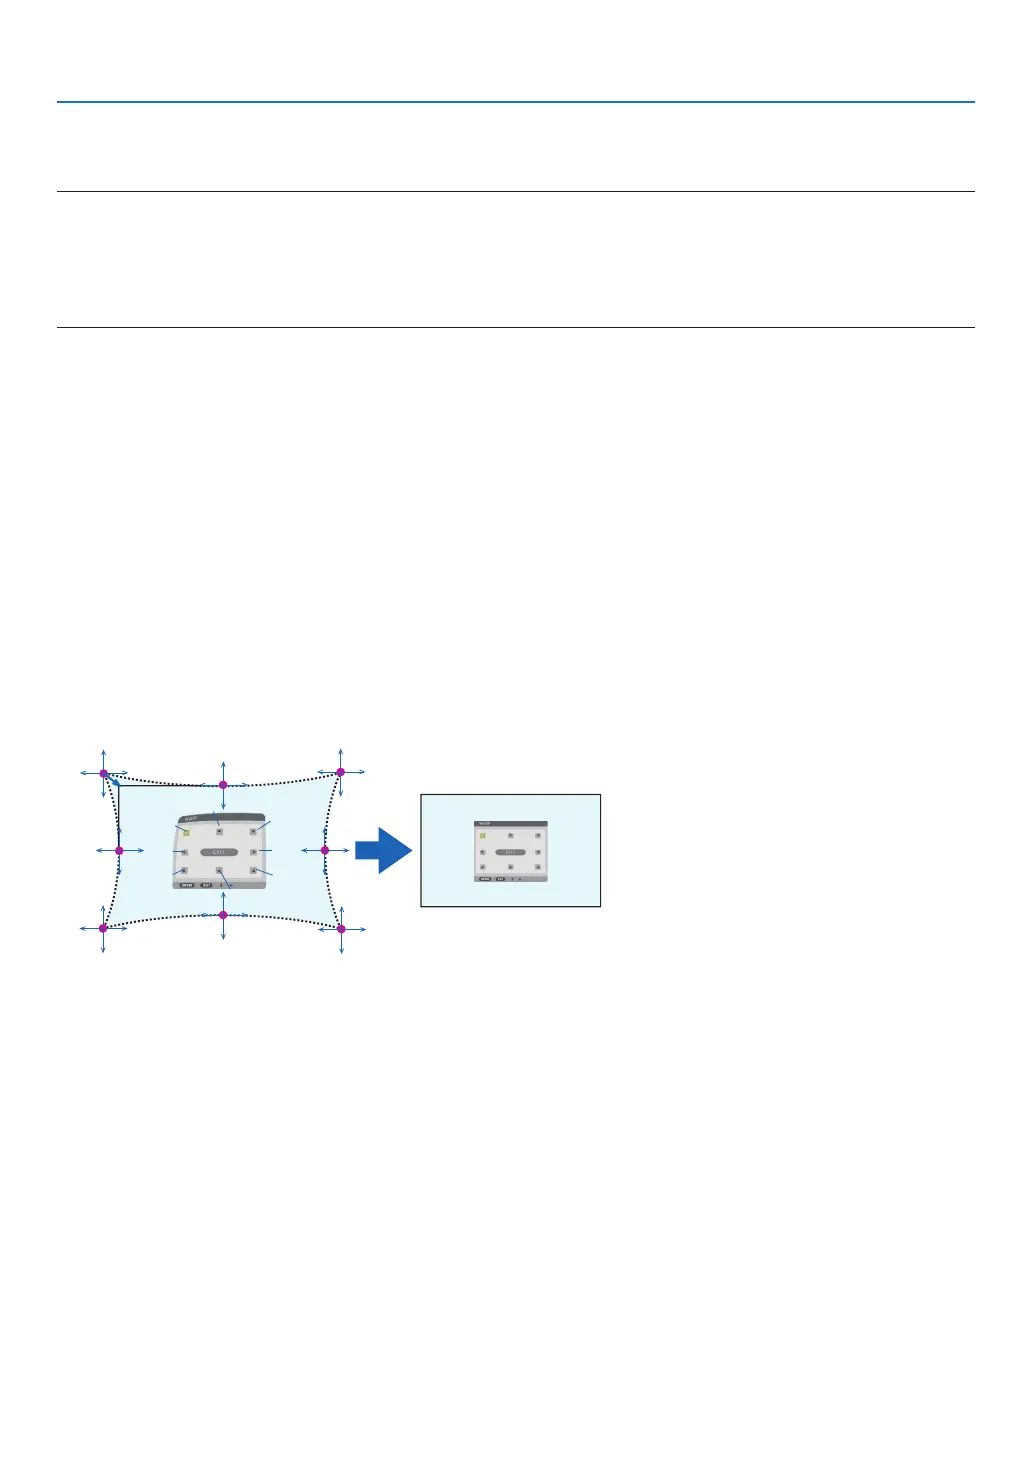
WARP
Correct projected image distortion on a specic surface as a column or a sphere.
NOTE:
• When the maximum adjustment range is exceeded, distortion adjustment is disabled. Set up the projector at an optimal angle
since the more the adjustment volume gets large, the more image quality gets deterioration.
• Please note that the image will go out of focus due to the difference in the distance between peripheries and the center of the screen
for projections cutting across corners as on a column or a sphere. Lenses with short focal points are also not recommended for
projections cutting across corners as the image will go out of focus.
Adjustment method
1. Align the cursor with the [WARP] of the [GEOMETRIC CORRECTION] menu and the press the ENTER.
• Adjustment screen will be displayed on.
2. Press the ▼▲◀▶ buttons to align the cursor (blue box) with the target adjustment point and then press the
ENTER.
• The cursor will change into an adjustment point (yellow in color).
3. Press the ▼▲◀▶ buttons to adjust the corners or sides of the screen and then press the ENTER.
• The cursor will back to yellow box.
Explanation for correcting distortion
• Eight adjustment points can be moved independently.
• For left and right sides, use ◀/▶ buttons for adjusting the range of distortion, and ▼/▲ buttons for adjusting
the distortion peak.
• For top and bottom sides, use ▼/▲ buttons for adjusting the range of distortion, and ◀/▶ buttons for adjusting
the distortion peak.
• For corners, use ▼▲◀▶ buttons for moving positions.
a
b
c
e
h
d
g
f
b
a
c
d
e
f
g
h
4. For adjusting other points, repeat Step2 onwards.
5. When the adjustment is completed, move the cursor onto the [EXIT] on the adjustment screen and press
the ENTER.
• The screen will be switched to the [GEOMETRIC CORRECTION] menu.
The adjustment completion screen will be displayed on.
6. Press ◀ or ▶ button to move the cursor onto [OK] then press [ENTER].
• The adjusted values for WARP are stored and the screen display goes back to the [GEOMETRIC CORREC-
TION].
TIP:
A commercially available USB mouse is available to perform correction. (→ page 38)
 Loading...