Date Name Signed Revision:
issued 20.06.03 Mangel Substitute for issue
approved 20.06.03 Denk of
released 20.06.03 Denk
text no. 30100
copy to: 95
N
E
M
O
P
U
M
P
E
N
Continued Page 4.0R
N
E
M
O
P
U
M
P
E
N
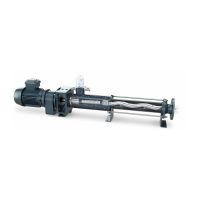
4 INSTALLATION INSTRUCTIONS
PAGE
4.0
4 Mounting and Installation
If the NEMO
®
pump was stored and the rotor grease protected:
Remove the grease before installing the stator.
Clean the rotor thoroughly in order to avoid unsuitability of
the grease with the stator material and the pumping medium.
Screw the pump at all fixing points (bearing housing / drive
stool, end stud, support feet) using all fixing bores securely
down to the sub-structure (ground plate, machine frame,
foundation etc.).
4.1 Direction of Rotation
The direction of rotation of the pump is given on the model plate
and in the order confirmation. The direction of delivery of the
NEMO
®
pump is a function of the direction of rotation.
Changes must be agreed upon and confirmed by the supplier.
4.2 Pressure
If not explicitly confirmed otherwise in the order confirmation,
the maximum permissible pressure (e.g. when turning clockwise)
inside the pump housing (A)
– for models with pump housing of cast iron 6 bar
– for models with welded pump housing 10 bar.
The maximum permissible pressures inside the end flange (B)
is a function of the design applied for connections
– with flange: maximum nominal pressure (e.g. PN 16)
– with threaded internal socket: maximum 25 bar
– with DIN 11851 "dairy" thread up to DN 100 for one or two
stage pumps: max. 12 bar, for multi stage pumps: max. 25 bar
– for other versions: maximum permissible pressure of the socket
connection, but not more than 6 bar per pump stage, depending
on the stator installed.
4.3 Piping System
■ Arrange suction and pressure pipes so that when the pump is not
running, the medium is still present before and after the pump.
Sufficient media should remain inside in order to lubricate the
pump during restart.
GB