OPRHT70 A0310
4-8
4
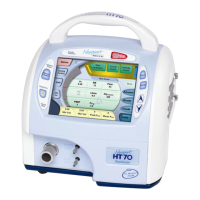
Navigating the Screens
1. To set Alarms: Touch the Alarms button to open the alarm
setting screen.
Touch the desired alarm setting button to activate it (appears
highlighted) then use the s t panel buttons to adjust, and then
press Accept to confirm changes. See “Alarms Screen Navigation”
on the following pages for more details.
2. To select Breath Type: Touch to toggle between Volume Control
and Pressure Control. Then press Accept.
3. To set the Mode: Touch to scroll through the selections: A/CMV,
SIMV or Spont. Then press Accept.
4. To select NIV: Touch the NIV button to toggle between Off and
On. Then press Accept.
5. The Help button [future update]: When the Help button is
touched, the center panel displays an explanation of the features/
controls on the current screen. Touch the Help button again to close
the tutorial.
6. The Pressure Bar: The pressure bar appears on every screen.
It indicates dynamic pressure in the patient circuit in green, the High
and Low Pressure Alarm settings with a red line and a green line
represents the peak pressure of the last breath.
7. To set the parameter settings:
Touch the selection then press the s button to increase the value or
the t button to decrease the value. Then press Accept to confirm the
change. The following parameter choices are available for adjusting:
VT (Tidal Volume) RR (Respiratory Rate)
PEEP PS (Pressure Support)*
Ptrig PC (Pressure Control)
Flow (in volume control)
i time
NOTE: The Flow and i time setting are inversely related to each
other. In Volume Control, the VT (tidal volume) is the controlling
setting. Changing either Flow or i time causes the inversely related
setting to be recalculated to match the new Flow or i time setting and
the VT remains steady.
For example, if you change the Flow rate to a higher setting, the i time
will decrease to meet the new Flow setting. If you change the i time
to a longer time period, the Flow rate will decrease to meet the new i
time setting.
* Not available on all models
 Loading...