Copyright © 2014 NEXCOM International Co., Ltd. All rights reserved
32
VMC 1100 User Manual
Chapter 5: Touchscreen Driver Installation
Installing PenMount Mouse Driver in Windows 2000/
XP/XPT/XPE/2003/VISTA/7/WES7/2008/8
If you have an older PenMount driver installed on your system, uninstall it
first and follow the steps below to install PenMount Windows Universal
Driver:
Plug in your PenMount 6000 control board and install PenMount Windows
Universal Driver. Make sure the driver is installed before control board
is plugged. Then the driver will have the assigned COM port or USB port
detect PenMount device.
To install the driver:
1. In folder PenMount Universal Driver, find “Setup.exe” and run it.
2. A License Agreement window appears. Click “I Agree” and “Next”.
3. When ready to install the program, click “Install”.
4. Installation takes some time.
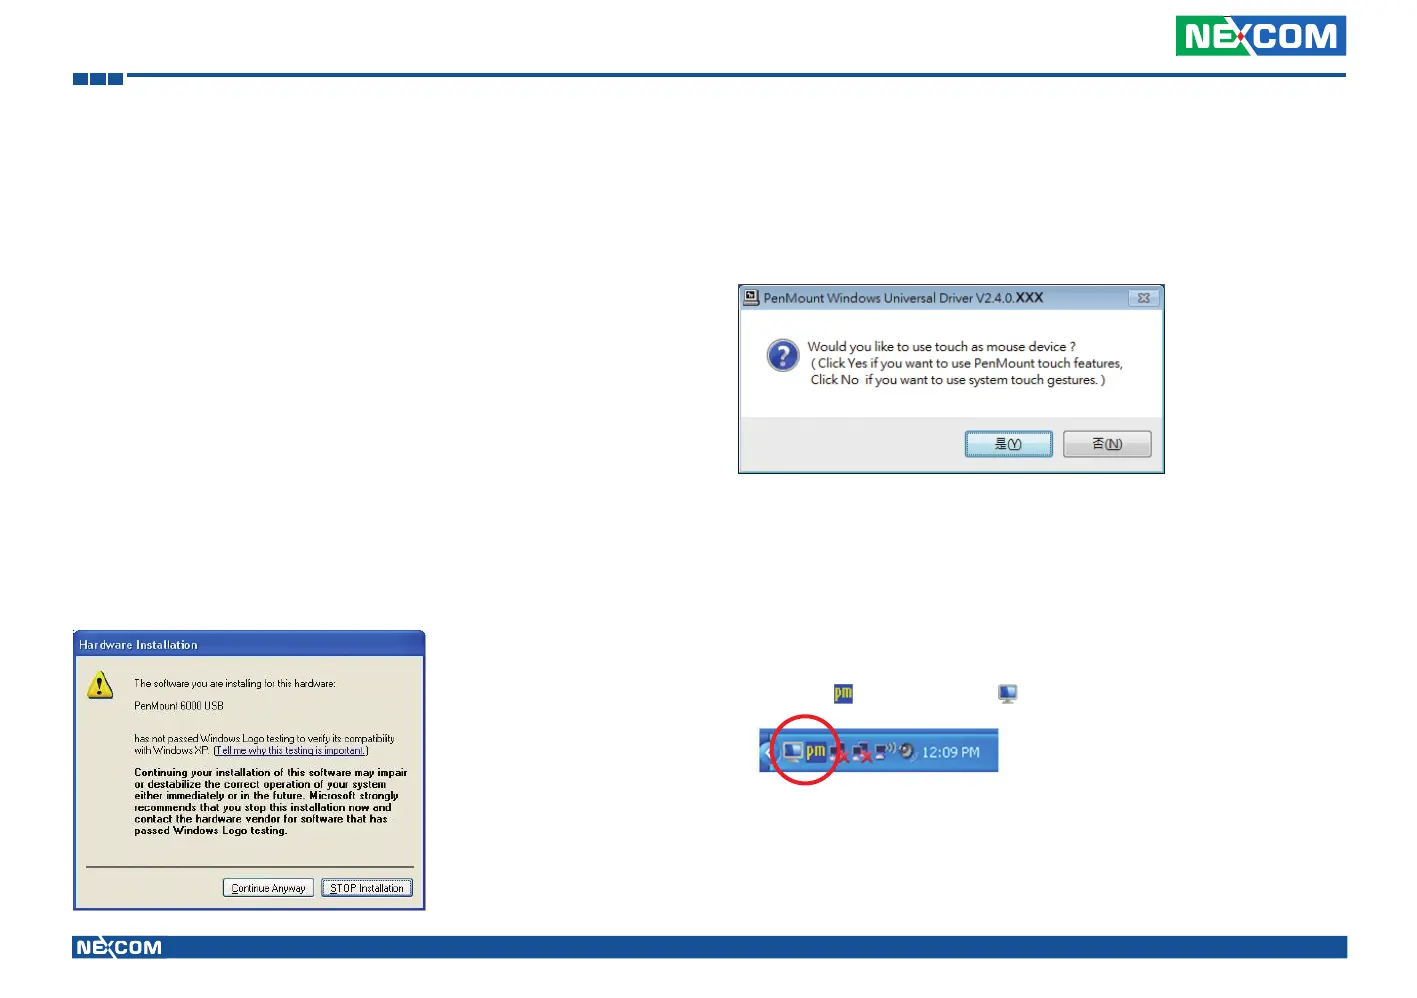
5. When the warning message screen appears, please click “Continue
Anyway” to continue.
6. When the window below shows up, please select “yes” for installing
PenMount as mouse mode; select “no” for digitizer mode. If your
operating system doesn’t support Windows tablet input, digitizer device
can’t be used, therefore you have to select “yes” here, otherwise after
the installation the touch doesn’t work after re-booting.
7. A window notifying of installation completion appears. Click “Finish”.
NOTE: If you are installing the driver with Microsoft WHQL, you will
see the screen in step 6 directly instead of step 5.
8. Then restart operating system.
As soon as driver installation finishes, both the icons of PenMount
Monitor and Gesture AP show up in the notification area.